This article assumes you have already some experience in creating Java Apps. For instance if you have done the first 2 lectures of the course Application Development. You should also have prepared the DHT temperature/humidity sensor and have a working sketch for it (eg. by completing step 1 and 2 of practical assignment 2 of Application Development, or via this tutorial). The connection used is a USB serial connection to an Arduino using a COM port.
Steps:
- Create the userinterface for the Java App
- Add the jSerialComm library
- Drop in the example class LocalTemperaturePanel
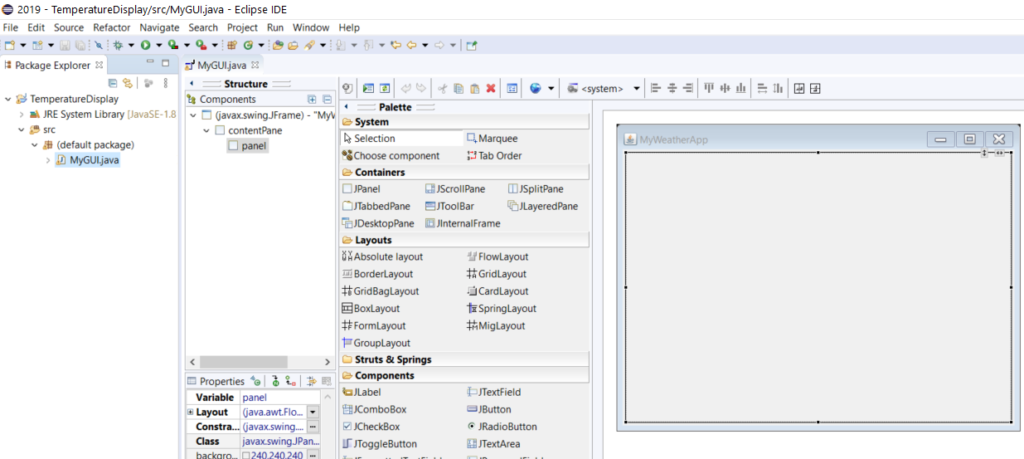
1. Create the userinterface for the Java App
Using Eclipse, start a new Java Project. Add a JFrame via File > New > Other, WindowBuilder, Swing Designer, JFrame.
Set the layout of the contentPane to GroupLayout. Add a JPanel that fills the entire contentPane.
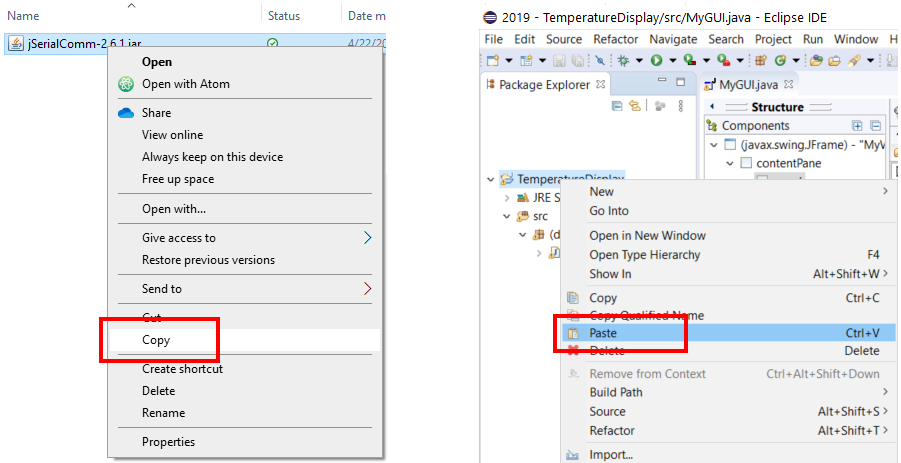
2. Add the jSerialComm library
To be able to communicate via a serial connection we will add the jSerialComm library to the project. Download it as a .jar file here. Copy the .jar file in the Windows Explorer. In Eclipse, right-click the main project folder and paste it into that folder:
Next, add the library to the build path: right click it, and select Build Path > Add to Build Path. Now you can use the library in your project.
3. Drop in the example class LocalTemperaturePanel
Download the zipfile with this class here and unzip it. Copy the java file, and paste it into the src folder of the project in Eclipse.
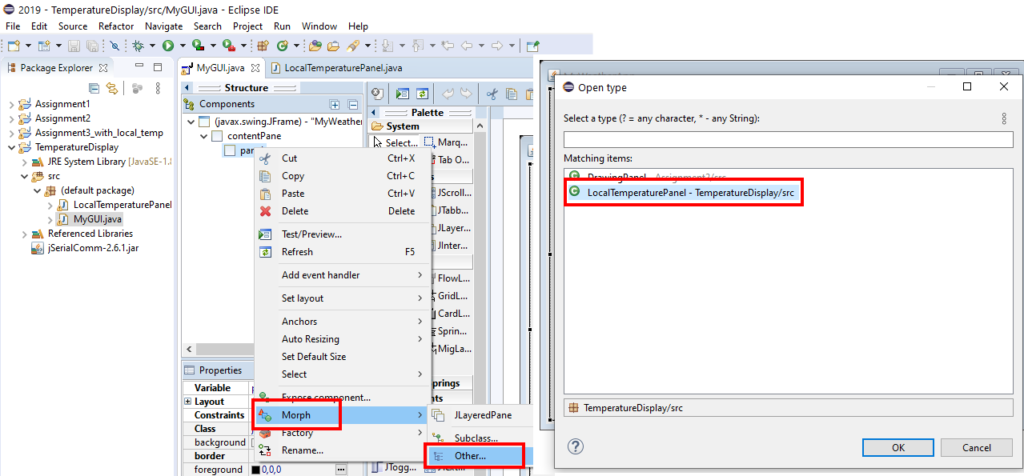
Morph the panel you added in step 1 to a LocalTemperaturePanel:
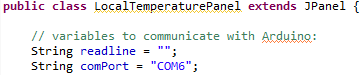
Connect the circuit with the DHT sensor to your computer (connect an USB cable between the Arduino and your computer). In the Arduino IDE, check the COM port for the Arduino. In the code, change the port accordingly:
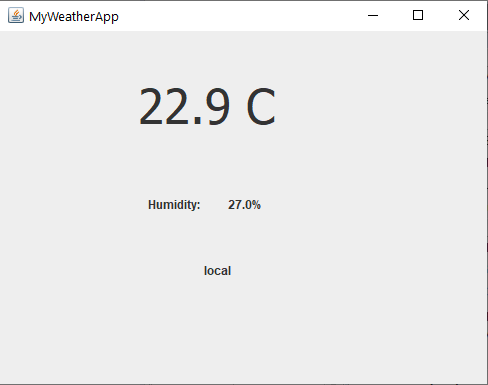
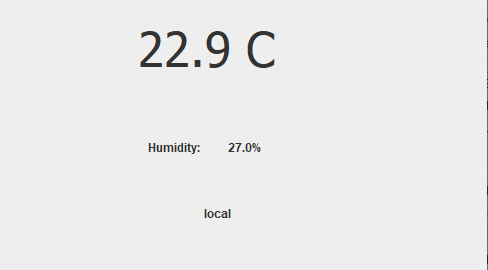
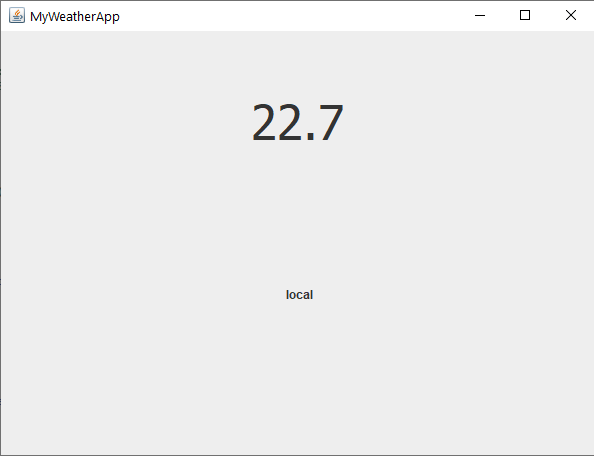
Now Run the application. It should display the temperature in the panel:
If it works, continue to the paragraph “Display humidity” below.
If it is not working, upload the sketch in the Arduino IDE and start the Serial Monitor. Does that show the proper output in the Serial Monitor? (temperature and humidity values) Make sure the Arduino is running the basic temperature sketch (DHT_Unified_Sensor.ino) without the extra’s you might have added like Bluetooth communication. If you do not have that anymore, open it via File > Examples > DHT sensor library, “DHT_Unified_Sensor”, save it with a different name (do not overwrite a version you already have). Then configure the sketch:
Set the DHT sensor type in the sketch. Find the #define DHTTYPE lines and make sure the DHT22 has comments in front, and remove the comments in front of the the DHT11 line:
// Uncomment the type of sensor in use:
#define DHTTYPE    DHT11     // DHT 11
//#define DHTTYPE    DHT22     // DHT 22 (AM2302)
//#define DHTTYPE    DHT21     // DHT 21 (AM2301)
Also check if the line which defines the DHTPIN has the right pin number (the pin you connected the signal line of the sensor to):
#define DHTPIN 2
Now upload this sketch and see if the Java App displays the temperature.
Display humidity
For the humidity to be displayed, add a Label to the userinterface of the LocalTemperaturePanel and make that a field. If there is no Design tab:

Close the file, and re-open it by right-click it in the Package Explorer and choose Open With, WindowBuilder Editor.
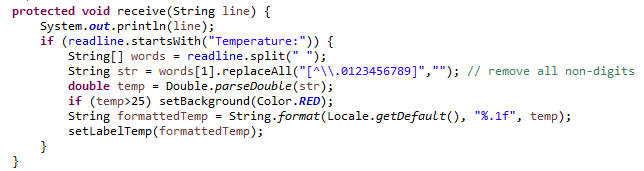
Give the newly added label a value in the receive() method (read on):
Copy the if-statement, so it reads:
if (readline.startsWith("Temperature:")) {
    // code for Temperature (already there)
}
else if (readline.startsWith("Humidity:")) {
    // new code for Humidity (use Temperature as example, but needs modification!)
}
Use the code of the temperature as an example (it is displayed above). End with a line that sets the text of the label for the humidity with the appropriate value. It will look like (your label might have different name):
lblHumidity.setText(...);If you have done it well, your app displays both values and refreshes it live (breathe on the sensor, see if values change).