The examples in this article use an OLED display.
Countdown timer example

In its simplest form, a countdown timer can be coded like this, using the loop() for repetition (no for- or while-loop needed!):
void loop() {
  if (count>=0) { // if counter not finished
      sprintf(buf, "%2d", count);
      display.draw2x2String(4,3,buf); // show the counter
      count = count - 1; // decrease counter
  }
  delay(1000); // wait one second
}
Download the sketch: oled_display_countdown_start_button.ino
Full simulation including breadboard on Wokwi:
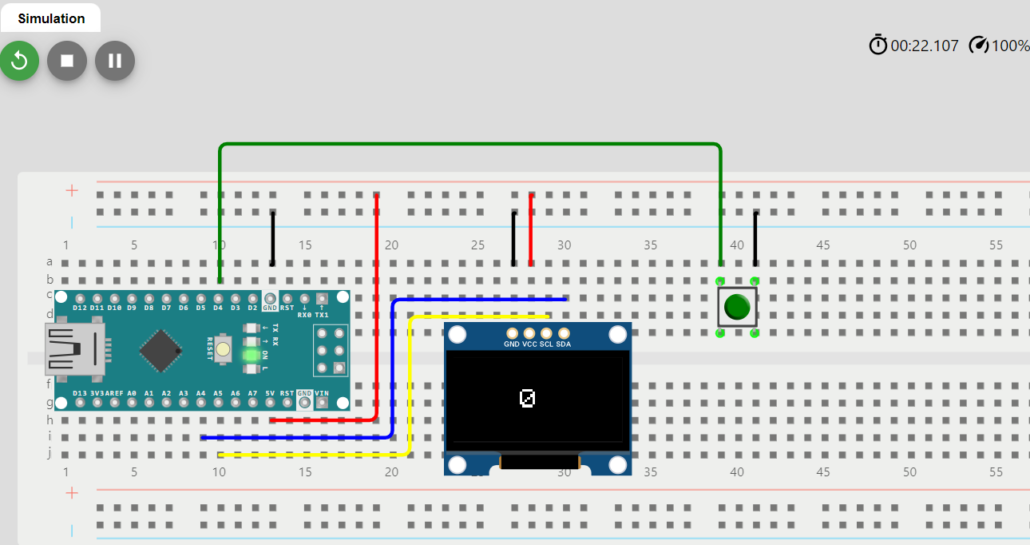
This will countdown from 10 to 0 in ten seconds after the button is pressed. If you prefer to display the number as a time, like MM:SS, you can realize that as follows:
int min = count/60;
int sec = count%60;
sprintf(buf, "%02d:%02d", min, sec);
display.draw2x2String(2,3,buf);
Full example : oled_display_countdown_start_button2.ino
Both examples use a button to start the timer. This is realized by a waiting loop (a loop which does nothing, except for checking its condition) as the last line in setup():
while(digitalRead(START_BTN)==HIGH) ;Note the empty statement: ‘;’ does nothing, thus waits for the button to be pressed (becomes LOW).
Another example: push-and-hold

Start a sketch if button held for a period. If released prior to the period abort. Uses the millis() function to keep track of time (in milliseconds). Learn why using delay() in cases like this is not useful.
    if (millis() >= time_start + period) { // holding period over?
      display.clearLine(0);
      display.drawString(0, 0, "DONE"); // time to hold the button for period succesfully done
      status = 1;
    }
    else if (digitalRead(START_BTN) == HIGH) { // button released?
      // abort, button was released
      display.clearLine(0);
      display.drawString(0, 0, "ABORT");
      status = 2;
    }
Download the example: oled_display_hold_button.ino (Wokwi simulation here)
Another example: turn Arduino on or off by holding a button: button_on_off_long_press.ino (Wokwi simulation here)
Parallel tasks, advanced timer example
About running tasks in the background: it is true that the loop() is actually a kind of ‘single task’ that does not allow (or is difficult) to run things in parallel or in the background.
However, because the Arduino is fairly fast, tasks that are performed in serial (one after the other) may still appear to the user as if they are being performed simultaneously.
It is important that you do not use delays, so that everything is executed as quickly as possible.
Instead of using delays, you can then keep the time and have things done at a certain time: eg. make an LED blink every 300ms and read all buttons at the same time (as quickly as possible).
The example below uses that: three tasks (in the loop) are performed in serial, but for the user it looks like they occur in parallel, because they do not contain any delays.
See the code:
void loop() {
  unsigned long currentMillis = millis();

  // task 1 - blink time on display every 300ms when setting it:
  if (currentMillis - previousMillis2 > 300 ) { // 300ms passed?
    previousMillis2 = currentMillis; // save the last time
    blink = !blink;
    // ... display blinking numbers when setting the time  ...
  }

  // task 2 - update countdown timer every second
  if (currentMillis - previousMillis > interval) { // interval passed?
    previousMillis = currentMillis; // save the last time
    // ... display changing countdown timer on the display ...
  }

  // task 3 - check for pressed buttons
  for (int i = 0; i < NUMBUTTONS; i++) {
    // Update the Bounce instance :
    buttons[i].update();
    if ( buttons[i].fell() ) { // a button was pressed
       // ... process actions for buttons ...
    }
  } // end for
}
Here the time is kept with millis().
The example above is of course somewhat limited but in terms of coding not too complex. It is a timer of which the time can be set using up/down/set buttons. It can be paused while running and after it is finished, it can be start again.
More examples:
Start sketch after first button is pressed, then display a counter that counts up until 20 and then finishes. While running, it also checks the buttons pressed.
So this example executes 3 tasks in parallel: 1) blinking text, 2) counter counting & display it, 3) check buttons. Download example: oled_display_countdown_timer_and_check_buttons.ino or view it as Wokwi simulation.
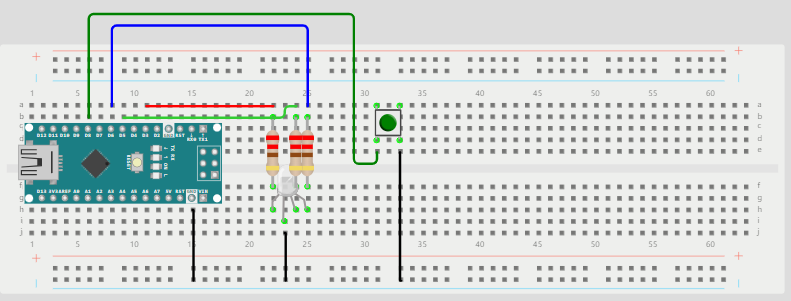
An example showing RGB color LED with alternating colors ask a start sequence to start a game using a button. Complete simulation with breadboard and code on Wokwi:
Besides this you can also use timers and even a form of multi-theading. But that soon becomes complex …