Appendix 1: Using examples in Eclipse.
Both books (“Head first java” and “Aan de slag met Java”) come with a lot of examples. Examples from both books are included in the zip-file that comes with this course.
Getting an example from a book in Eclipse involves the following four general steps.
Close any other projects that are still open via File > Close All.
Step 1: Create an (empty) Java Project
Select File > New > Java Project from the menu. Give the project a name, for example “Examples”.
Step 2: Locate and copy .java file(s)
Use Windows Explorer to browse to the folder containing the examples. In the ZIP file that comes with this course, they are located in the folder “book”. Next, find a sub-folder which contains the actual code of the examples.
For instance, book\Head First Java\chap01 contains the examples of chapter 1 of “Head first java”.
And book\Aan de slag met Java\Voorbeelden Broncode\H02\Vb0204\src contains example 0204 of chapter 2 of “Aan de slag met Java”.
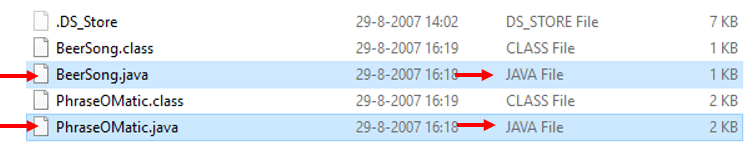
Select only the java files, then select Copy (CTRL+C):
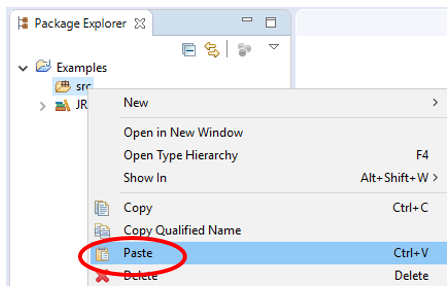
Step 3: Paste .java files in the Eclipse project’ src folder
Switch to Eclipse. Paste the files in the src folder by clicking it with the right-mouse button and select Paste (or CTRL+V):
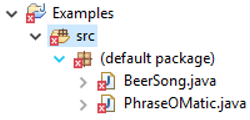
If you expand the src folder, you see that both files appear under default package. It is possible that errors occur:
To fix the errors, open the first Java file. Click the light-bulb with the error and select (double click) the first option to move it to the right package:

Now the file should be Ok.
Repeat this for the other .java files (with errors).
Background info: The first line of a .java file may contain a package-definition. It defines the name of the package that file is supposed to be in. If no name is given “default package” is used. In this case: BeerSong.java is part of package “chap01”.

Step 4: Run the program
Hitting the Run button will start the program of which the .java file is currently open.
However, if an example consists of multiple .java files, you will have to find the .java file which contains the main-method (and Run that).
Appendix 2 Common problems
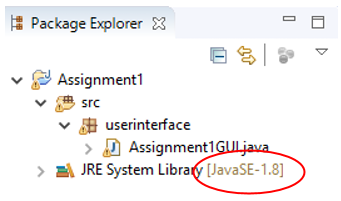
In the first step of the assignment (create project) check whether the correct Java version is used. We use JavaSE version 1.8. You can see this in the package explorer:
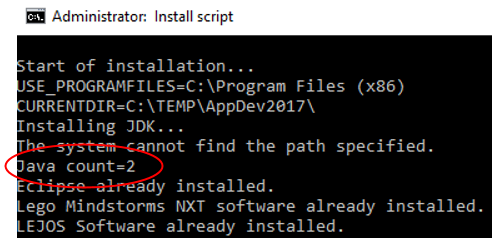
For example, if the WindowBuilder is causing problems in step 3 of this assignment, then make sure you do not have multiple installations of Java on your computer. This is checked by the installation script (install.bat). In the text-output of the script, the “Java count” number should be 2:
For Eclipse to work properly you should have installed the JDK and the Java Runtime Environment (both 64-bit). In the list of installed programs (*) you will see 2 lines like this (version numbers might be different):
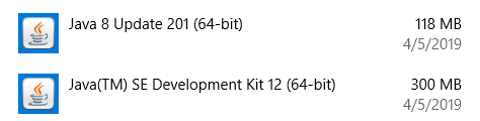
(* Type ‘programs’ in the search field of the taskbar, then choose ‘Programs and Features’ )
So, no other or additional versions, and update 201 (or higher).
If you do have other, more or older versions, remove these, leaving only the above 2. Then restart your computer.
If after the above check, the WindowBuilder still causes problems, such as when switching to the Design tab, try the following: Restart your computer.
Appendix 3 Install Window Builder
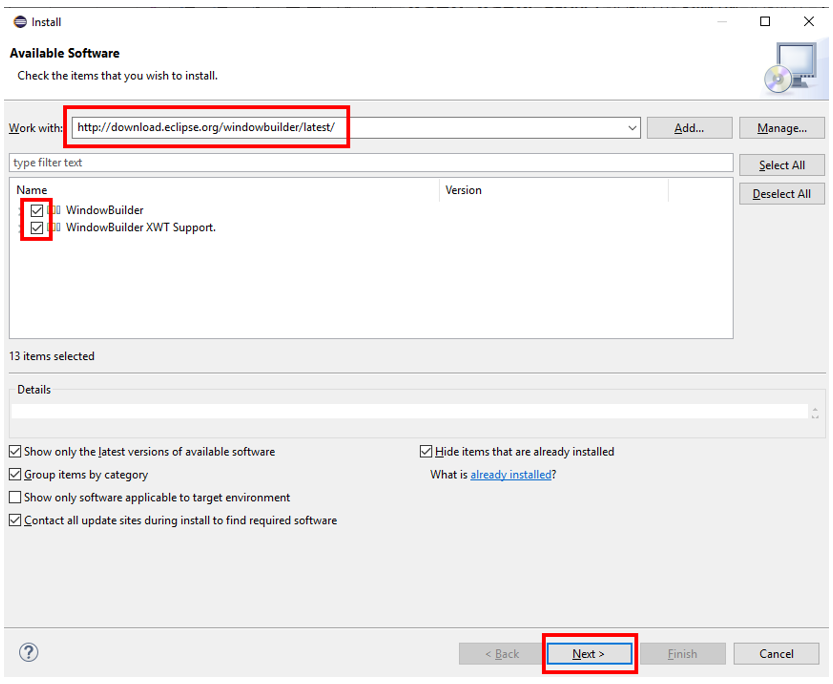
The tool to create graphical user interfaces is not part of all editions of Eclipse, and might have to be added. Choose Help > Install New Software… In the field Work with, enter this address
http://download.eclipse.org/windowbuilder/latest/
(press Enter), and select WindowBuilder and WindowBuilder XWT Support:
To start the installation press Next two times. Accept the license, then Finish. The installation will continue in the background. Wait for it to finish. If asked to restart Eclipse, do so.