An example to control the intensity of vibration using Pulse Width Modulation (PWM) for the Vibration DC Motor Module. This page has details on controlling this module for both Arduino and the Raspberry Pi Pico (with MicroPython).
Further down Pulse Width Modulation (PWM) is explained.
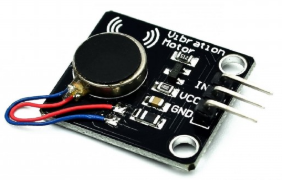
An example of a Vibration Motor Module :
Controlling the module with Arduino
Connect the module to 5V (VCC) and ground (GND) and the IN pin to any PWM pin of the Arduino. Eg. for an Arduino Uno, this can be pin 3. For an overview of PWM pins for different Arduino models, check this overview.
The example sketch below will make the motor vibrate on full power for 2 seconds. Then for half power for 2 seconds, and then off for two seconds. And repeat this cycle (loop).
int motorPin = 3;   // IN pin from motor connected to digital pin 3
                    // (this is a PWM pin on for instance the Arduino Uno)

void setup() {
  pinMode(motorPin, OUTPUT);  // sets the pin as output
}

void loop() {
  analogWrite(motorPin, 255); // turn on motor on full power (range is 0 - 255)
  delay(2000); // wait 2 sec., so motor will vibrate for 2 sec

  analogWrite(motorPin, 125); // turn on motor on half power
  delay(2000); // wait 2 sec., so motor will vibrate for 2 sec

  analogWrite(motorPin, 0); // turn off motor
  delay(2000); // wait 2 sec., so motor will be off for 2 sec
}
If it does not work, try changing the motorPin value from 3 to A3 or viseversa. The motorPin value being a PWM capable pin varies per Arduino board. Check that here.
It is also possible to use digitalWrite() to control the motor. However, in that case you can not set the intensity of the vibration.
Controlling the module with Raspberry Pi Pico
Connect the module to 5V (VBUS, pin 40) and ground (GND) and the IN pin to any GPIO pin of the Pico. Eg. pin GP16. See pin out diagram to locate the pins.
The example script below will make the motor vibrate on 70% of power for 10 seconds. Then for another 10 seconds on full power with shorter intervals. Power of less than 70% (0.7 * max) is often too soft to be felt. Better ways to distinguish different vibrations is by using different patterns (vary the timing/intervals). Based on example from core-electronics.
# Make the motor vibrate on 70% of power for 10 seconds.
# Then for another 10 seconds on full power with shorter intervals.
#
# Based on example from:
# https://core-electronics.com.au/courses/raspberry-pi-pico-workshop/#2.7

from machine import Pin, PWM # we need to import PWM to use PWM
import time

led = Pin("LED", Pin.OUT) # onboard LED

# intialise pin 16 as a PWM output
pwm_pin = PWM(Pin(16))

# this sets up the frequency that the pin is turned off and on (it is not duty cycle)
pwm_pin.freq(1000)

# this varaible is used to help calculate the required input from a duty cycle percentage
max = 65535

# while loop for 10 seconds:
t_end = time.time() + 10
while time.time() < t_end:
    led.on()
    pwm_pin.duty_u16( int(0.7 * max) ) # turn on at 70%
    time.sleep(0.5)

    led.off()
    pwm_pin.duty_u16(0) # turn off
    time.sleep(0.5)

# while loop for 10 seconds:
t_end = time.time() + 10
while time.time() < t_end:
    led.on()
    pwm_pin.duty_u16( max ) # turn on at max power
    time.sleep(0.1)

    led.off()
    pwm_pin.duty_u16(0) # turn off
    time.sleep(0.1)


