This article has been updated to reflect the 2022 version of Android Studio (‘Bumblebee’).
In this tutorial you will create an app with Android Studio with a simple userinterface which provides an input field (textfield) in which you can enter text, a button and a textview which displays a message. It can be used as a first project if you are starting to create Apps using Android Studio. It will show the basics of creating a userinterface and adding an eventhandler to a button. If you did not install & setup Android Studio yet, do that first.
Start a new Android Studio Project (either from the Welcome screen or via File > New > New project).
Choose “Basic Activity”. Click Next.
Type a name: eg. Hello World”. Check the language, it should be set to ‘Java’. Set the API Level to 21: API 21: Android 5.0 (Lollipop).
Changing the Package name and the Location is optional.
Press Finish.
Create the userinterface
The example project Basic Activity consists of two fragments, which can be seen as pages in the App. You can navigate between them using the next and previous buttons. We will extend the userinterface of the first fragment.
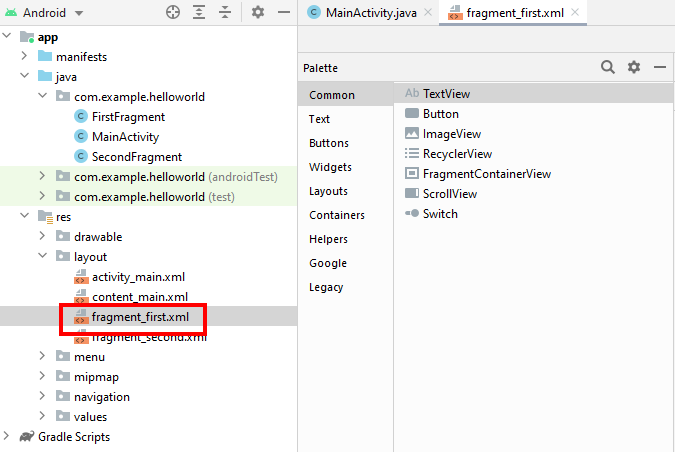
The layout of the first page of the userinterface is defined in fragment_first.xml, which you can find under res, layout in the folder structure, so open that by double clicking the file:
The userinterface already contains a textView with the text ‘Hello first fragment’. We are going to add an input field in which the user can type his/her name. When the user presses the Ok-button, a welcome text will be shown with the name read from the input.
Make sure you are at the Design view. Select Text, PlainText in the Palette and drag it to the editor:
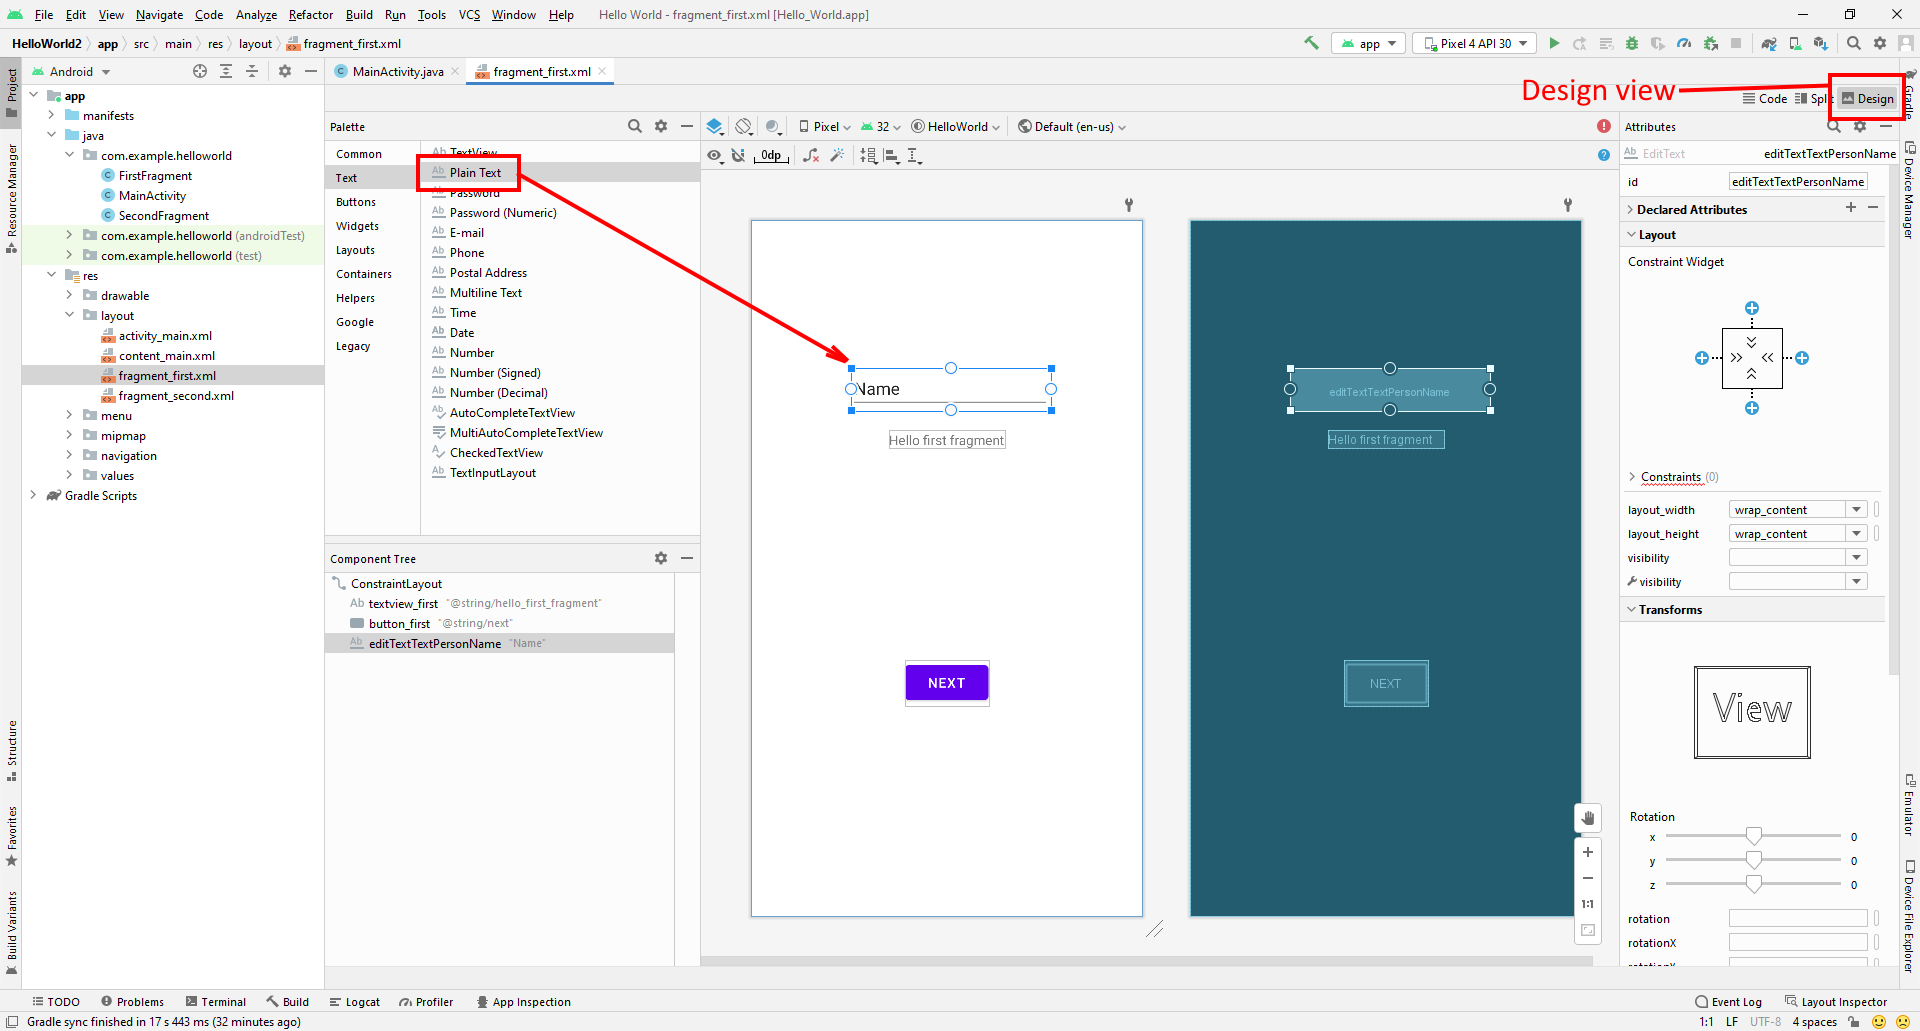
Drop it somewhere in the center above the text.
Now we will constrain the text element to the top and left. When you hover over the circles, you can see you can interact with them. Click the circle at the top side and drag it upwards to the top. Then drag the element itself down again to the old position. The element will now be constraint to the top:
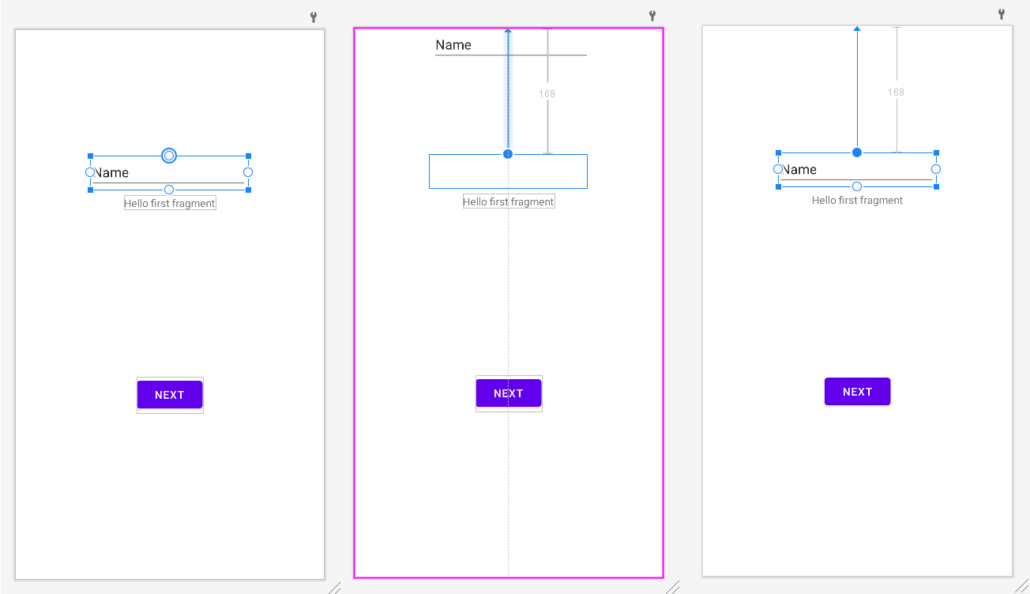
Do the same with the left side to center the element:
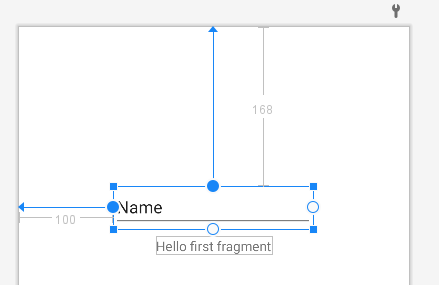
Also align the ‘Hello first fragment’ text to the left side of the textfield (drag its left-constraint circle to the left of the textfield above it):

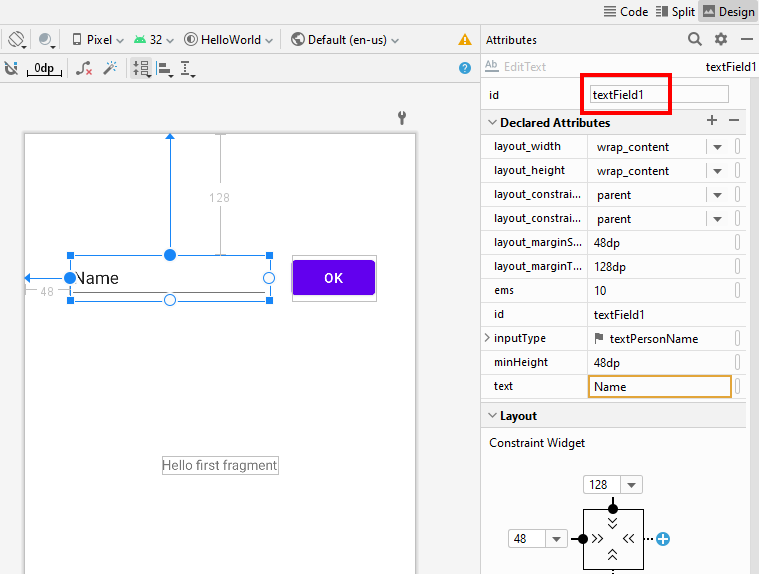
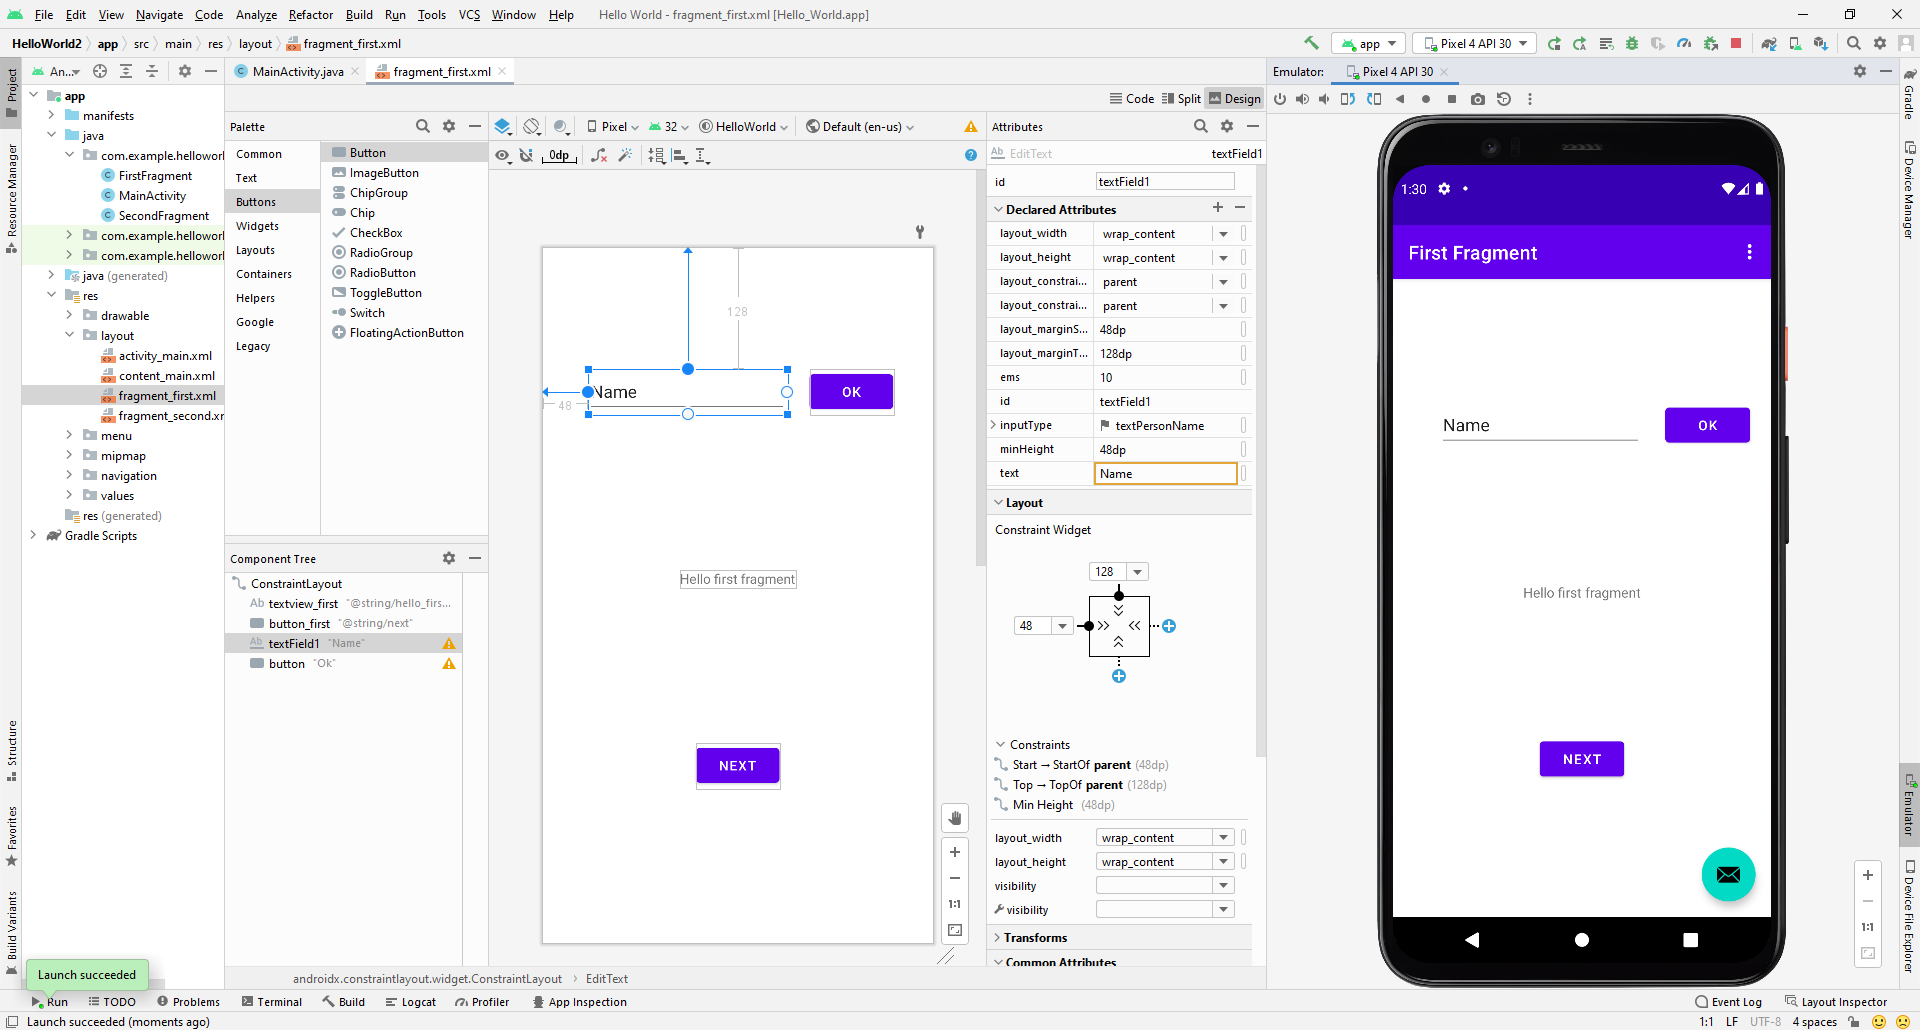
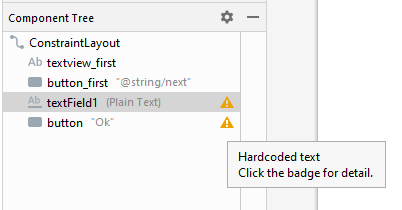
Select the textfield. In the Attributes panel, change its ID to “textField1” (click ‘Refactor’ in the popup that appears):
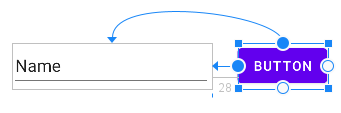
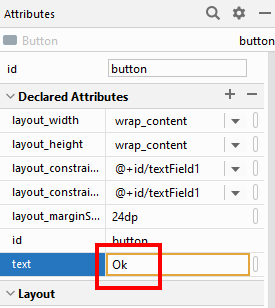
From the Palette, add a Button and constrain it to the textfield by clicking the small circle: do this for the left (start to textField1 end) and top-constraints.
Set it’s text to “Ok”. In the Attributes panel, open the ‘Declared Attributes’, then at ‘text’ enter “Ok”:
Run the App and verify everything is positioned well:
(if you do not have a Virtual Device yet, create one)
(Do not close the emulator)
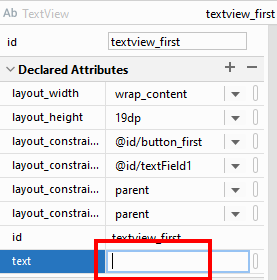
Remove the “Hello first fragment” text from the TextView (it should be empty and will be removed from the list of attributes if you press Enter after removing the text):
Add an eventlistener
Add an eventlistener for the Ok button:
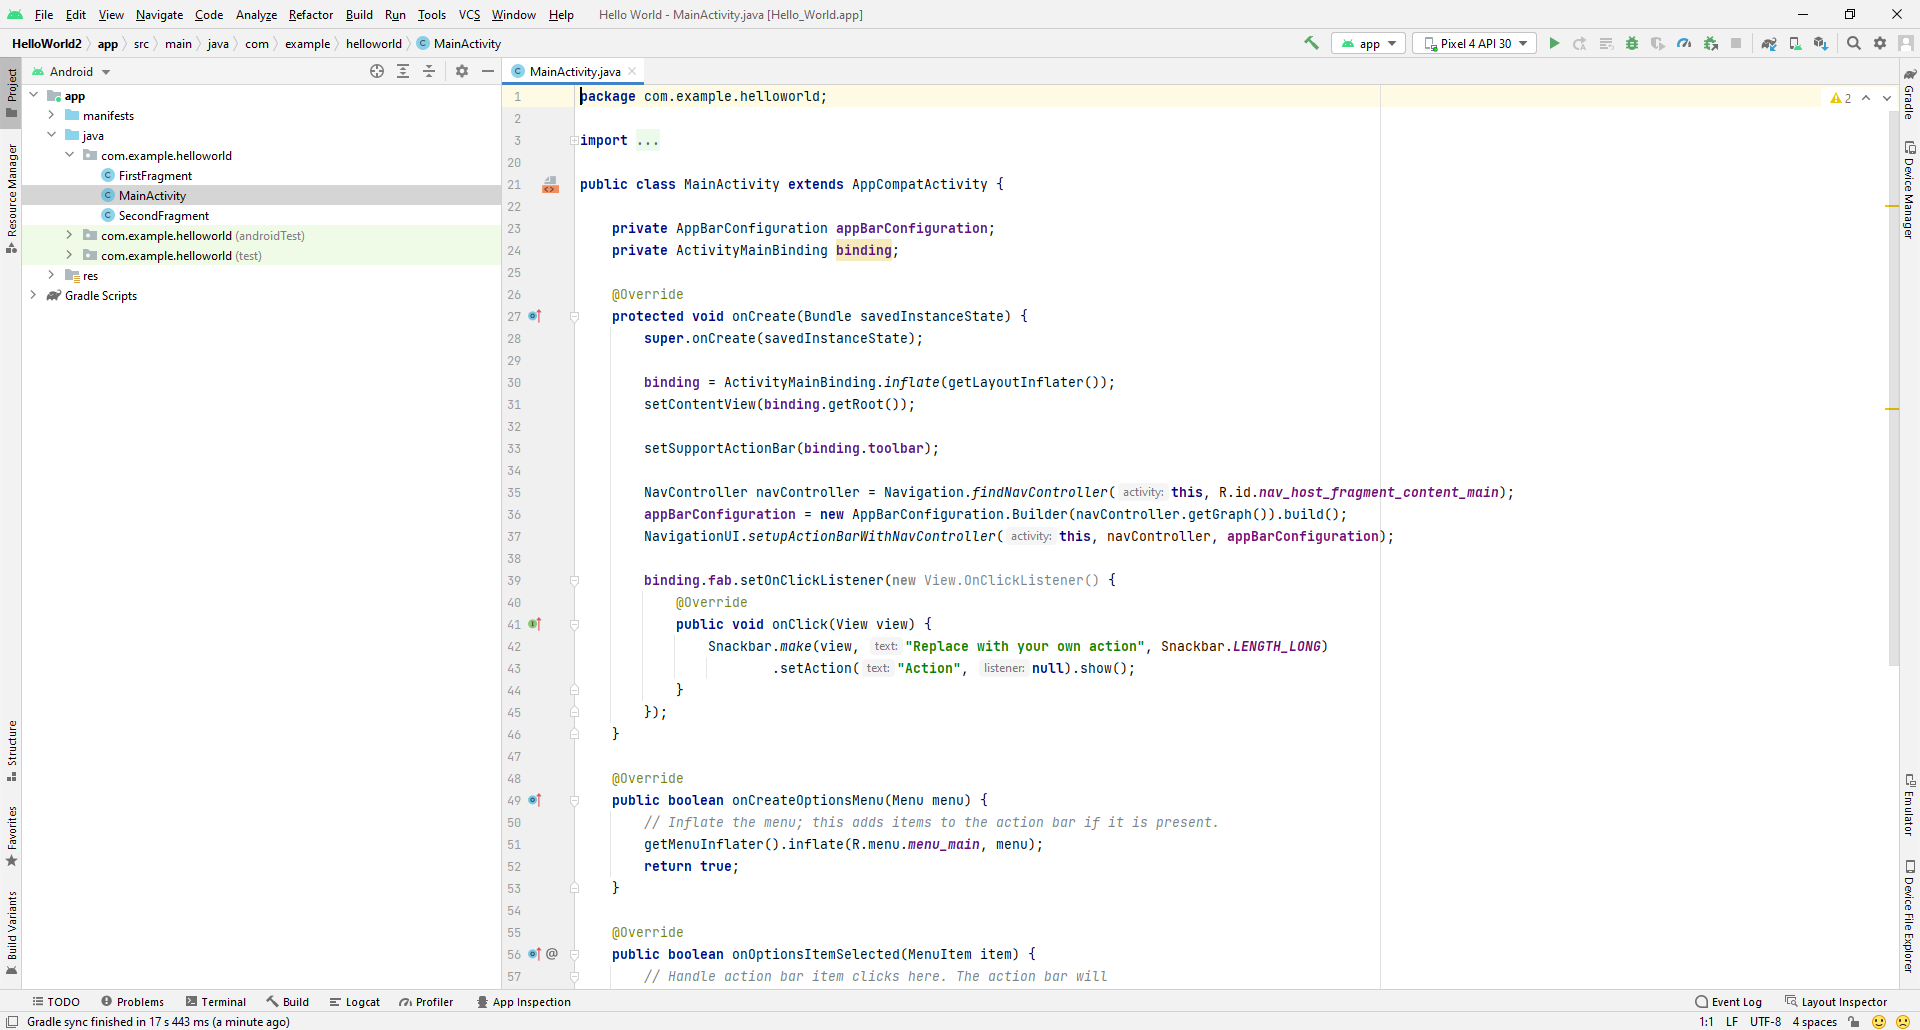
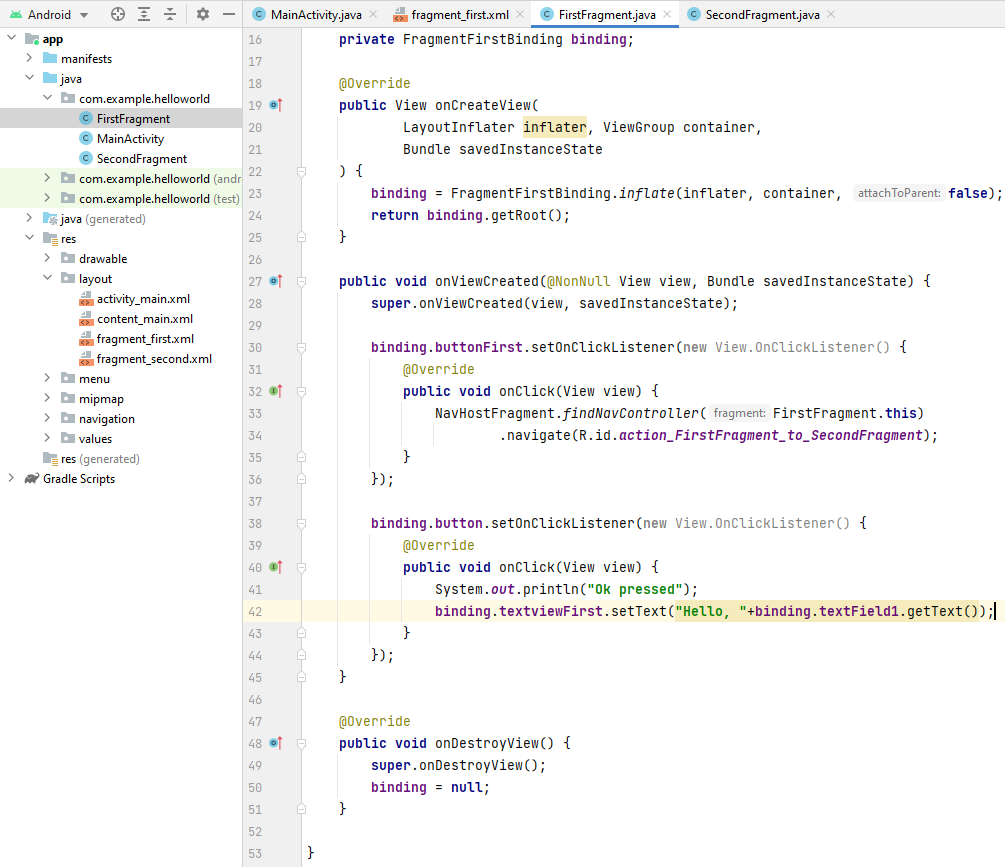
Switch to FirstFragment.java. You can also find it in the Project Structure under app, java, com.example.helloworld (your package name might be different).
Add the code below to the onViewCreated() method:
(make sure to add it at the end)
binding.button.setOnClickListener(new View.OnClickListener() {
@Override
public void onClick(View view) {
    System.out.println("Ok pressed");
}
});
Inside the eventlistener, we can add the line below to the onClick() method, right after the line with System.out.println():
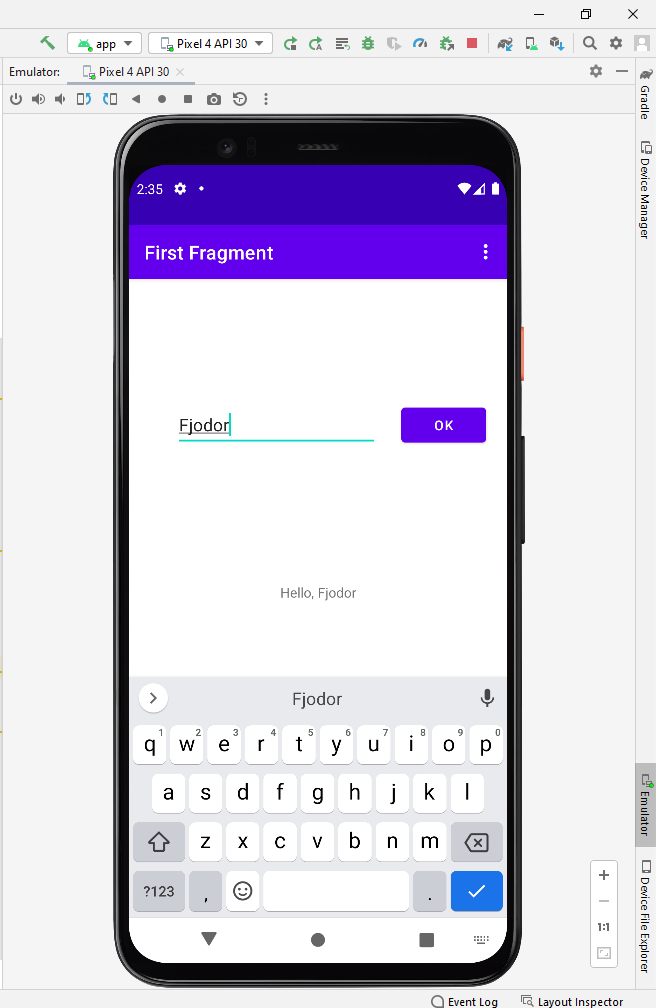
binding.textviewFirst.setText("Hello, "+binding.textField1.getText());Via the binding object, we can access the userinterface elements, like the input textfield (textField1), in which the name will be typed. We can also access textviewFirst, which is the textview which is empty at start (we removed its original text). To get the text which was typed in the textField1, we can call its getText() method.
Now it is time to test the App! (Run the App).
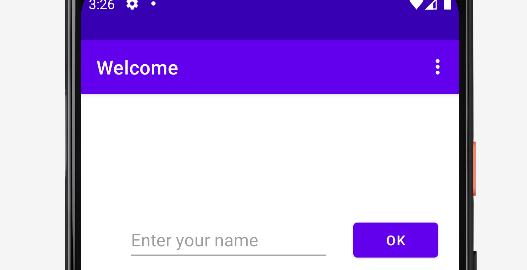
If you type your name and hit the Ok button, result should look like:
You can also review the code in case you need it:
Things to fix:
Use hint instead of placeholder
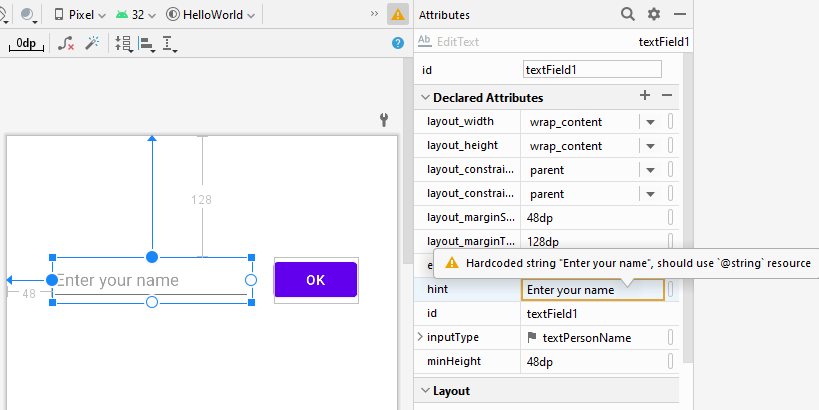
When you test the App, you might notice that it is rather annoying that, when you start typing, you first have to remove the placeholder text ‘Name’.
Instead of having this text in the text-attribute of the text field, it is better to put it in the hint-attribute: In the Attributes of textField1, at text remove the value (attribute should be empty), then scroll down until hint and enter ‘Name’ there.
Use resources instead of hard-coded strings
You might encounter warnings about strings:
Your app will work fine, it is just a warning. But if you want to build larger apps and for instance support multiple languages, you should fix this. We show how to do this for the hint value for textField1:
Select textField1 and in the list of attributes scroll down to the hint value and make this value empty. Then click the small button ‘Pick a Resource’:
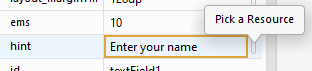
The dialog to define resources appears. Click the + to add a resource. Ehen enter the Resource name and value and press Ok, then select that resource and press Ok again:
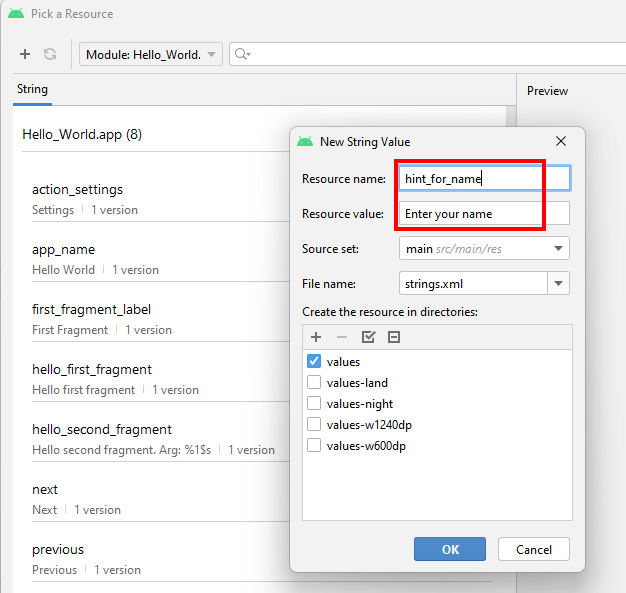
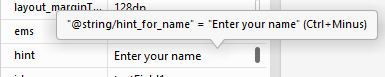
The value will now be @string/hint_for_name:
Prevent errors
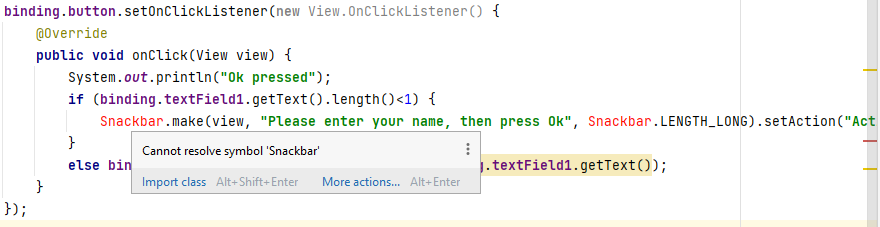
If nothing is typed, and the Ok button is pressed, a brief warning should be displayed, eg.: “Please enter your name, then press Ok”. We can use the class Snackbar for that. Add this to the eventlistener:
if (binding.textField1.getText().length()<1) {
    Snackbar.make(view, "Please enter your name, then press Ok", Snackbar.LENGTH_LONG).setAction("Action", null).show();
}
The Class Snackbar might be unknown, then it will turn red. This means you have to import it, hover over it and click ‘Import Class’:
Now move the code which displays the “Hello, ” message in the ‘else’ part of this if-statement. (Add the ‘else’ yourself).
Make the share button work
In MainActivity.java, find the code which adds an eventhandler to the Floating Action Button (fab):
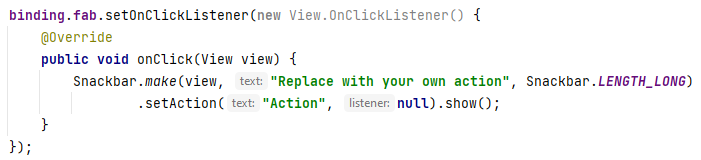
In the eventhandler, remove the line with Snackbar.make... and add your own code to handle press of that button. You can find plenty of examples of how to handle the share button. For instance this example shows how to send an e-mail with it. The code below can be used to accomplish this.
// get reference to textField1:
EditText textField1 = findViewById(R.id.textField1);

// send e-mail by using the 'Send to' Intent:
Intent email = new Intent(Intent.ACTION_SENDTO);
email.setType("message/rfc822");
email.setData(Uri.parse("mailto:"));
email.putExtra(Intent.EXTRA_SUBJECT, "my first app"); // subject of the email
email.putExtra(Intent.EXTRA_TEXT, "Hello, I just created an 'hello world' app to greet " + textField1.getText()+"\n\n"); // the body of the email
try {
    startActivity(Intent.createChooser(email, "Send mail..."));
} catch (android.content.ActivityNotFoundException ex) {
    Toast.makeText(MainActivity.this, "There are no email clients installed.", Toast.LENGTH_SHORT).show();
}
Please note that in order for this to work, you must have a working & configured e-mail app on the device running this app.
Make use of Enter key possible
When you hit the Enter key on the keyboard while entering the name, the same eventhandler should be invoked. How to do this is explained here.
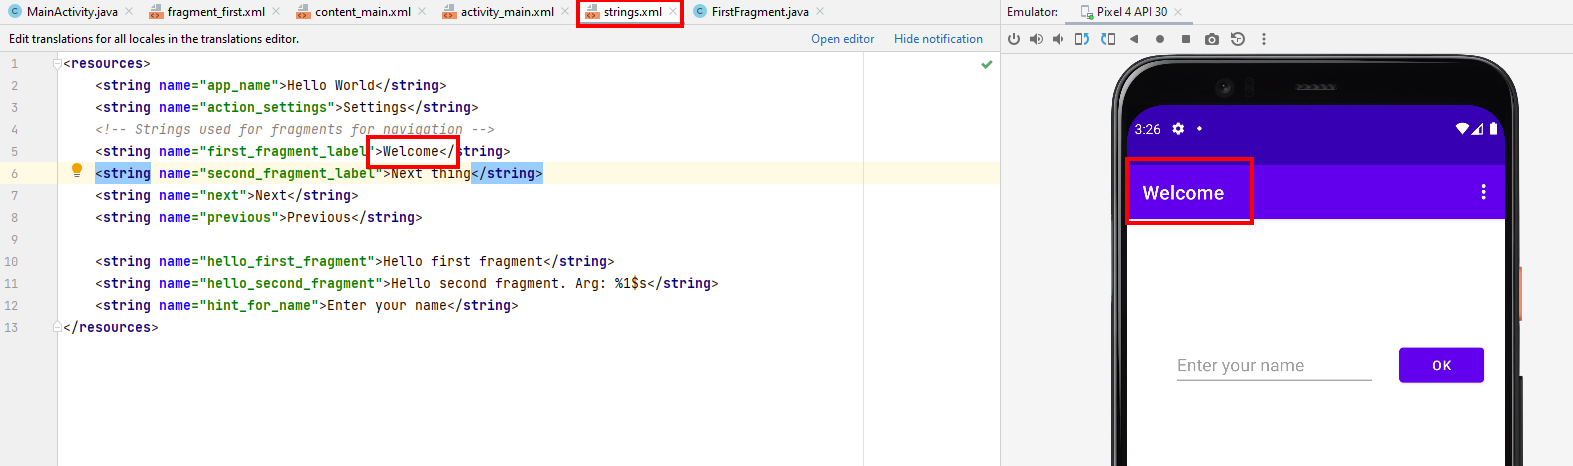
Change strings
You might want to change some other texts, like the heading of the fragment which is in the toolbar. For instance “First Fragment”. These can be found in the resource file Strings.xml (in the folder res, values):
More information
Continue to the series of articles on Android App Development.
Or, learn more from these tutorials and free courses: