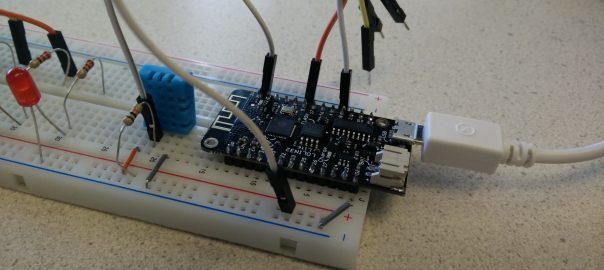
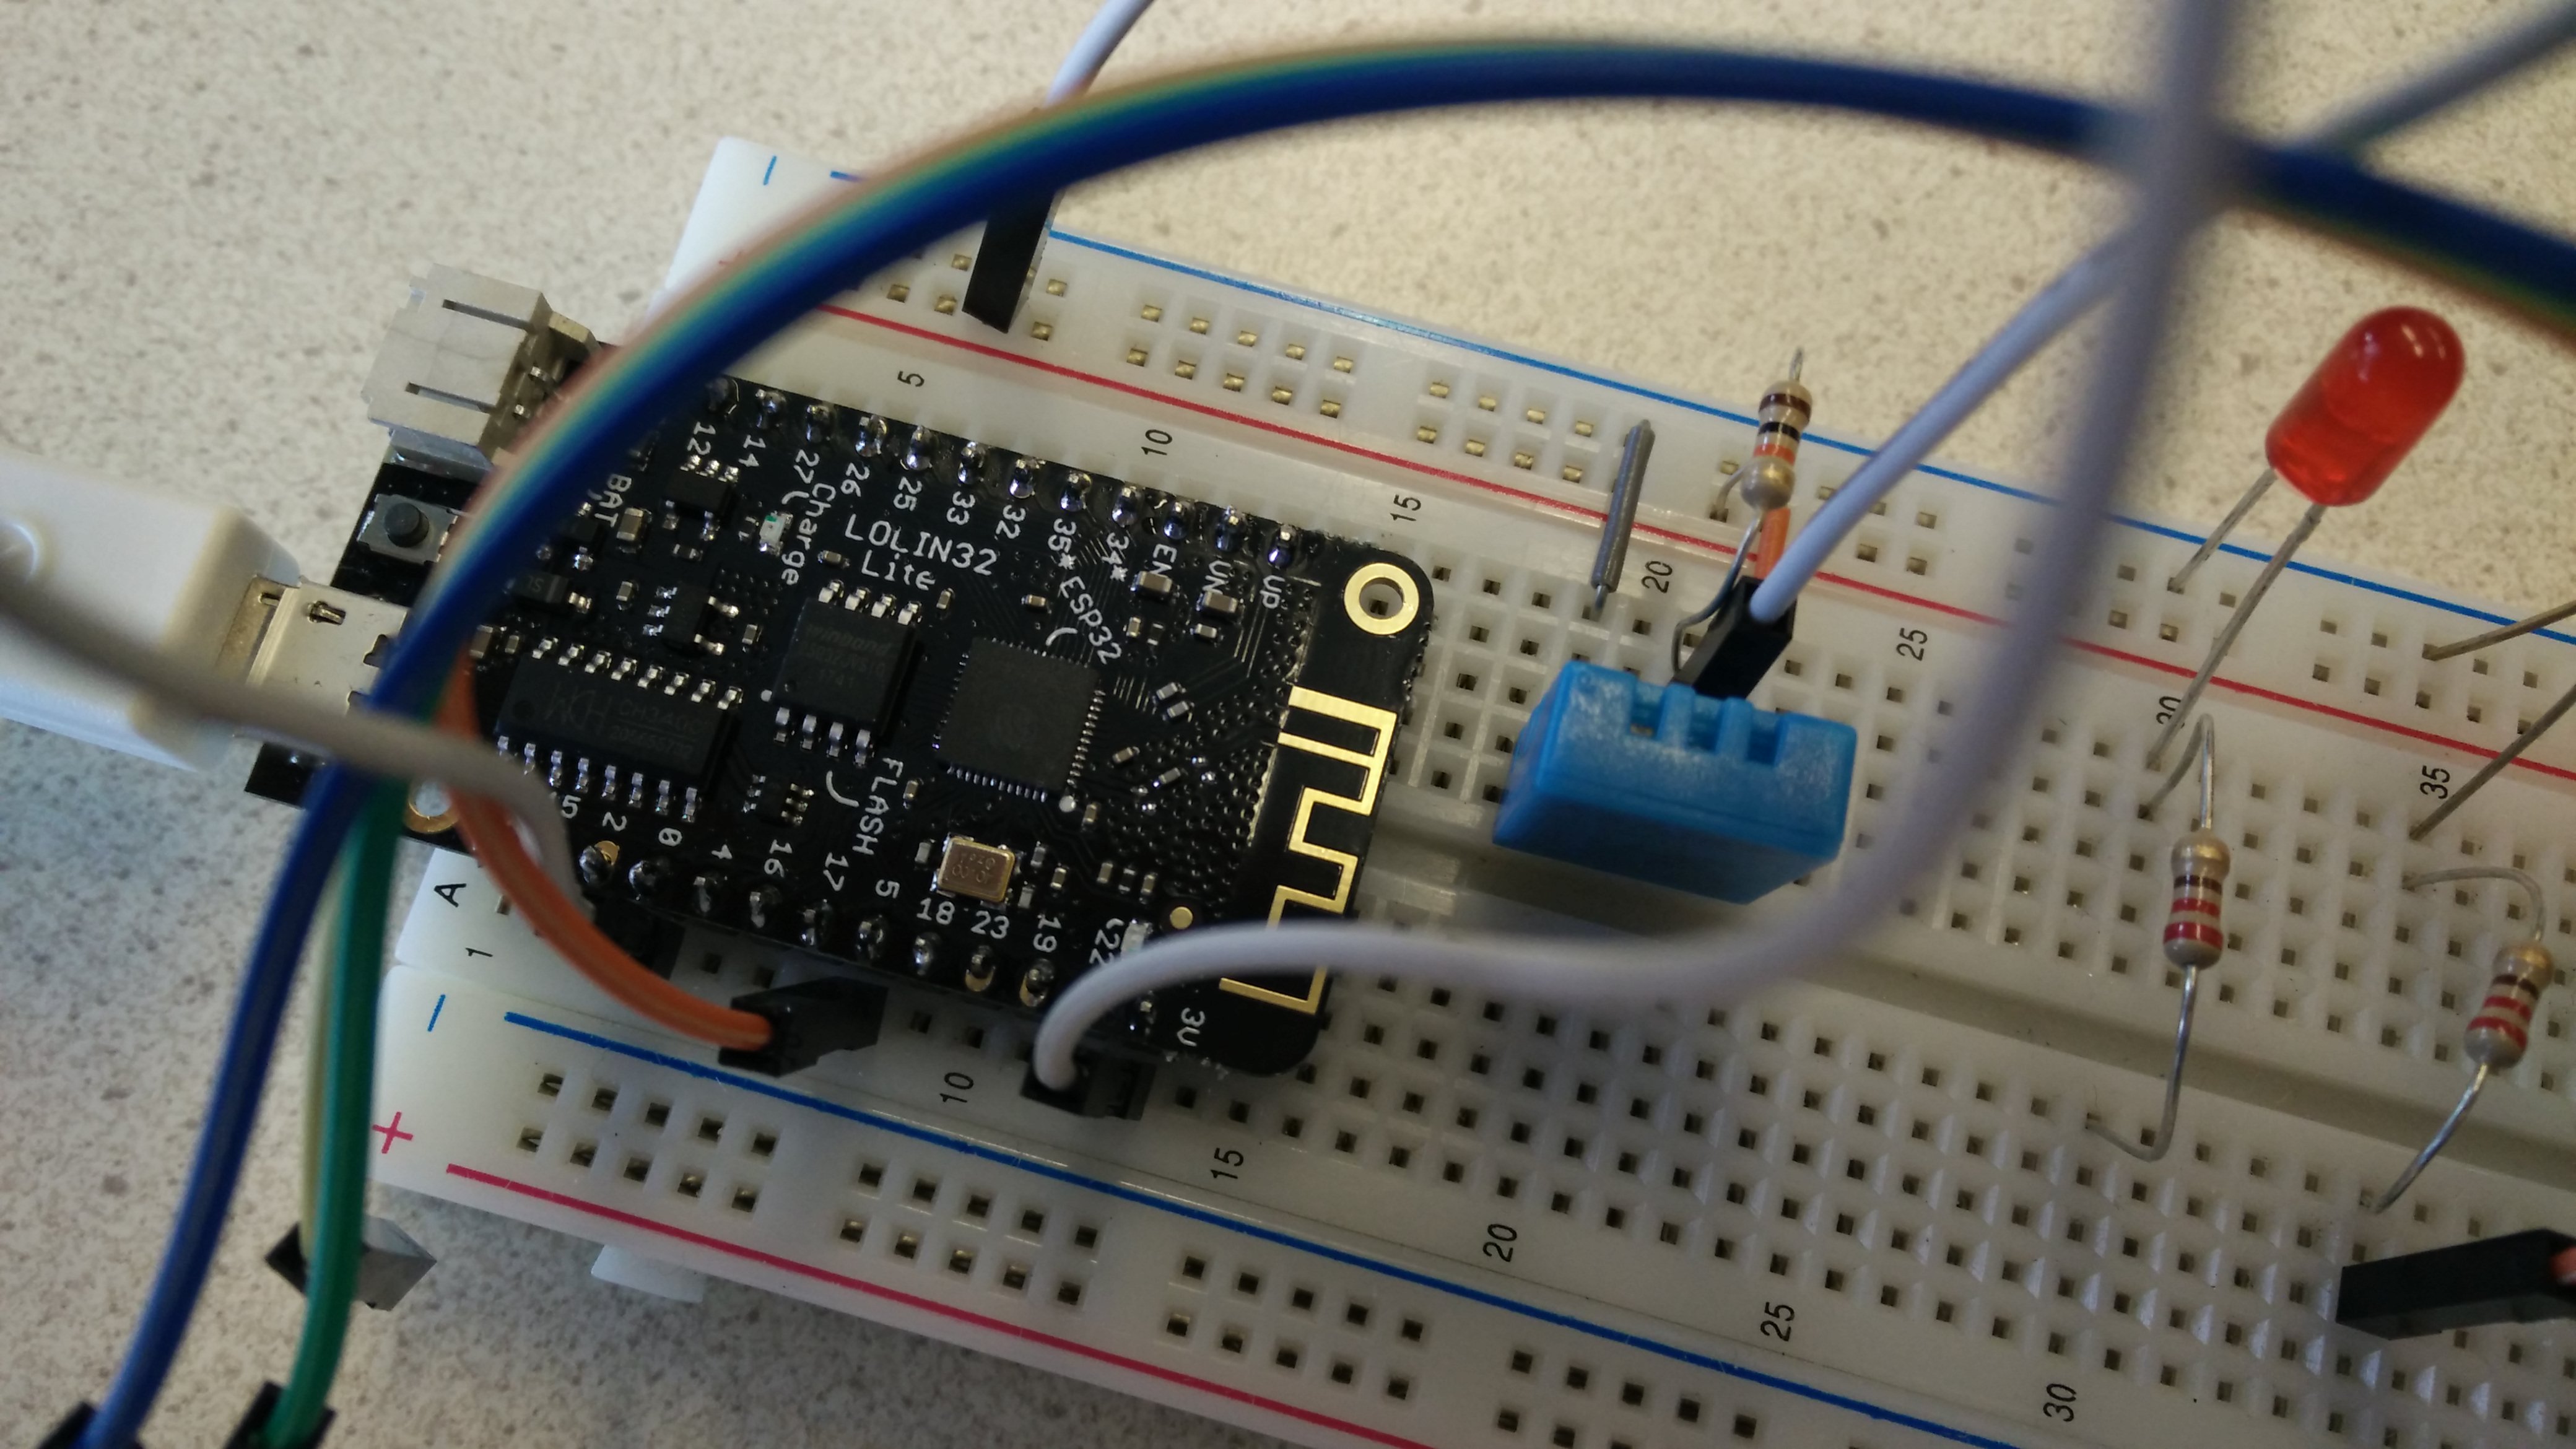
The ESP32 Wifi module can replace an Arduino, as it has similar properties. It’s main advantage is that it is faster, has more memory and has WiFi and Bluetooth on board. Just like the Arduino Nano it can be mounted on a breadboard. This allows building very compact prototype circuits:
Make module ready for use in Arduino IDE
Start the Arduino IDE. Choose File > Preferences. At “Additional Boards Managers URLs” enter "https://dl.espressif.com/dl/package_esp32_index.json" (without the quotes).
Now choose Tools > Boards > Boards Manager. Enter “esp” in the search field.
Click on “esp32 by Espressif Systems” and click the Install button.
To check if the module works, connect it with a USB cable to your computer and upload this sketch: esp32_blink.ino. This example uses the onboard LED, which is on pin 22 of the board.
If using Blynk you can start with the example sketch “ESP8266_Shield” via File > Examples > Blynk > Boards_WiFi or load my complete example: esp32_blynk.ino
Specifics for the LOLIN32 Lite
If you have a LOLIN32 Lite, right after installation of the ESP32 Arduino Core, set the Board to “WEMOS LOLIN32 Lite” and Upload Speed to 115200: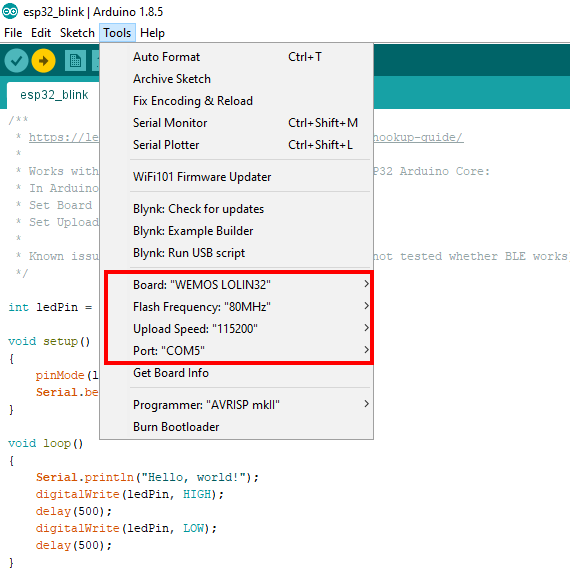
For the Serial Monitor set the speed to 115200 also.
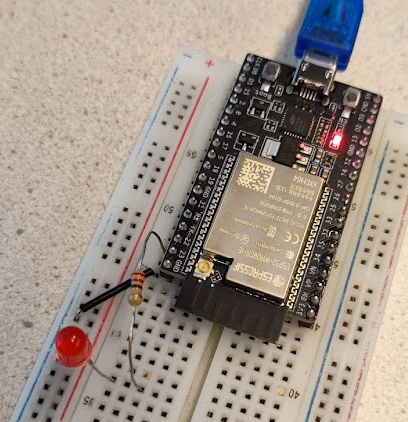
Specifics for ESP32-WROVER (IE)
If you have the ESP32-WROVER-IE dev kit, set the board to “ESP32 Wrover Module”, select the proper COM port and leave the other settings to their default. You must connect an LED to pin 22 yourself, as this module does not have an onboard LED that you can use (the single LED on the board is for 5V power indication only). Connect short leg of the LED to GND, other to pin 22 via 220 Ohm resistor:
Connect via Bluetooth
You can also connect to the module via Bluetooth, eg. with this this example sketch: esp32_bluetooth_led_control.ino. More information about this in this tutorial. Install a Bluetooth Terminal App on your phone, and send an “1” to turn on the LED, and a “0” to turn it off.
Hook up a Humidity & Temperature sensor
For this example, I added a DHT sensor connected to pin 0 of the ESP32 (you can use the pin numbers as printed on the module). It also needs a pull up resistor (4K7 or 10K) between VCC and the DATA pin, like this example.
For the DHT sensor, use the ESP specific library, via Sketch > Include Library > Manage Libraries, search for “DHT”, pick “DHT sensor library for ESPx”.
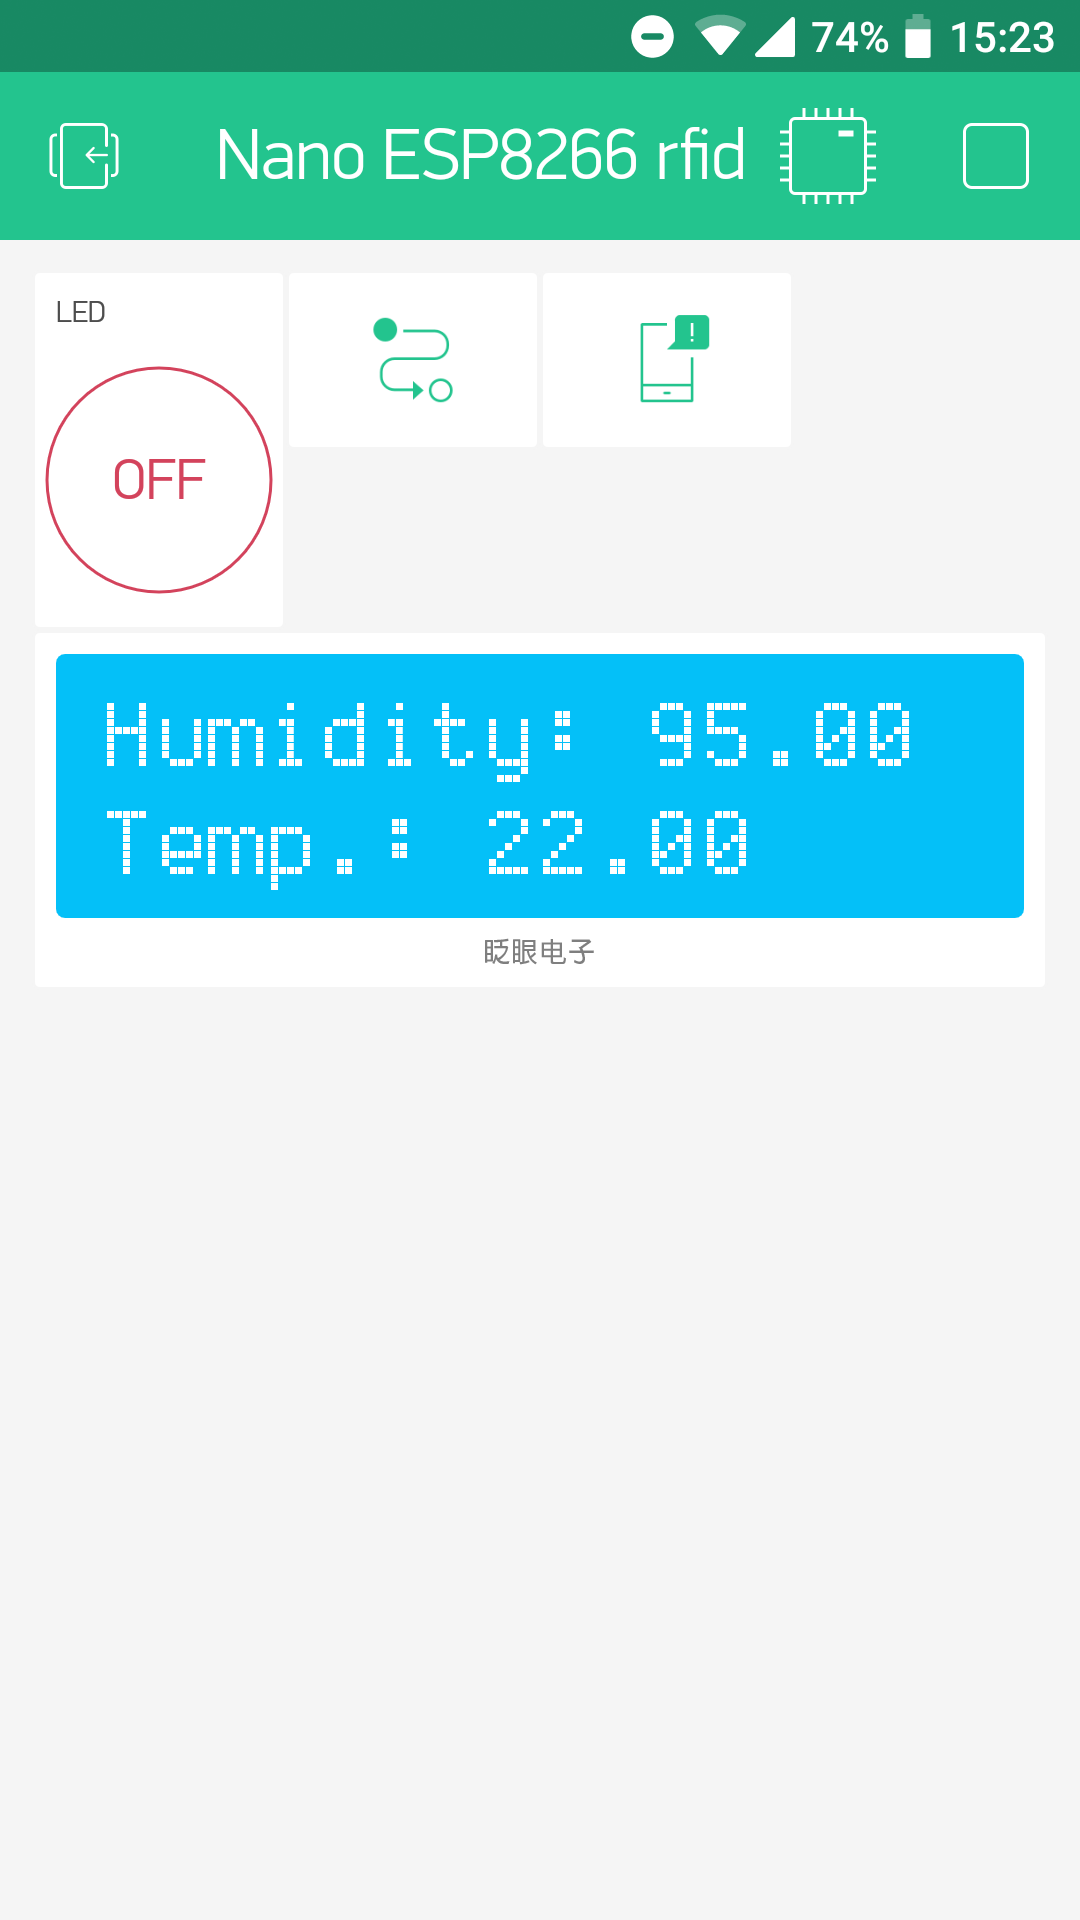
I used the same Blynk App as used for the ESP8266 Blynk introduction. this will show the Humidity & Temperature values in the LCD Widget of the Blynk App:
Connect analog components: RGB led example
Because the Lolin Lite does not have analog ports, you might have to resort to some tricks to get things working. For example, to connect an RGB led, you need this example. Do not forget to set the proper pins to which the r, g, and b pins of the led are connected (on line 12-14 of the sketch). I for instance used pins 32, 33 and 34.
Next: Create a connected sensor
To learn more about using the ESP32 module, go to the tutorial “Create a connected sensor”
More information
- Sparkfun’s “ESP32 Thing Hookup Guide”, and more ESP32 tutorials
- Randomnerdtutorials site has a lot of ESP tutorials, like this one: “ESP32 Client-Server Wi-Fi Communication Between Two Boards”
- How to power an ESP32 board (the Lolin has an additional option to provide power via the Li-po connector, eg. for a Lipo rechargeable battery, it also has an onboard charging circuit for that).