This tutorial demonstrates how to build a simple sensor and publish its values online (on a web server) using an ESP32 module. We will build an Arduino sketch which will read the sensor values, connect to WiFi, connect to a website and publish the values on the website. The published values can then be used to view them online (view them on a web page) or in an App (this is a separate tutorial).
This tutorial assumes you already have basic knowledge on Arduino and building simple circuits and have the Arduino IDE installed.
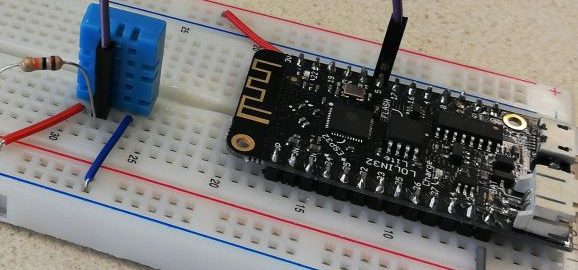
Build circuit: connect DHT11 temperature sensor to ESP32 module
Components:
- ESP32 Module, in this case a Lolin32 Lite
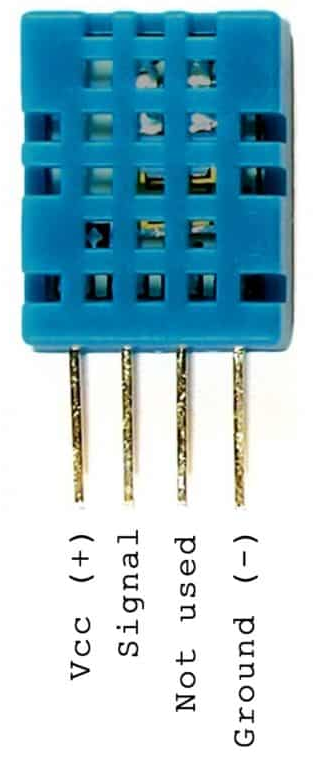
- DHT11 temperature & humidity sensor
- Breadboard
- Breadboard power module
- 10K resistor
- Breadboard wires

Connections:
- Connect 3.3V of ESP module to 3.3V power line of breadboard (red line*)
- Connect GND of ESP module to GND line of breadboard (blue line*)
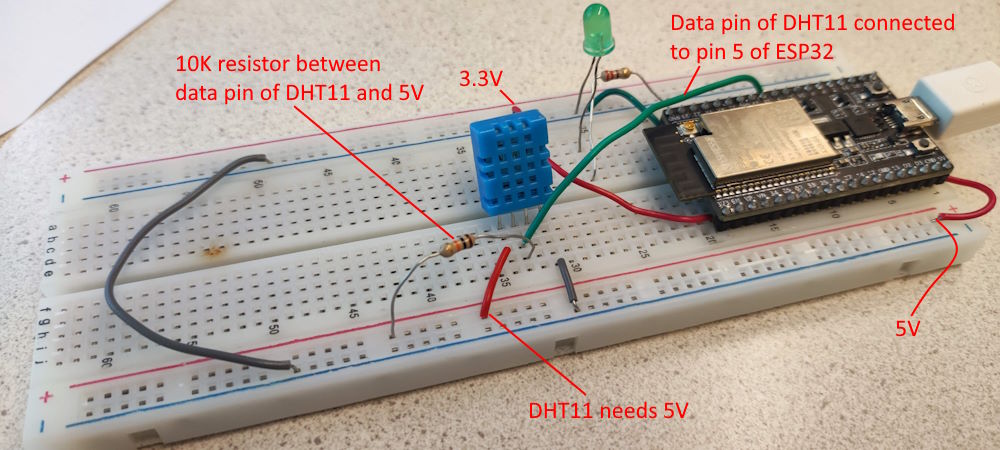
- The temperature sensor’s Vcc and GND pins are connected to the 5V + GND power lines on the breadboard.
- The data pin of the temperature sensor is connected to pin 5 of the ESP module
- There is a 10K resistor between the data pin of the temperature sensor and the 5V power line.
Important: some breadboards have the powerlines in different order, so always make sure you use the + and – connection from the power-module: the line connected to the – is the GND line and + is the power line (5V or 3.3V).
Tip: some ESP32 modules (like the Adafruit ESP32 Feather and the ESP32-DEV-KIT-DevKitC-v4 below) have a 5V pin, which is connected directly to the USB 5V. If that is the case, you can omit the breadboard power module and use the 5V from the USB pin to power the temperature sensor:
Make ESP module ready for use in Arduino IDE
Start the Arduino IDE. Choose File > Preferences. At “Additional Boards Managers URLs” enter "https://dl.espressif.com/dl/package_esp32_index.json" (without the quotes). Press Ok.
Now choose Tools > Boards > Boards Manager. Enter “esp” in the search field.
Click on “esp32 by Espressif Systems” and click the Install button.
Install ESP version of DHT library
To be able to use the DHT sensor, we must install a library. For this example we use an ESP-version of the DHT library “DHTesp”. You can add it into the Arduino IDE via Sketch > Include Library > Manage Libraries, search for “DHT”, pick “DHT sensor library for ESPx”.
Or do a manual install: goto github.com/beegee-tokyo/DHTesp to download this library (click the “Clone or download” button and choose “Download ZIP”). Extract the zip-file to Documents\Arduino\libraries and rename the folder to “DHTesp”.
First test: check if DHT sensor works
Connect a mini USB cable to the power module on the breadboard and connect it to your computer.
Connect a micro USB cable to the ESP module and connect it to your computer.
Download the first example "DHTesp_basic_example.ino" and open it in the Arduino IDE.
Set the Board to “WEMOS LOLIN32” (or your particular “ESP32 Dev Module” model, eg. the ESP32 we showed above), select the Port and set Upload Speed to 115200:
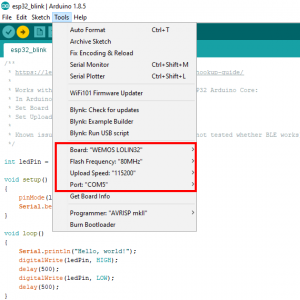
If the Port is unavailable check out this troubleshooting page. One of the reasons might you have to install the CH340 drivers.
Now, Upload the sketch and start the Serial Monitor when it is uploaded. Make sure the speed of the Serial Monitor is set to 115200. If it works, the temperature and humidity are shown:
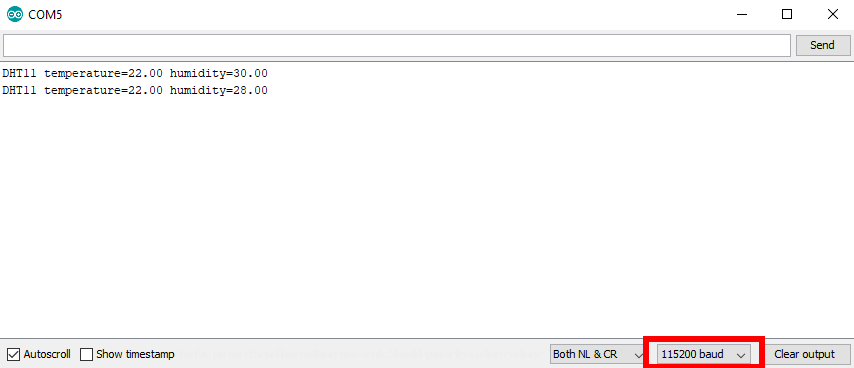
If you are getting “DHT11 error status: TIMEOUT” errors, double check the DHT sensor gets 5V power and is connected properly.
Complete code: use example code which publishes the values on the web server
Download the complete example "esp32_web_client_dht11_v2.ino" (and study it). It uses my web server home.et.utwente.nl to store values.
Find the lines with the settings for the WiFi connection (variables ssid and password) and adjust them to reflect your WiFi settings. If you attend one of my workshops, the preset values might work.
If you want to upload values to a different web server, adjust the variable server and test_root_ca (this contains the certificate, more on this below). And check the request settings in the function doRequest(). The request is made like this: GET /val/variable/value where variable is the name of the variable to use for the value.
Something you must change are the variable names in the function call of function doRequest(). These must become unique names for your use case, as otherwise your variables will be overwritten by values of others. So find this in the code:

And change the "temp" and "humidity" (red underlined) to something unique, eg. "temp953276" and "humidity17897".
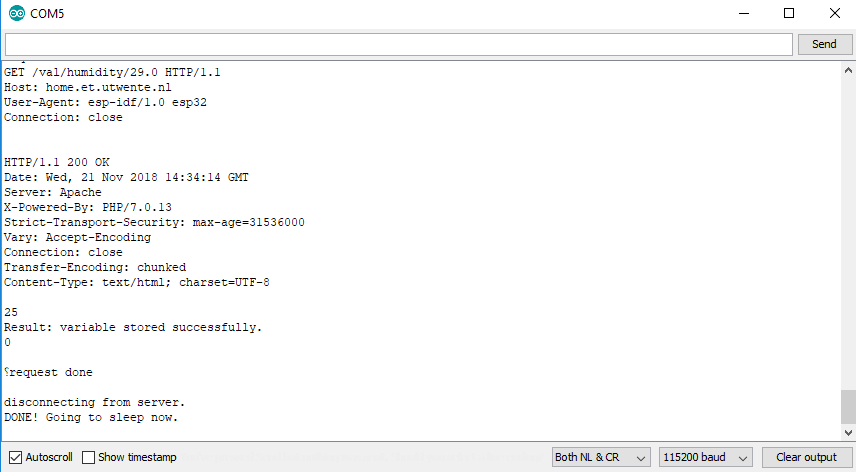
Now, Upload it and start the Serial Monitor when it is uploaded.
If everything works, you will see no errors and output will be similar to:
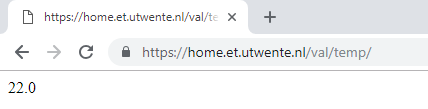
Also, if you goto the URL you can find the values online. If you choose "temp953276" the latest value can be found here:
https://home.et.utwente.nl/val/temp953276
What’s next
More information
- “Getting started with the ESP32 Wifi module”, includes info on how to connect it to the Blynk App
- Sparkfun’s “ESP32 Thing Hookup Guide”
- If you do not want to use my webservice but for example the Blynk cloud service, check out this post. You can also connect to the ThingSpeak service to log and analyse data from sensors.
Footnotes
Update 10/9/2019: this website was moved to a new server, so the certificate in the example sketch has been updated.
To get the proper certificate code, I use the command below on my web server (shell-login via ssh/putty):
openssl s_client -showcerts -connect home.et.utwente.nl:443 > cert.output
In the example above, the certificate will be written to the file “cert.output”. If there are multiple certificates, get the one labelled “Root CA”. You might also be able to find the certificate of your server in the Control Panel of your website.