By utilizing the Arduino-bit and the Proto-bit, all kinds of electronic circuits and components can be connected to a Littlebits circuit.
In this example, we connect an Ultrasonic sensor to the Arduino-bit with the Proto-bit.
The distance measured by the Ultrasonic sensor will be displayed on the Number-bit.
This example is based on the Bat Vision Invention with some minor improvements and changes.
Materials
LittleBits modules
Other materials
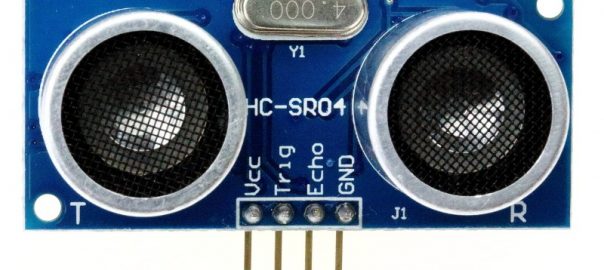
- Ultrasonic Ranging Module HC – SR04
- 4 wires with connectors male-female
Connect ultrasonic sensor to Proto-bit
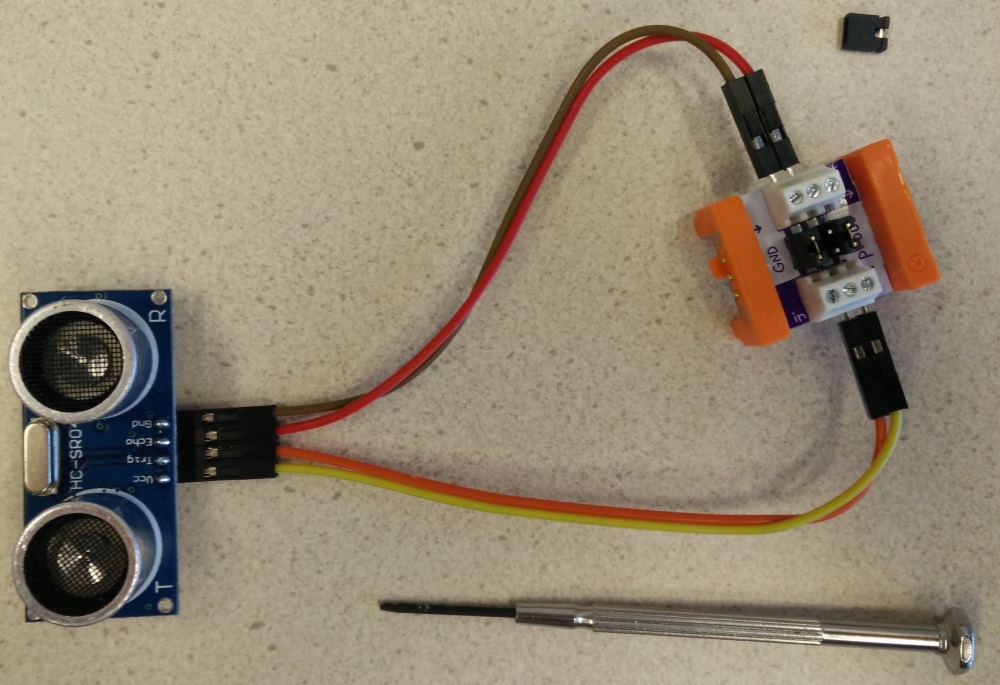
Remove the middle jumper of the Proto-bit, otherwise it’s input will be connected to the output.
Connect the echo-pin of the ultrasonic sensor to the Proto-bit output (top middle connector): red wire.
Connect the trig-pin of the ultrasonic sensor to Proto-bit input (bottom middle connector): orange wire.
Connect Vcc (yellow wire) and GND (brown wire).
Build circuit as shown
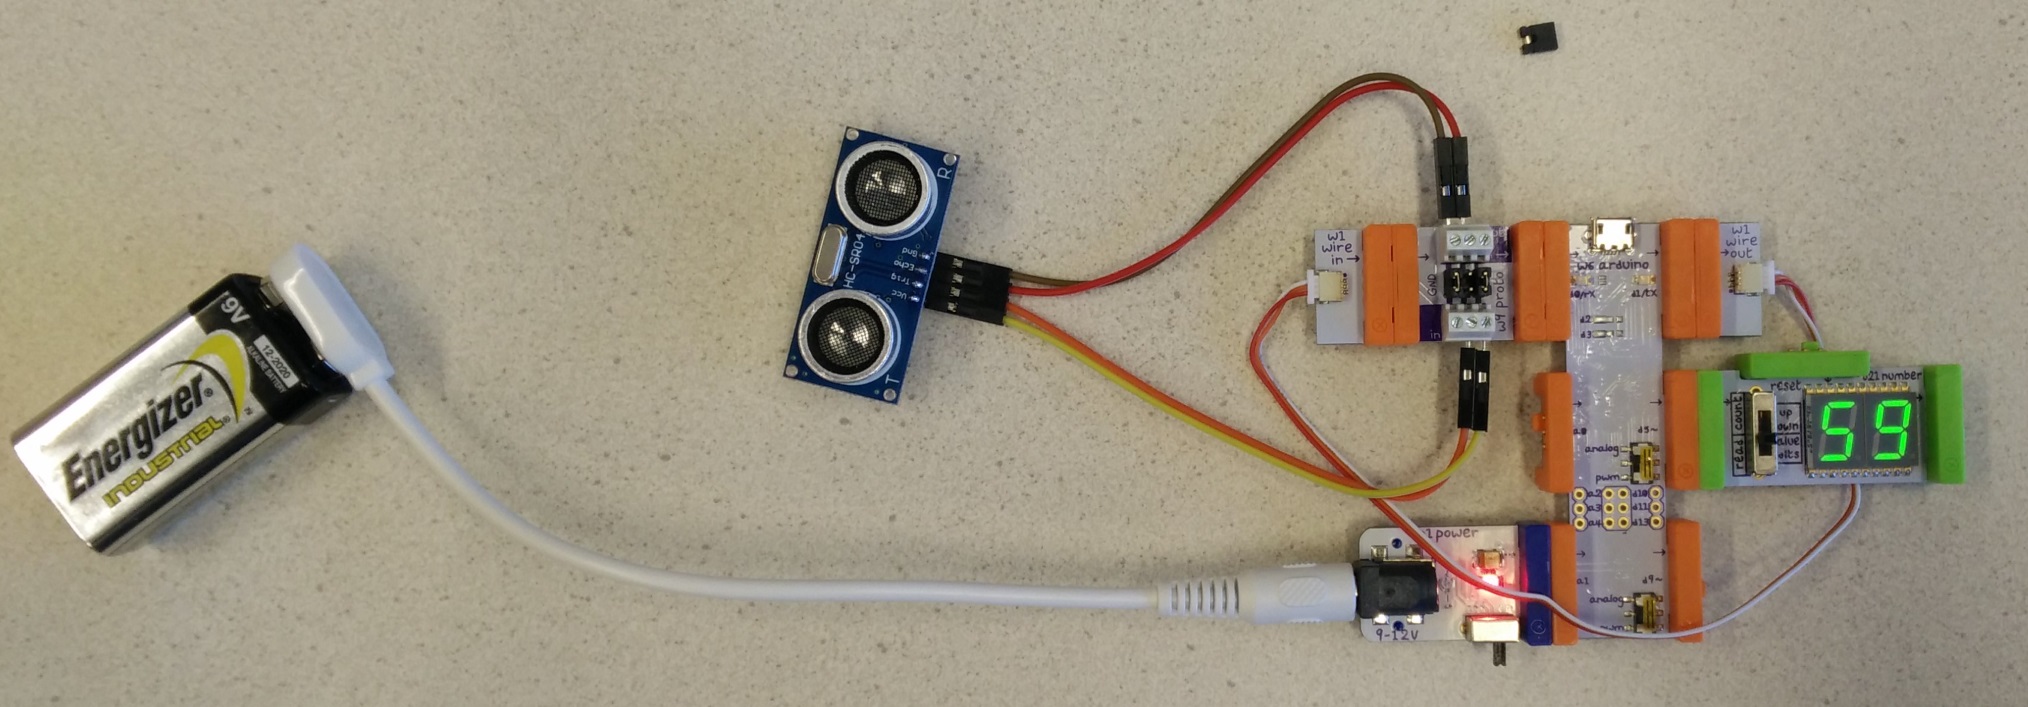
Make sure the switch of the Number-bit is set to “value”.
Make sure a Wire (w1) is connecting the ‘in’ side of the Proto-bit to output d1/tx of the Arduino-bit.
Program Arduino-bit
The program used for this example is shown below. Connect the Arduino to your computer with the USB cable.
Turn on the Power-bit (the Arduino-bit does not get power via the USB port!).
On your computer, start the Arduino IDE (you can download it here).
Set the board to “Arduino Leonardo” (Tools > Board).
Set the proper COM port (Tools > Port).
Start a new Sketch (File > New) and copy the example program in to the Arduino IDE.
Save, then press the Upload button to send the program to the Arduino-bit and execute it.
Start the serial monitor (Tools > Serial Monitor) to see values output there.
// Define pin numbers for input/outputs
#define IN_ECHO  0
#define OUT_TRIG 1
#define OUT_NUMBER 5

void setup()
{
  // Pin configuration
  pinMode(IN_ECHO, INPUT);
  pinMode(OUT_TRIG, OUTPUT);
  pinMode(OUT_NUMBER, OUTPUT);

  // Pin initialization
  digitalWrite(OUT_TRIG, LOW);
  analogWrite(OUT_NUMBER, 0);

  // open the serial port at 9600 bps:
  Serial.begin(9600);
}

void loop()
{
  int distance;

  distance = distance_measure();

  // display the distance in the serial monitor:
  Serial.println(distance);

  // send the distance to the number-bit:
  analogWrite(OUT_NUMBER, distance * 2.55 ); // convert 0-100cm to analog value of 0-255

  delay(60);
}


int distance_measure()
/* Measure distance */
{
  int echo_state;
  int start_time;
  int end_time;
  int distance;

  // Trigger input
  digitalWrite(OUT_TRIG, HIGH);
  delayMicroseconds(12);
  digitalWrite(OUT_TRIG, LOW);

  // Wait while echo is low
  do
  {
    echo_state = digitalRead(IN_ECHO);
  } while(echo_state == LOW);

  // Get the start time
  start_time = micros();

  // Wait while echo is high
  do {
    echo_state = digitalRead(IN_ECHO);
  } while(echo_state == HIGH);

  // Get the end time
  end_time = micros();

  // Get the distance in centimeters
  distance = (end_time - start_time) / 58;

  return distance;
}
More info
Learn how an Ultrasonic sensor works and use with Arduino