This tutorial describes how to build an electronic circuit with an RGB LED (a LED that can change color), and change its color using an App. It also demonstrates two-way communication over Bluetooth LE between an App built with Android Studio.
Older versions of this tutorial:
If you have and Arduino, that can also work with the App made in this tutorial, everything is interchangeable, as the Bluetooth communication makes it independent of the electronics.
Create the RGB led prototype
First, build the circuit according to the example given below. See a full simulation on Wokwi. Plug the Raspberry Pi Pico W onto a breadboard, add the RGB led and resistors and wire them:
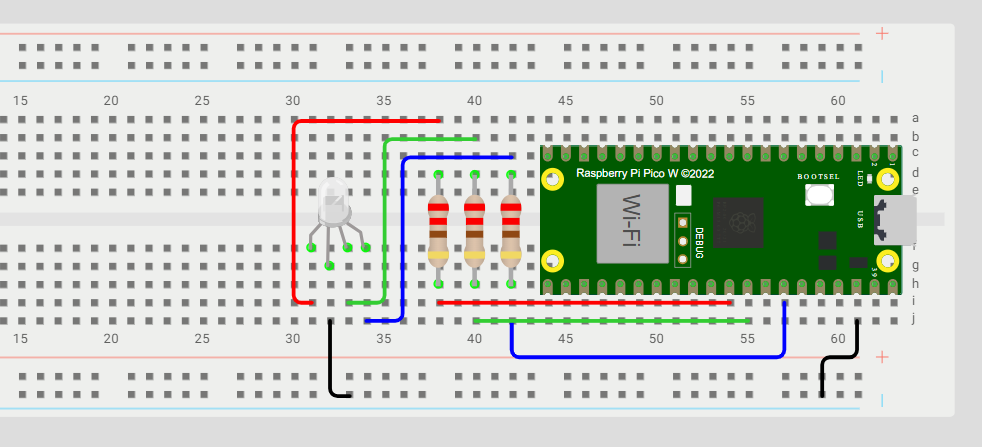
Connect red to GPIO pin 26, green to GPIO pin 27 and blue to GPIO pin 28. Resistors are 220 ohm (180 or 330 will work also). RGB LED is of type common-cathode.
If using a Common-Anode RGB LED: replace the black wire with a red one and connect that to 5V:
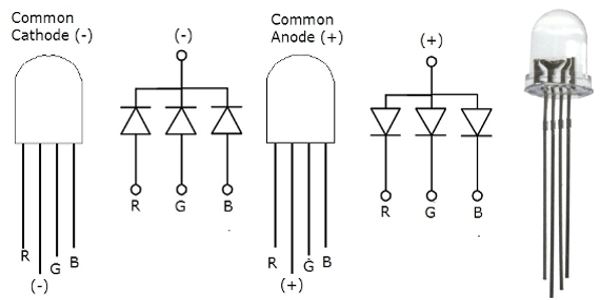
How to distinguish between common anode & common cathode? Use a multimeter in continuity mode (turn knob to Diode-sign ![]() ). If the LED lights up with the red tip on the longest lead and the black on one of the other leads – you have a common anode RGB LED. If the LED lights up with the black tip on the longest lead and the red tip on one of the other leads – you have a common cathode RGB LED.
). If the LED lights up with the red tip on the longest lead and the black on one of the other leads – you have a common anode RGB LED. If the LED lights up with the black tip on the longest lead and the red tip on one of the other leads – you have a common cathode RGB LED.
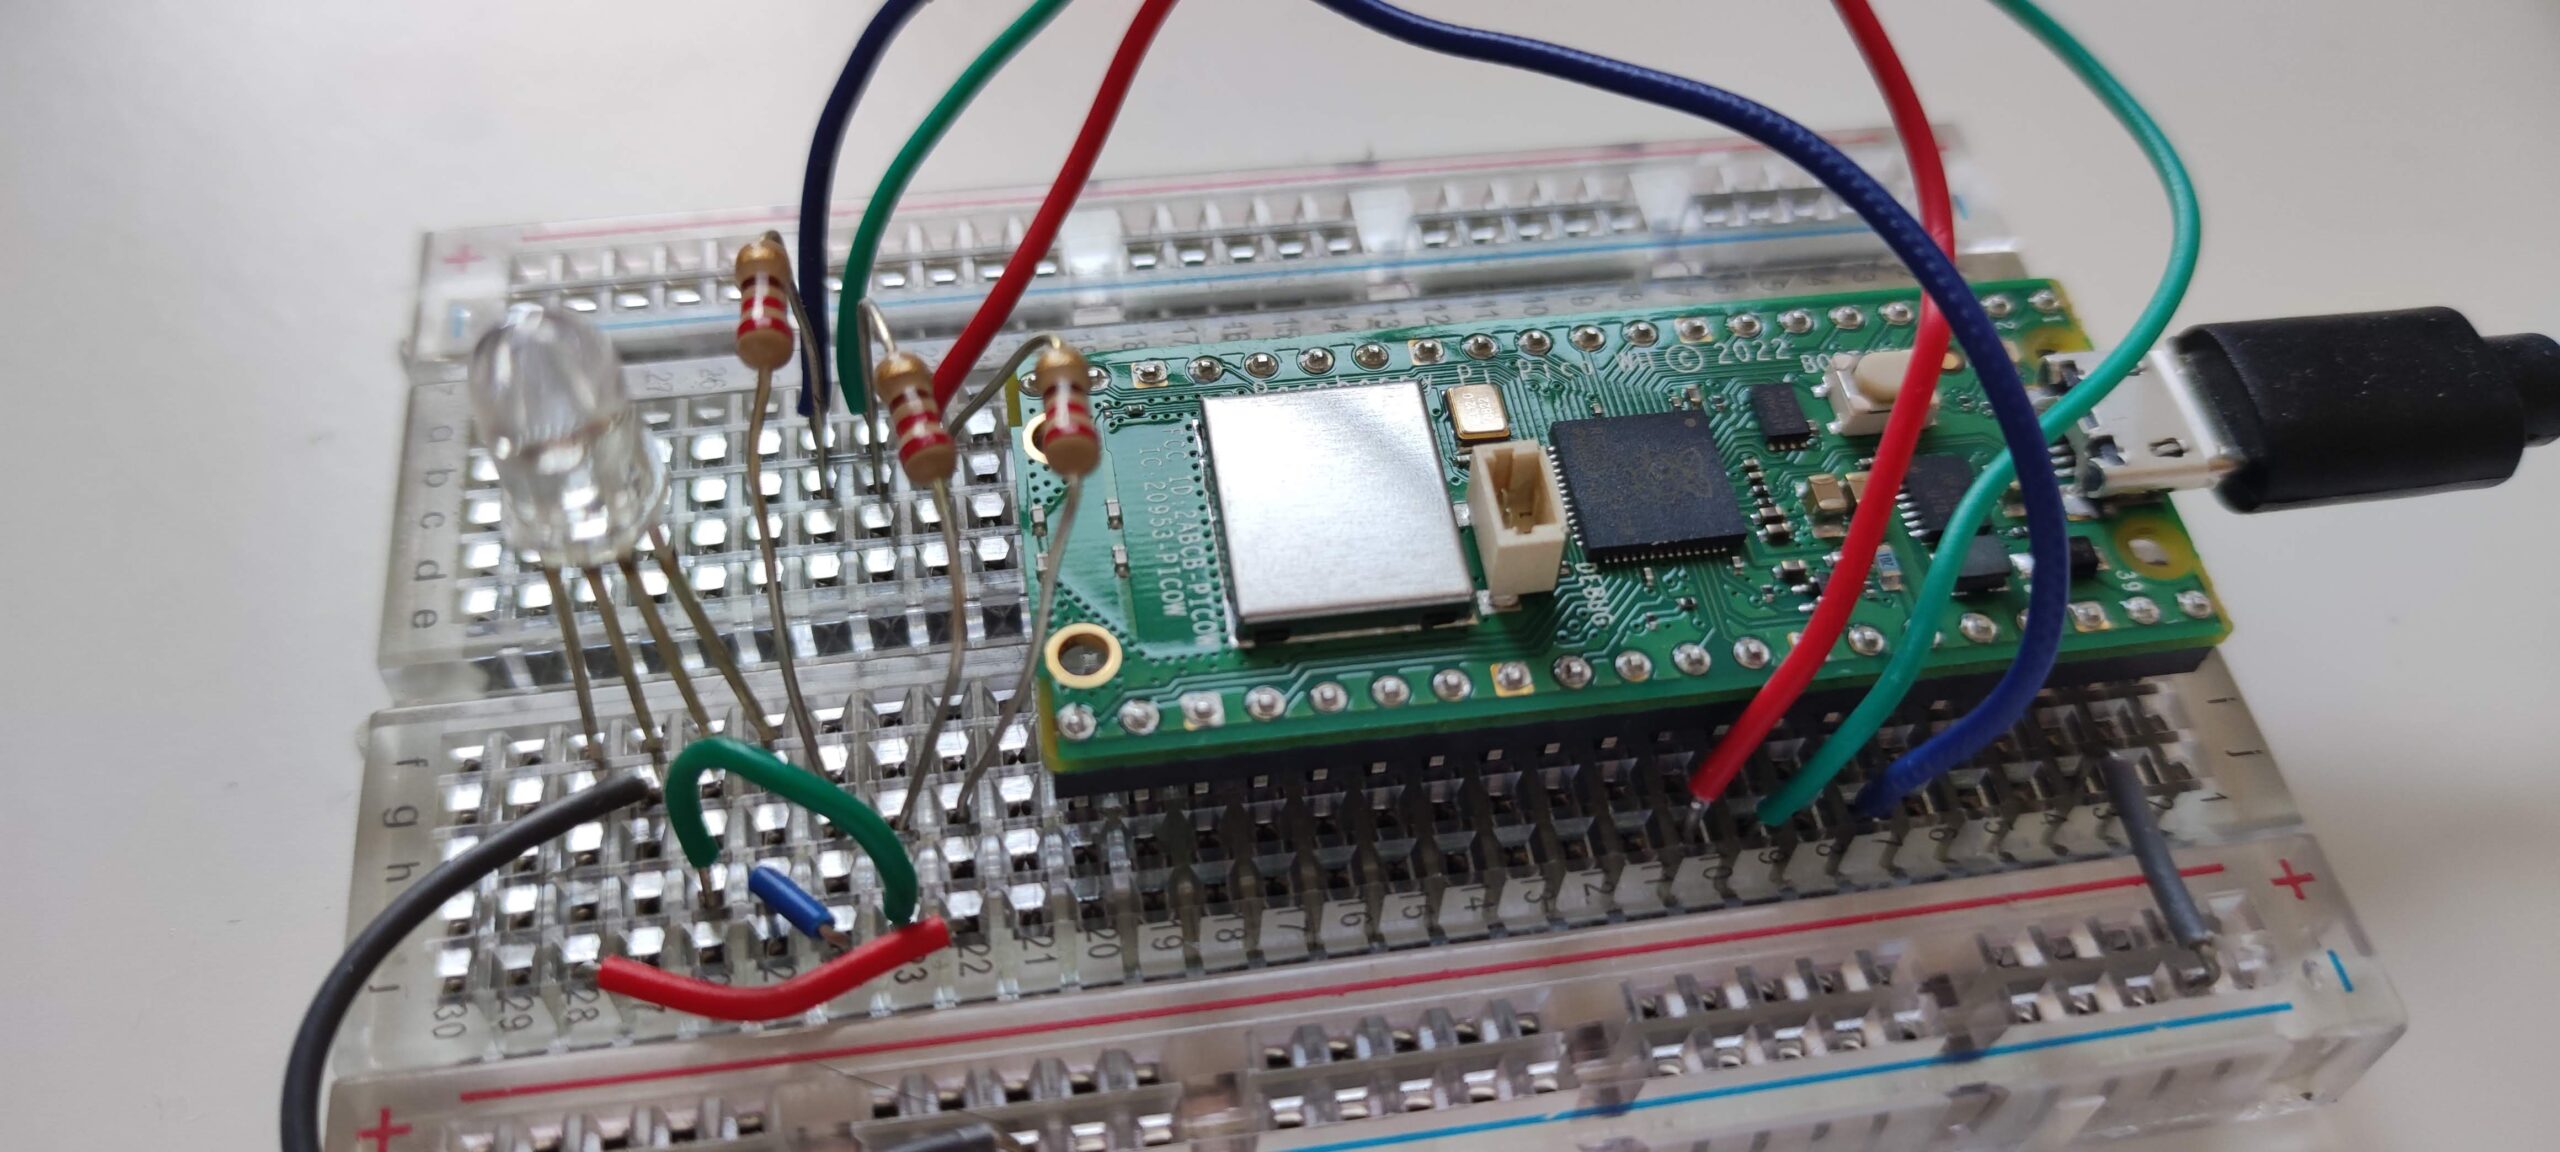
You should end up with something like this:
Test the circuit, getting the LED to change colors

Run the full simulation on Wokwi. As you can see the LED alternates Red-Green-Blue colors. To have your LED do the same, follow the steps below.
First install MicroPython:
- Download the latest release of the UF2 firmware file
- Connect the Pico to your computer while holding down the BOOTSEL button (it’s a small button on the Pico)
- A drive will appear. Drag/drop or copy the UF2 file into that drive and wait for the copying to finish. The Pico will reboot, with the new MicroPython firmware.
Download the Python script rgb_led_test.py and open it with the Thonny editor. Connect the Raspberry Pi Pico to your computer with the USB cable. Set the proper connection option and Python version via Run > Configure interpreter.
Now press the Run icon in the toolbar to run the script. This should result in the LED blinking with alternating colors.
Test changing colors via Bluetooth
Before we are going to build our own app, we first test if we can change the color of the RGB led via Bluetooth.
To allow the Python script to receive color values via Bluetooth, we are going to utilize this Bluetooth Example.
![]() Download the complete set of scripts here
Download the complete set of scripts here
Extract the zip-file to a folder on your computer and open the main.py file in the Thonny editor.
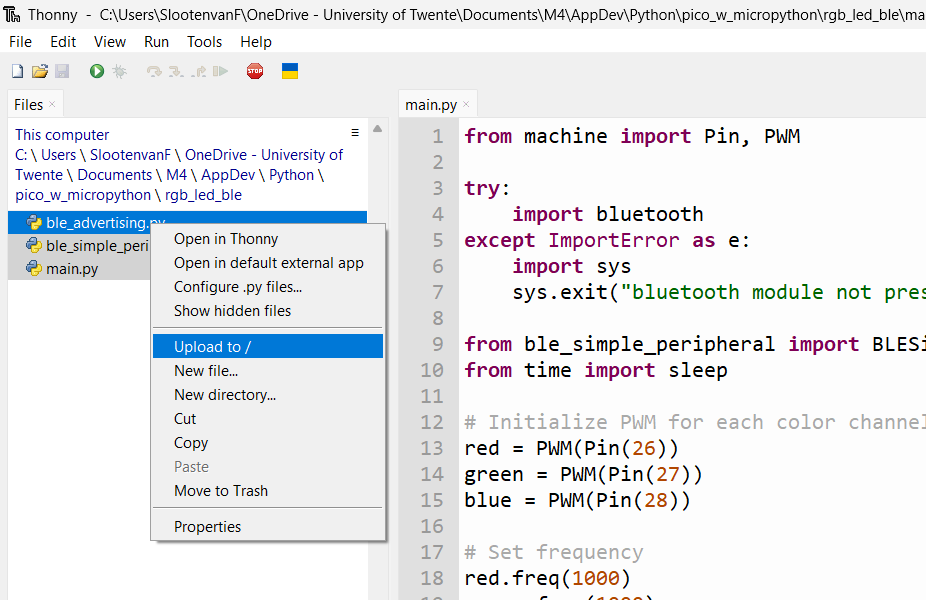
Next, upload the files to the Raspberry PI Pico W: select all three files, and right-click on them. Then choose “Upload to /”:
Now Run the main.py script. The LED should blink red 3 times to indicate it has started. It should now be available for Bluetooth connections.
To test if it is possible to connect and send values, we will use a Simple Bluetooth Terminal App, with which we can ‘chat’ (exchange text messages) between our phone and the Raspberry PI Pico W.
Install the terminal App on your phone (Github project here). If this app does not work for you, some other Bluetooth Terminal Apps might work also, for instance Dabble.
Start the Terminal App you just installed (on your phone). If being asked for Location permission, allow this (it is needed to locate the device). Click the connect icon in the title bar:

Allow to turn on Bluetooth. If it does not come up with a list of devices to connect to, go to the menu, pick “Devices” and go to the tab “BLUETOOTH LE”. Press scan. If your Pico is on, it should appear in the list (with the name assigned in the code). Click it to connect to it.
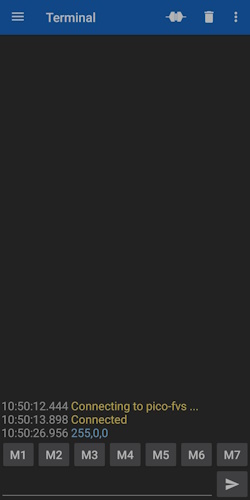
You should now be able to send text messages in the terminal. Try sending:
255,0,0This should make the LED turn red.
We have now confirmed that the Pico can receive text messages via Bluetooth to change the color.

Creating the controller App with Android Studio
To quickly prototype the app, the code was generated with help of AI. Github Copilot was used for that. First install Android Studio. It’s advised to do a first tutorial first, as we will not explain every detail of Android Studio. Here are some tutorials on Android Studio too. You can get help from Copilot also, if you mention that you are a novice user and need more guidance. An advantage of using Github Copilot is that it offers better coding assistance, and works better with multiple files (like we will have when creating an Android Studio project). An alternative to consider is Gemini, the AI assistant added to Android Studio recently.
Before you start, think of which AI model to choose. See below. I used the GPT-4o model for this exercise, and it worked pretty decent.

The conversation with Copilot started with the prompt below. You may read the whole conversation here (sign-up to GitHub first). The opening prompt with this kind of generative coding is very important, so think that through well. Examples of good prompts can be found here.
Prompt used to get started:
I would like to control an RGB led with an Android App via Bluetooth Low Energy (BLE). The RGB led is connected to a Raspberry Pi Pico W, with RGB pins connected to GPIO pins 26, 27 and 28. The given code below is an example of controlling it with MicroPython. It can receive color values like 255,0,0 (for red). Can you generate code for an Android app, usable in Android Studio, to have a Userinterface with a color selector and send the selected color value to the Raspberry Pi Pico W via Bluetooth? The App should also be able to setup the connection to the Raspberry Pi Pico W by scanning for BLE devices, presenting that as a list, and allow the user to select the device to connect to.
The MicroPython code on the Pico is given below.
After the initial prompt, I forgot to attach the example Python code. But Copilot got started pretty well without it and even generated that (although I decided not to go with that).
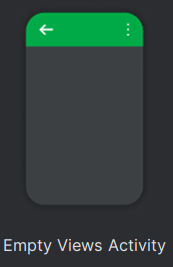
Before you start an Android Studio project yourself: in order to be able to use Java in recent versions of Android Studio, you should start with a project template that supports that. For example the template “Empty Views Activity”.
I opted to ask Copilot for solutions in Java, as the majority of available examples and libraries are using that. And it also fits my experience better.
The code generated was not perfect and needed quite some iterations before it eventually worked. This might have been avoided if the initial prompt was prepared better. But in the end the result was pretty impressive and significantly reduced the coding time.
![]() The complete Android Studio project can be downloaded here.
The complete Android Studio project can be downloaded here.
Structure of the App
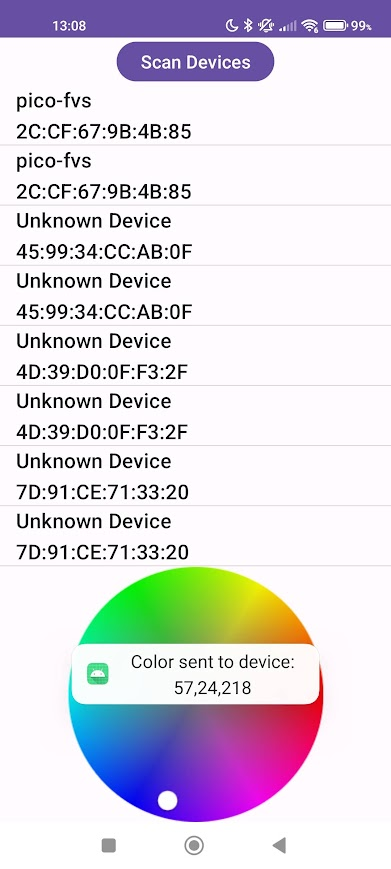
The userinterface of the App consists of 3 main elements aligned vertically: the Scan button, a list of discovered Bluetooth devices and the color picker:
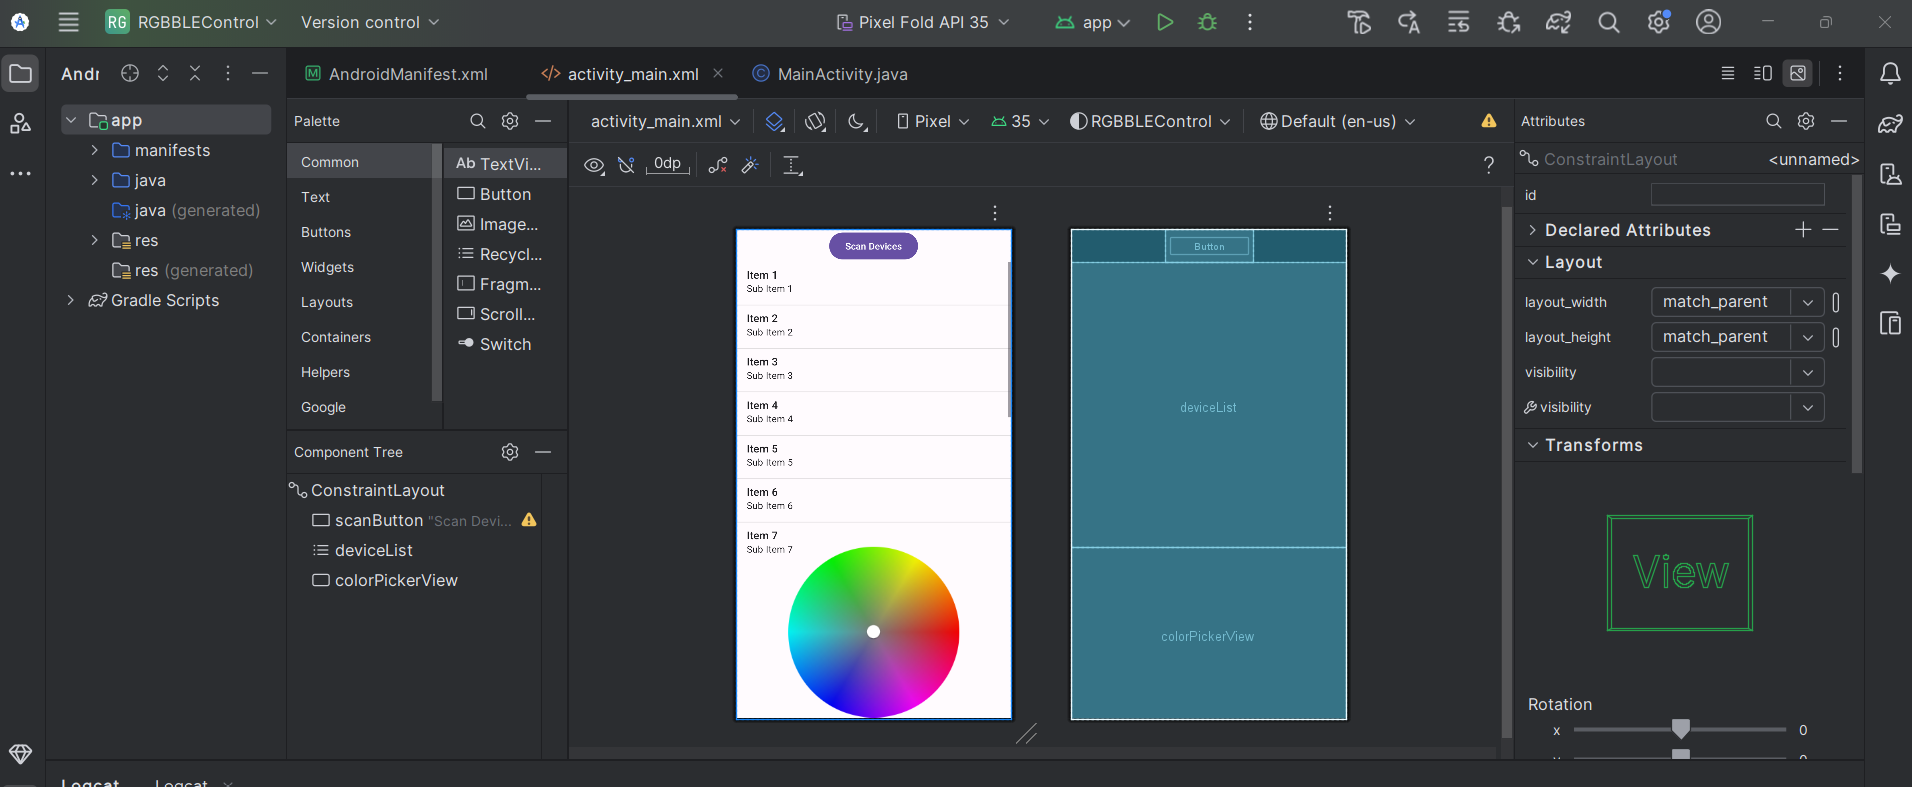
Feedback is given mainly via Toast messages (small popup notifications).
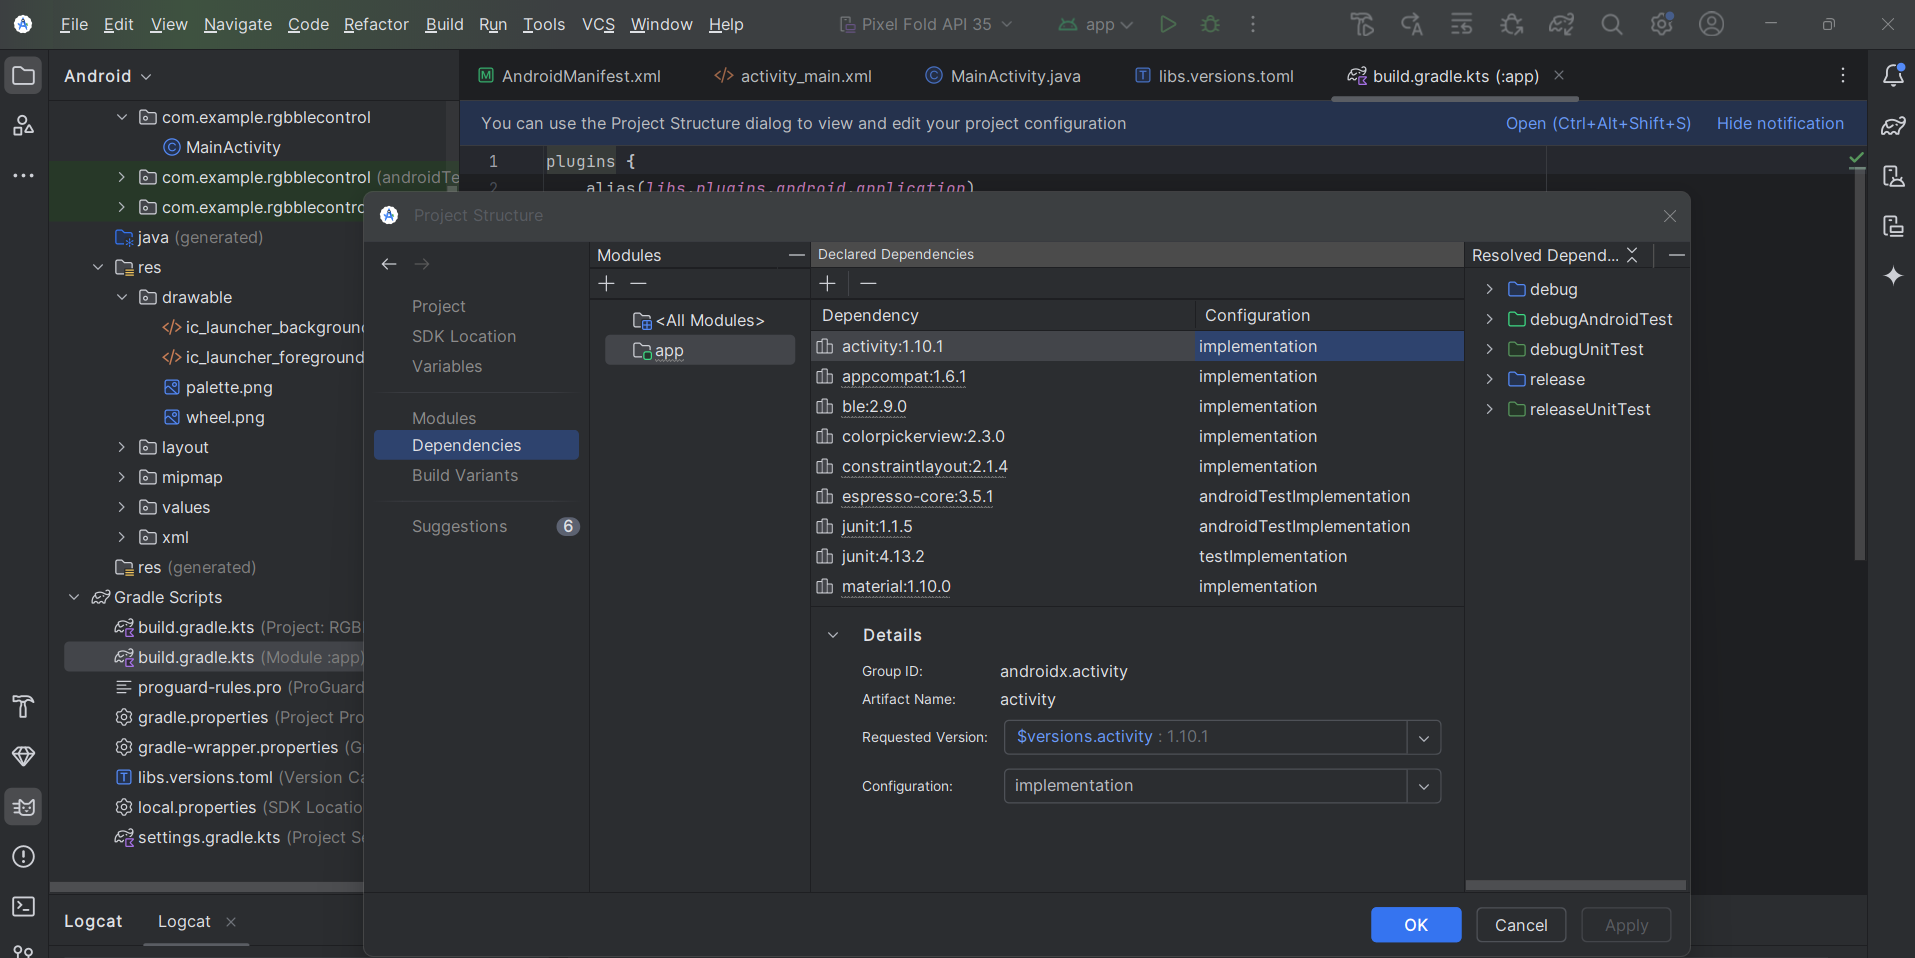
The main libraries chosen where the ColorPicker and the NordicSemiconductor/Android-BLE-Library. A full list can be managed via File > Product Structure:
The result