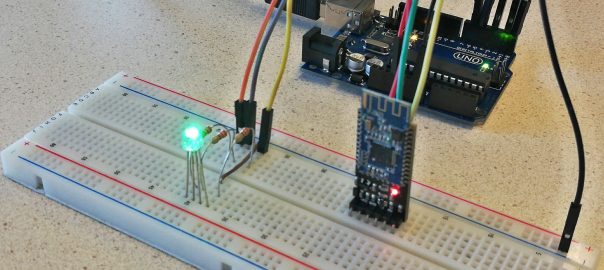
In this example we will control a RGB LED from an Android App via a Bluetooth connection. A HM10 BLE Bluetooth module is connected to an Arduino Uno.
This tutorial assumes you already have some experience with Arduino. If not, you might want to follow a basic tutorial and/or install the Arduino software (the IDE).
This tutorial is based on this instructable. Learn more about using RGB LEDS here.
1. Setup the RGB LED with the Arduino
First, build the circuit according to the example given below:
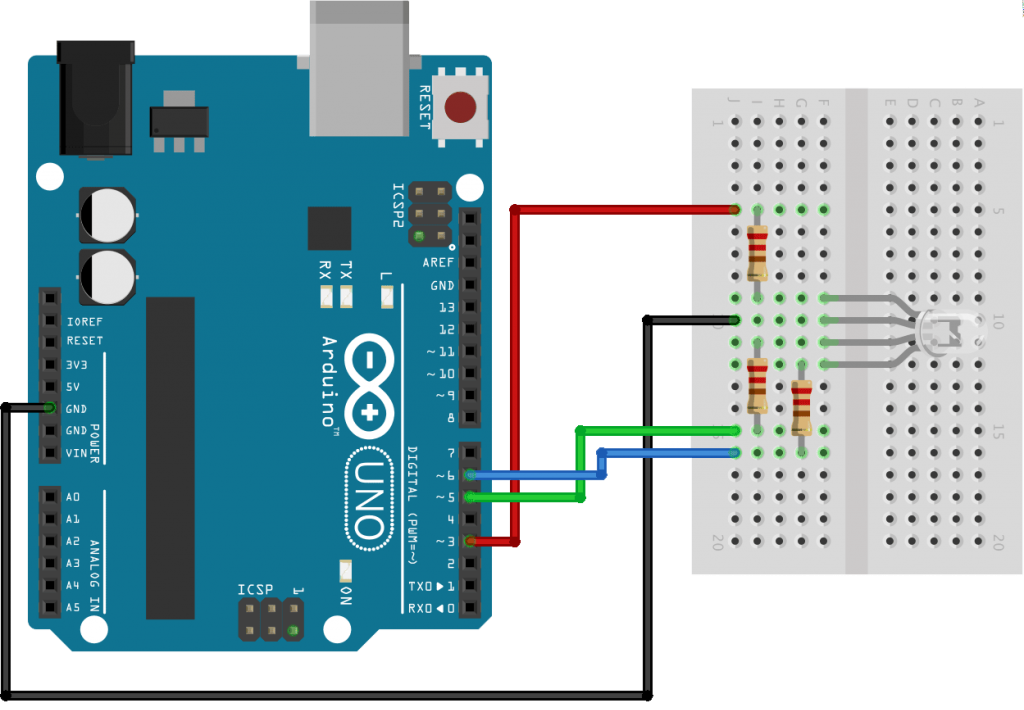
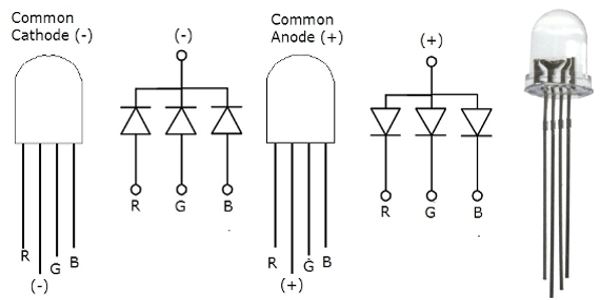
Resistors are 220 ohm (180 or 330 will work also). RGB LED is of type common-cathode.
If using a Common-Anode RGB LED: replace the black wire with a red one and connect that to 5V:
Next, download this example sketch: BT_rgb_led.ino and open it in the Arduino IDE.
Please note: if using a Common-Anode RGB LED: In the code, find the comment “// if you're using a common-anode ...” and use the that piece of code instead of the code for the common-cathode LED (comment that out).
Select your type of Arduino (Tools > Board) and it’s port (Tools > Port) and click the upload button to compile the code and upload it to the Arduino.
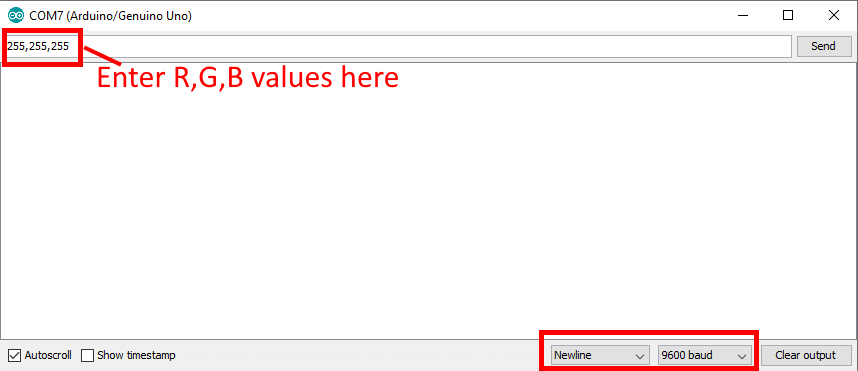
Start the Serial Monitor (Tools > Serial Monitor) and set it to “Newline” and “9600 baud”.
Now type “255,255,255” and check if the LED turns on (white).
2. Connect and setup the Bluetooth module
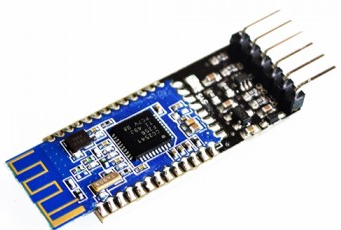
We will use an HM-10 Bluetooth module as an example here.
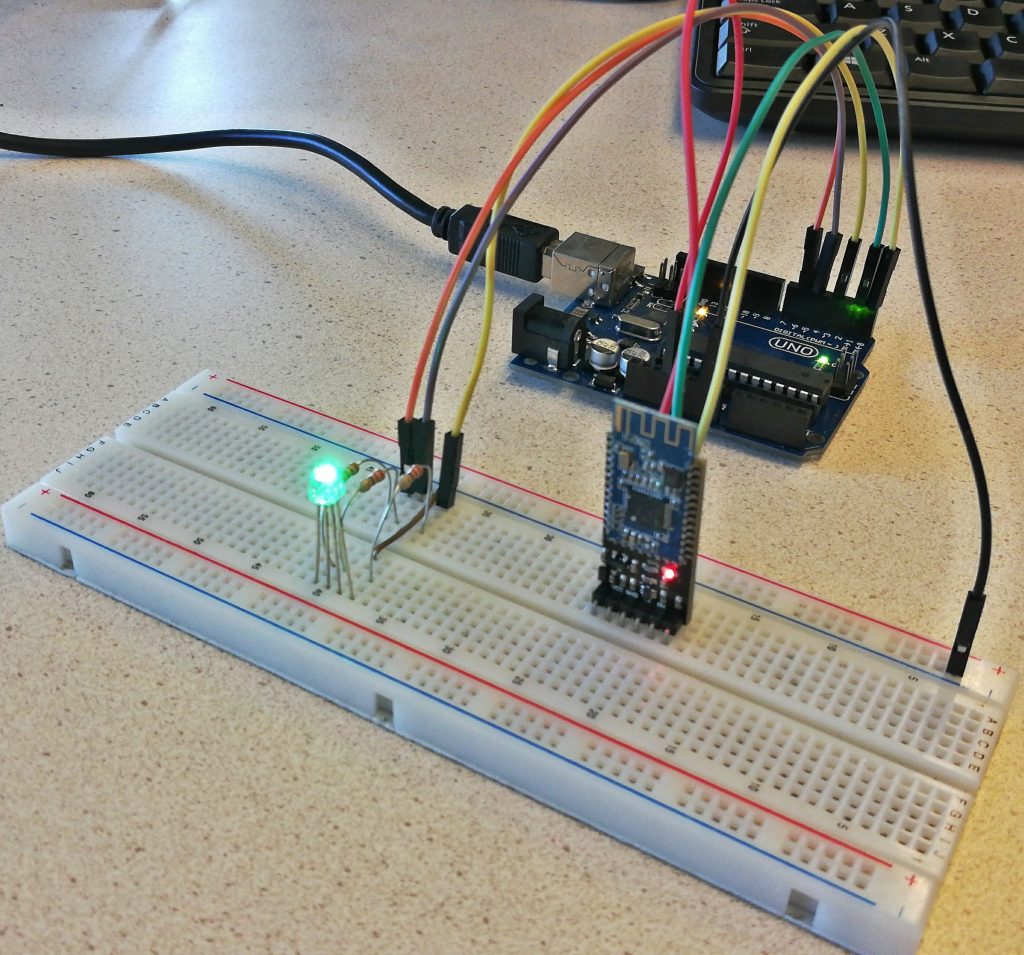
Mount the Bluetooth module on the breadboard and connect it to the Arduino:
HM-10 TX - Arduino Pin 10 (softRX)
HM-10 RX - Arduino Pin 11 (softTX)
HM-10 GND - Arduino GND
HM-10 VCC - Arduino 3.3V
Open the Arduino IDE. Load example “SoftwareSerialExample” via File > Examples > SoftwareSerial.
In the sketch, find both lines that call the begin() function and change the baudrate of both to 9600:
Serial.begin(9600); // was 57600
mySerial.begin(9600); // was 4800
Save the sketch. Check the type of Arduino (Tools > Board) and it’s port (Tools > Port) and click the upload button to compile the code and upload it to the Arduino.
Open the serial monitor at 9600 baud.
The Bluetooth module uses AT commands to read and write system information, they do not need to be followed by a line break.
If you don’t get a response when you enter a command something may not be connected properly and you’ll need to troubleshoot your module.
When you are connected type:AT – it should respond with OK
You can find your firmware version:
AT+VERS? – firmware version
And set your device’s name:
AT+NAME? – get current name
AT+NAMEyourname – set the name (12 chars max)
Now using the command AT+NAMEyourname set the device name to something unique, to be able to recognize it easily.
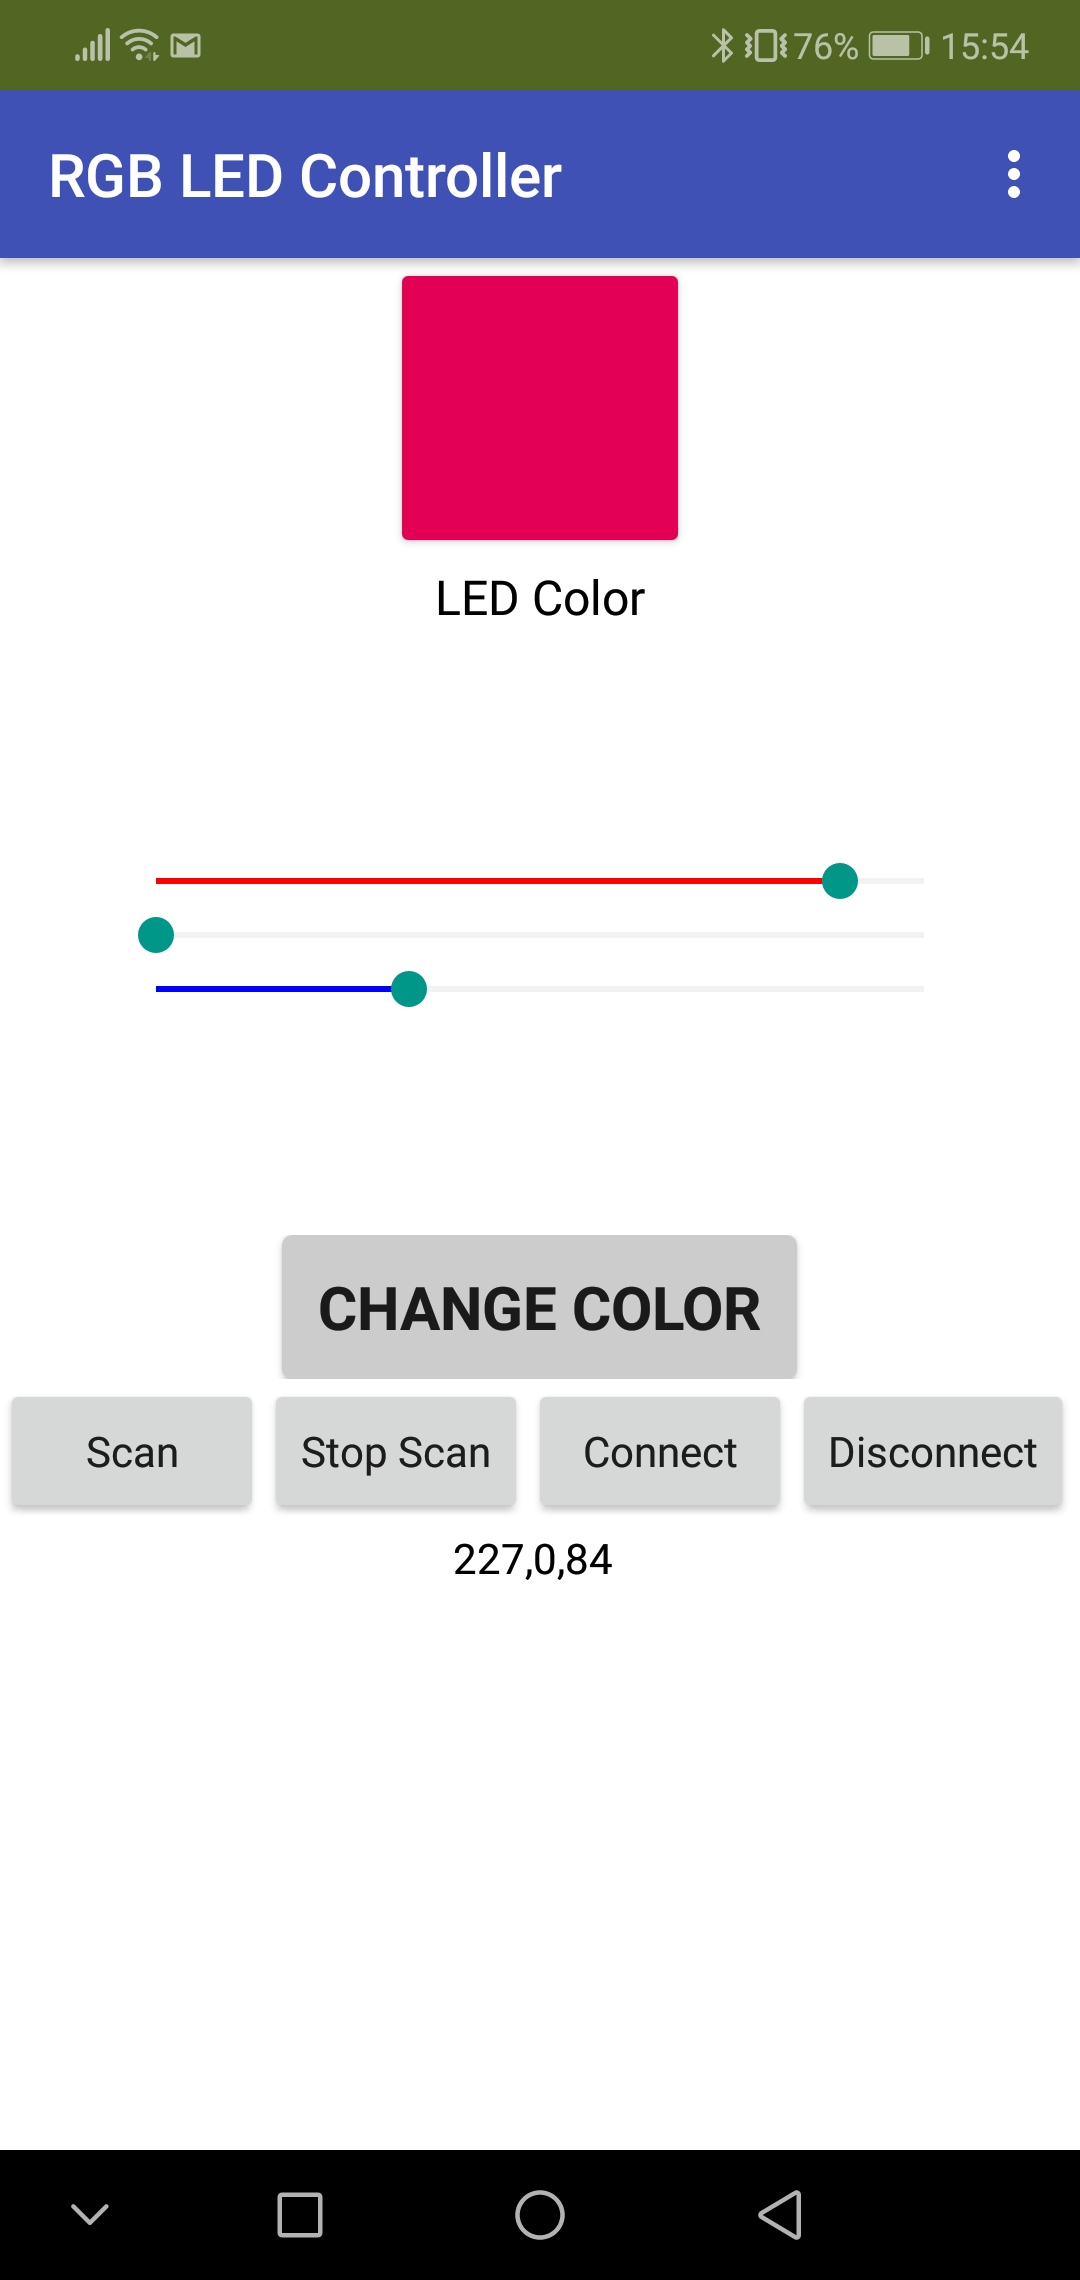
3. Control the LED with an Android app
Move the jumpercables from Arduino Pin 10 & 11 to 0 and 1:
HM-10 TX - Arduino RX (D0)
HM-10 RX - Arduino TX (D1)
This connects the serial connection of the bluetooth dongle directly to the Arduino (hardware) serial.

Switch back to the Arduino sketch created in step 1 and upload it to the Arduino.
On your phone, download this app and install it.
(Visit this page on your phone and click the link. You might have to enable installing external APK’s.)
Now run the App, connect to the bluetooth dongle and start changing the color of the RGB led.
Challenge
Create this Android App yourself and add features to it. Eg. with new features: color wheel, on/off button. How to do this with Android Studio will be shown in a future Blog post.
Building the App yourself with App Inventor
It is also possible to create the App using App Inventor. If have created this example Control_RGB_LED_v3.aia based on the two tutorials below. You can import the .aia file into App Inventor. If you want to learn more about building apps with App Inventor, check my article here.
If you are going to make an app yourself which uses Bluetooth, it is strongly advised to read one of these tutorials on how to do this:
- Martyncurrey: “Arduino, HM-10 and App Inventor 2”
- Randomnerdtutorials: “Android App – RGB LED with Arduino and Bluetooth”
If you would like to build an app with Android Studio:
- Control RGB Lights From Android With Arduino & Bluetooth LE (BLE); Android Studio project is on Github
Tips
In App Inventor, a Bluetooth connection cannot be shared between screens. A work-around for this using ‘pseudo screens’ can be found here.