This article highlights four different ways you can make sounds with the Arduino or play music. It starts with the easiest one: (1) adding a small buzzer, then (2) a standard loudspeaker, then (3) using your smartphone as the speaker via an connected app. It ends (4) with using an MP3 module. A tutorial which also covers 1 and 2 can be found here.
Although this page is mainly for Arduino, it lists some options for the Raspberry Pi Pico too.
1. Add buzzer (small piezo speaker) test playing ‘happy birthday’
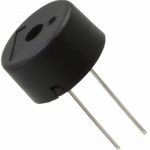
Passive or active?
There are two types of buzzers: passive and active ones. You can determine the difference: an active buzzer has a + sign on top, to indicate the + pin. The + pin must be connected to VCC (usually 5V) or an output pin of the Arduino. Read further down below how to use an active buzzer.
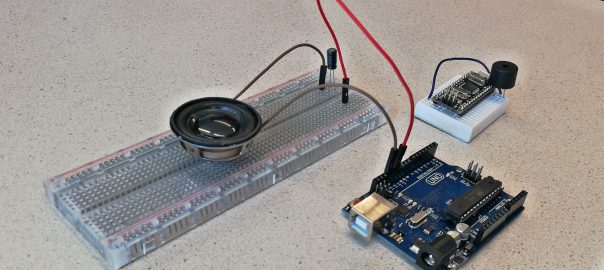
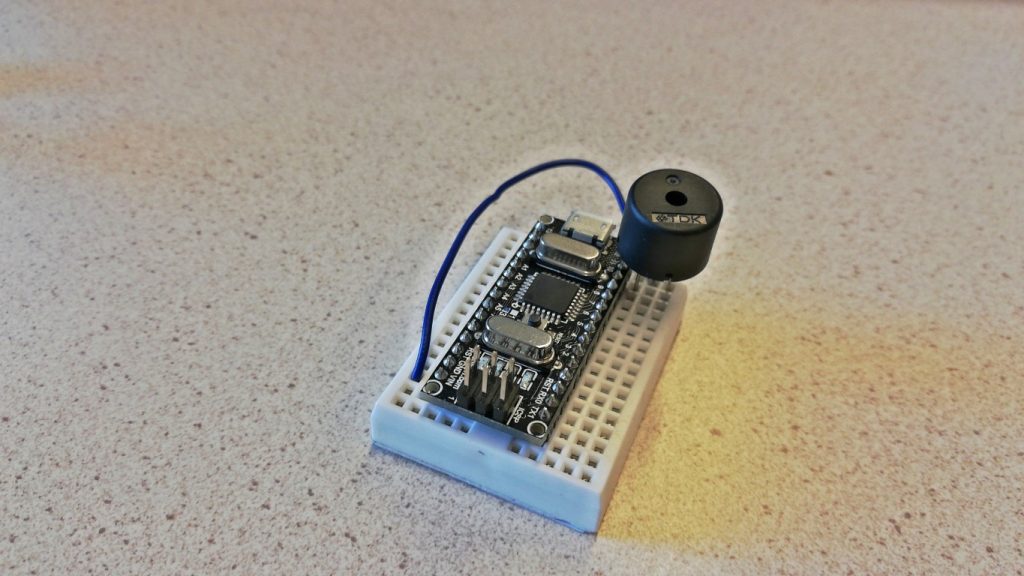
In this example we use a passive buzzer which is directly connected to Arduino pin 12 and GND. A passive buzzer needs a frequency signal on the output pin to be able to make sounds in different pitches. All 3 examples photos below have one pin connected to pin 12 and the other to the GND (on the Nano: the blue wire):
Download the sketch sound_tune_happy_birthday.ino and upload it to test playing ‘happy birthday’.
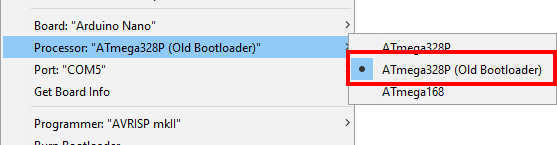
If using an Arduino Nano you might get an upload error:

Make sure you have selected the old bootloader from the Tools menu:
Active buzzer
If you connect an active buzzer to 5V and GND, it will make a (sharp) noise. To be able to make different tones, we need a Pulse Width Modulation (PWM) signal on its + pin. You can find an example sketch here.
→ More tips & troubleshooting info at bottom of this article!
Raspberry Pi Pico: passive buzzer tutorial & Wokwi simulation & another.
2. Add a loudspeaker and play tones or music
Connect a loudspeaker via a 10uF capacitor to pin 12. The capacitor should be between one of the connectors of the speaker and pin 12 (so do not connect the speaker directly to pin 12!). Be careful connecting the capacitor with its “+” (plus) to pin 12, and its “-” (minus) to the speaker. The negative pin (or minus) of the capacitor is usually indicated by a “-” marking, and/or a colored strip along the side. They might also have a longer positive leg.

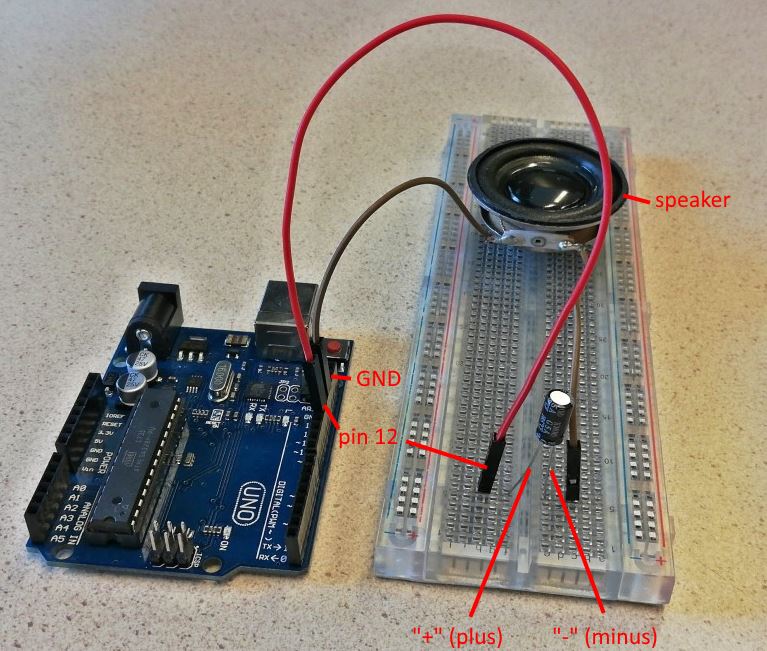
You might want to learn more about polarity, especially the part on “Electrolytic Capacitors”. If you need more in-depth information on speakers, see “Circuit with Loudspeaker” in this tutorial.
Just like the buzzer example above, you can use the sketch sound_tune_happy_birthday.ino and upload it to test playing ‘happy birthday’.
(if using an Arduino Nano, also check out the troubleshooting above)
If using a speaker like this, you might want to add an amplifier.
→ More tips & troubleshooting info at bottom of this article!
3. Make sounds and play music on your phone via Dabble
Use your phone as a wireless loudspeaker for the Arduino. The example sketch that came with the Rover Car already plays some basic Dabble music tones. To use the Dabble App with your Arduino creation, it must be connected to your phone, eg. via a Bluetooth module. This is explained also in the Rover Car tutorial.
If not installed yet, install the Dabble library (Sketch > Include Library > Manage Libraries, search for “Dabble”).
Now you can use this example bt_dabble_test_music.ino to play tones if you press keys on the Dabble Gamepad. Connect the Dabble App, go to the Music tile, and add all piano notes (press +):
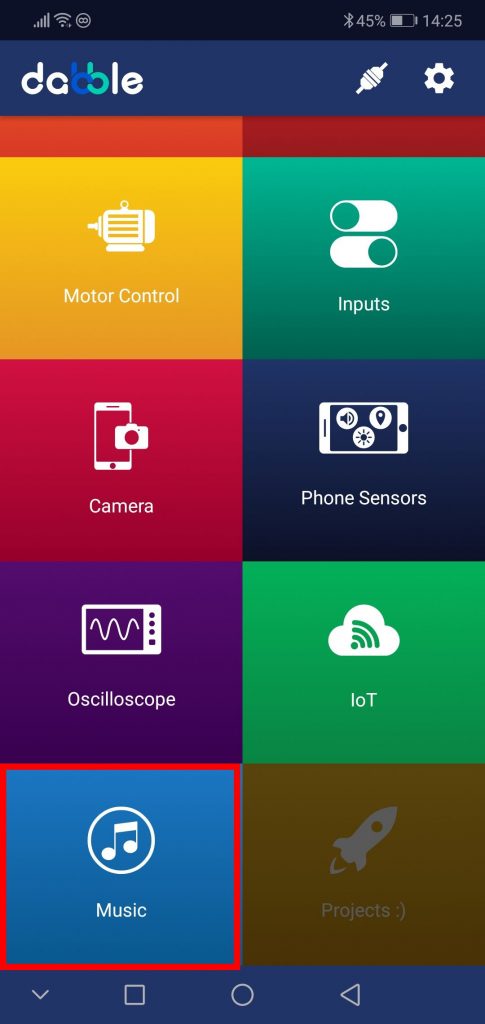
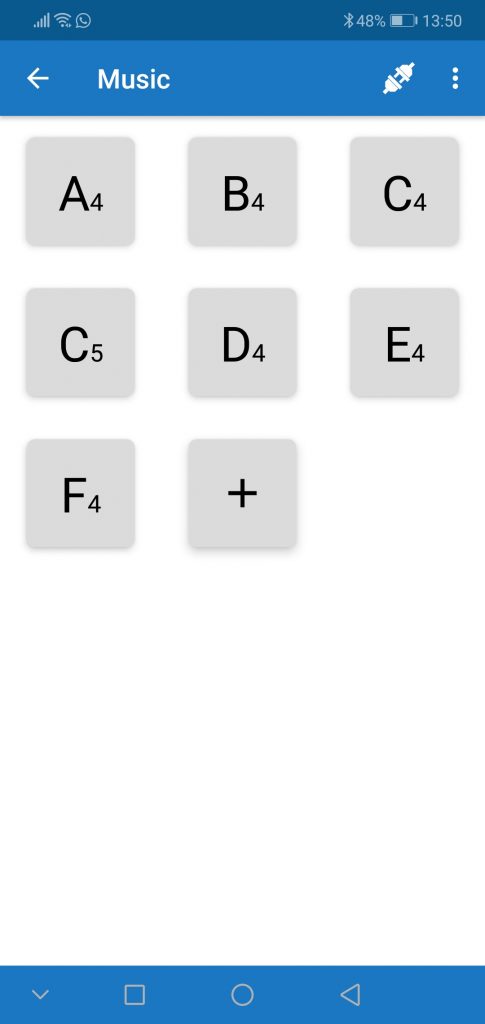
Go back and switch to the Gamepad tile to play notes.
You can add any (mp3) sound or track via the App. For example, if you have a mp3 file with the sound of a Horn (eg. Horn.mp3), you can add it with the + button and assign a two-character code to it (eg. “Ho”), after which you can play it from the sketch like this:
Music.play("Ho");
Or add it to a queue (playlist):
Music.addToQueue("Ho");
To stop playing you may use the method Music.stop(); which will also clear the queue.
4. Make sounds and play music via MP3 player module
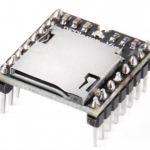
Use small MP3 modules like the DFPlayer to quickly build a MP3 player or play sounds via the MP3 player. (For my students: you can borrow this module from me). It requires a MicroSD card with MP3 files and the “DFRobotDFPlayerMini” library. Technical information and a tutorial on how to use it can be found here.
Warning: specs say this can run on 3.3-5V but findings show that it only runs properly on 5V!
You can start with this example sketch mp3_player.ino.
For Raspberry Pi Pico see this tutorial and its full set of code.
Tips & troubleshooting
If using the Arduino tone() function, you might get timer-related conflicts and/or “__vector_7” compile errors. As an alternative, you can use the NewTone library.