Through this tutorial you become familiar with developing a Python application with a graphical userinterface. We will create an App which can display weather data from various weather stations. Data will come from an online xml service providing weather data.
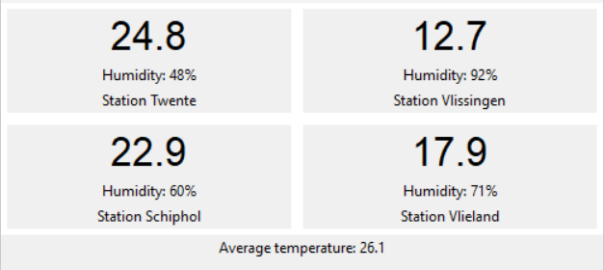
We are going to create an application that can display the temperature of several weather stations in the Netherlands, as well as the average temperature of those weather stations.
You are given a WeatherStation class for reading the data. This class can read data using an XML file. XML files are used on the internet to provide data in a structured way (in a specific format). Buienradar is a site that provides weather data from several weather stations in XML form.
Tutorial steps
- Design and create the user interface
- Add the WeatherStation class to the project
- Realize displaying the temperature & station name
- Add multiple instances of the class to the user interface
- Calculate the average temperature and display it
These steps are explained in detail below.
1. Design and create the user interface
First, we create one of the four Panels for displaying the temperature with the name of the weather station. Then we use that Panel several times (copy) to display the data of several weather stations. Also, we create a separate part of the user interface in which the average temperature is displayed (at the bottom in the example).
Start with a new folder for this project and name that “Assignment3_s1234567” (use your student number in the name). If you are not a student of mine, you may choose any name for the folder.
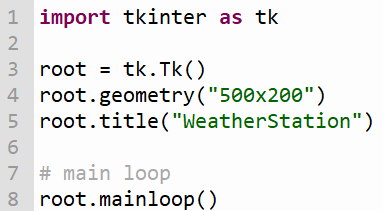
Setup a basic script with a bare-bones userinterface as learned in previous tutorials, and save that into the folder. It might look like:
Next, we will construct a class, based on a Tkinter Frame (it inherites from tk.Frame). This will be a panel that can display a temperature value of one station. Learn more about classes, objects and methods in Python here.
This could look like:
class TemperaturePanel(tk.Frame):
    w = "" # WeatherStation
    temperature = "20.0"

    def __init__(self, parent, id):
        tk.Frame.__init__(self, parent)
        self.configure(background="#ffffff", borderwidth=5)

        self.labelTemp = tk.Label(self, text=self.temperature, anchor="center", font=("Arial", 25))
        self.labelTemp.pack(side="top", fill="both")
Make sure to add the code at the top of the script, after the last import line.
Then, add another Frame, which we can use as a container for multiple panels. The Frame will take care of the layout of the panels. They will be organized in a grid with two columns. The Frame can look like this:
class Frame(tk.Frame):
    def __init__(self, parent):
        tk.Frame.__init__(self, parent)

        self.panel1 = TemperaturePanel(self, 6290)

        # add to grid:
        self.panel1.grid(row=0, column=0, sticky="ew")

        # 2 equal sized columns:
        self.grid_columnconfigure(0, weight=1)
        self.grid_columnconfigure(1, weight=1)
Finally, add a line at the end, just before the main loop to add the frame to the userinterface;
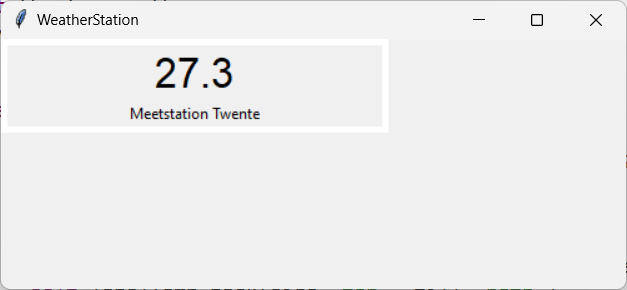
Frame(root).place(x=0, y=0, relwidth=1, relheight=1)If you run the script, it should look like:
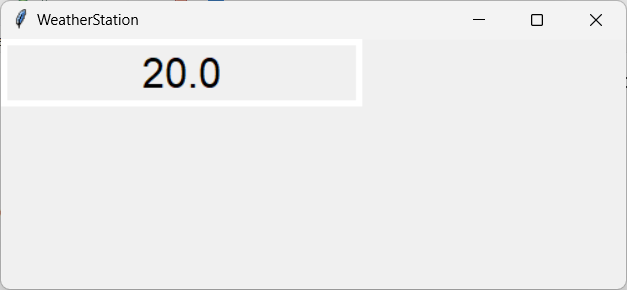
The “20.0” is a placeholder, and not related to any temperature reading (yet). Can you find it in the code?
Add the WeatherStation class to the project
Download the script WeatherStation.py and copy it into the project folder. At the top of your userinterface script, import it:
from WeatherStation import WeatherStationOpen the file in your editor. It contains the class definition which has several methods (functions in the class) that you can use to get data from a given station. Learn more about classes, objects and methods in Python here.
Realize displaying the temperature & station name
Now we will add code to the TemperaturePanel class so it can actually display the temperature from a station.
Before the definition of labelTemp, add:
self.w = WeatherStation(id)This will assign class variable w with and object created from class WeatherStation, with the given id. That id is a parameter that was already present in the init method of the class (it came with the example code from the previous step).
Next, add a line to assign class variable temperature with the temperature value we read from the WeatherStation:
self.temperature = self.w.readTemperature()Run the script. It should give a real value of a station:
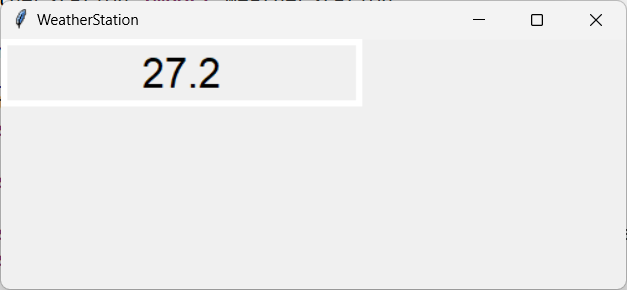
Do you know from which station? (Hint: check the shell).
Now, in your editor, open the script WeatherStation.py. Look for the first class variable named ‘xml’ in that class. It has the source of the data (de URL of the XML file). Open that URL in your browser and have a look. Find a weather station different from the one that is already used in the app (the one with id 6290). Find the id of that new station and assign it to panel1 in your userinterface script:
Change this number into an id from a different station:

Run the script and check if the station and its temperature are different now.
Now we would like to see the station name in the userinterface also. Duplicate the labelTemp in the class TemperaturePanel and name that copy “lblStationName”. Remove the parameter for the font, font=(“Arial”, 25) or resize it, as we want the stationname to be displayed smaller.
For lblStationName, in the parameter list, replace the assignment of the text:
text=self.w.readTemperature()with a call to the function of the class WeatherStation that provides the station name. You should be able to find that function in WeatherStation.py.
Now, the station name should be there:
Add multiple instances of the class to the user interface
Find the definition of panel1 in class Frame. Duplicate it 3 times so you have 4 instances. Name them panel1…panel4. Assign different station id’s to all of them.
Assign them to the grid also, so duplicate the line self.panel1.grid(… also and assign them to the proper rows and columns in the grid:
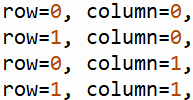
Calculate the average temperature and display it
To be able to calculate the average, we must first have the temperature of a panel as a floating point number. Currently, the temperature is a string, and cannot be extracted from the TemperaturePanel.
So we will add a method to the class TemperaturePanel which:
- Reads the temperature (as a string) from the WeatherStation
- Converts that to a float
- Returns the value (this will be the result of the method)
This could be the skeleton of this method, with comments in pseudo code:
def readTemperature(self):
    # read temperature from the WeatherStation:
    temperature_str = ...
    # convert temperature to a float:
    temperature_value = ...
    return temperature_value
Use this to complete the method yourself (put the proper code on the parts indicated with …).
Hints:
- How to read the temperature can be seen in the parameter “text=” when the labelTemp is created, in the __init__ function of the TemperaturePanel.
- Read more about type conversion here.
After that method is finished, we can proceed with the calculation of the average. This can be done at the end of the __init__ function of the class Frame. Here, you can do (in pseudo code):
average = (sum_of_temperatures_of_all_panels)/4The sum of temperatures can be a simple addition (using ‘+’ operators) of the 4 temperatures that you can read by calling the method readTemperature() that we just created for each panel. So for the first panel, this would look like:
self.panel1.readTemperature()This should give you sufficient information to construct the line of code that calculates the average yourself.
Test if it works by printing the result in the shell:
print("average:", average)Then run the app. Does it show the proper value of the average in the shell?
Now, all that remains is showing that in the userinterface. Add a label for that:
self.label = tk.Label(self, text=average, anchor="center")
self.label.grid(row=2, column=0, columnspan=2, sticky="ew")
The last line will properly place it in the grid, spanning two columns.
Formatting the output number
You might notice that now it only shows the number, and also might have a lot of decimals (for instance 25.599999999999998). So you must properly round the number and format the result shown, including text that clarifies what it is.
There are many ways of formatting output of numbers. Here, an example using formatted string literals:
f'xxxxxxx-message-xxxxxxx {average:.1f}'Which will get the results with 1 decimal point.
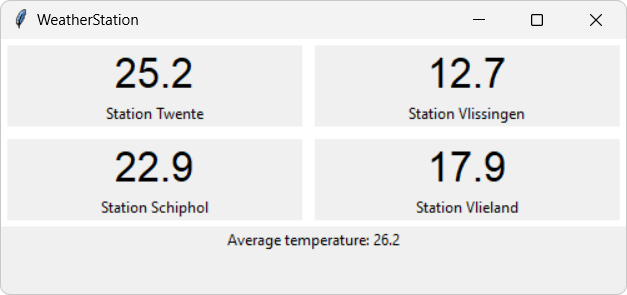
Use this to properly visualize the resulting average, as shown in the userinterface below.
The final result should look similar to this:
Finalize the application: add comments
Make sure to add more comments to the parts of the code that you added/modified. Use multi line comments or single line comments. Use the comments to explain how the code works. It must be clear for us, when we review your code, that you understood its purpose.
Some examples of comments:
"""
Example of a multi line comment.
This is the second line of the comment.
"""

# Example of a line of code with comment at the end of the line:
print("Start of temperature measurement"); # display text at the shell
At the top of the main script, add multi line comments with a general description of the script and have your name and, if you are following my course, student number on the first line of that block of comments.
Are you a student?
For students doing the course Application Development, having added the required comments is mandatory. When you hand-in the assignment, this will be checked. Before handing in, check the “Finalize” section and the checklist that comes with the assignment on Canvas too!
Summary
with this tutorial you have written Python code and learned how to apply variables in expressions to perform calculations.
You have also learned the following:
- Create a user interface.
- Using expressions to perform calculations.
- Calling and determining the right methods from existing classes.
- Using variables as parameters for methods.
- Coming up with and creating new methods.
Learn more
Some tutorial sites to learn more:
Also, check out other Python tutorials on this site!
Extra practice
It would be nice to display for instance the humidity in the TemperaturePanel. Add a label for that, and use method readValue() of the WeatherStation class to get the humidity like this:
self.w.readValue('luchtvochtigheid')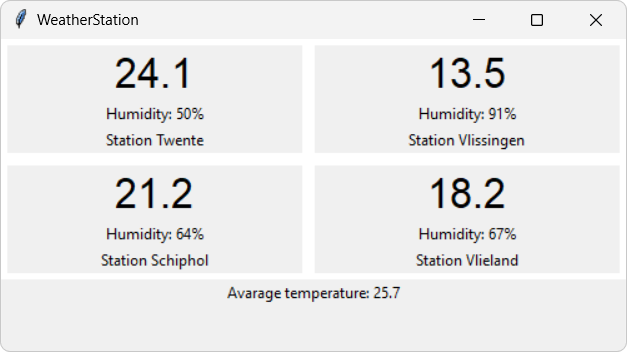
It would also be nice if the application could refresh the data every other minute or so… that’s something we leave open as an extra challenge.