Information on how to use an 0.96 inch OLED Display (128*64 pixels) with an Arduino. This is an i2c module, which makes it easy to connect as it has only 4 wires. It is assumed you have installed the Arduino IDE and have some basic understanding of using electronics and wiring a breadboard. In addition, after learning the basic use, learn how to make a menu system by adding buttons.
A complete simulation with breadboard of the first example below is available on Wokwi. With that, you can try the example without the need for making the example on a breadboard.
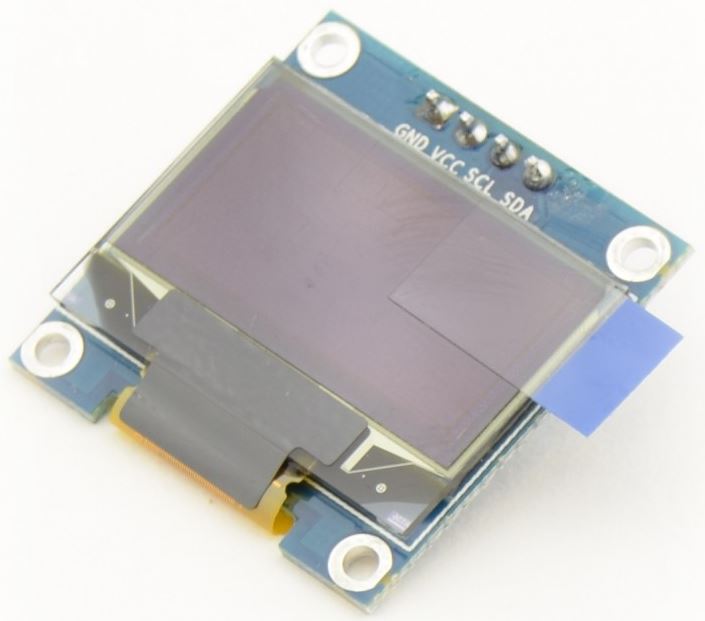

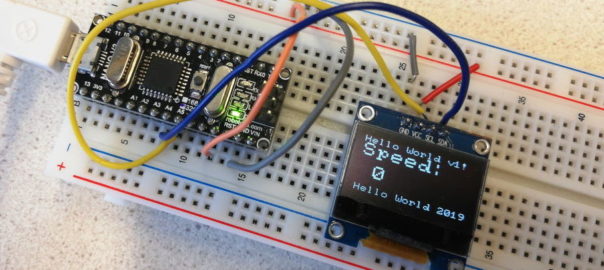
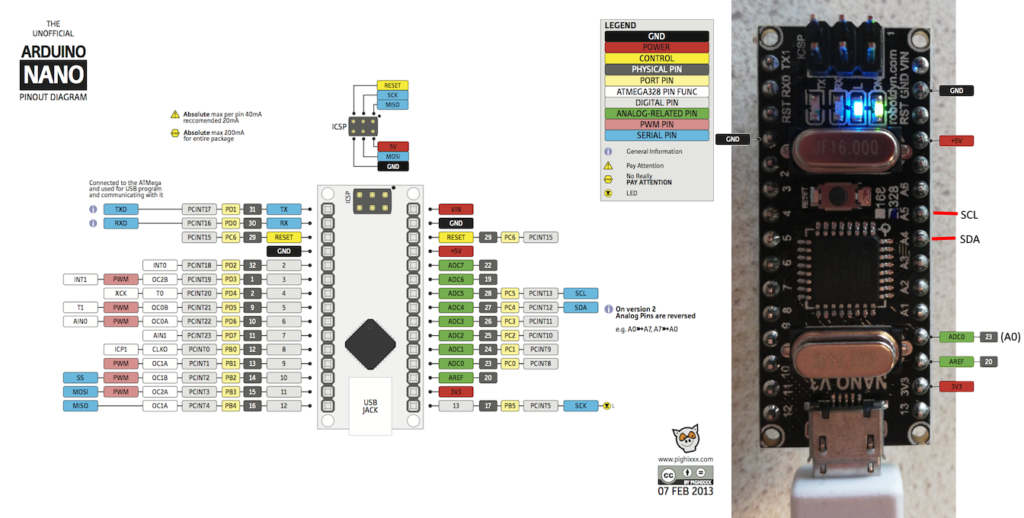
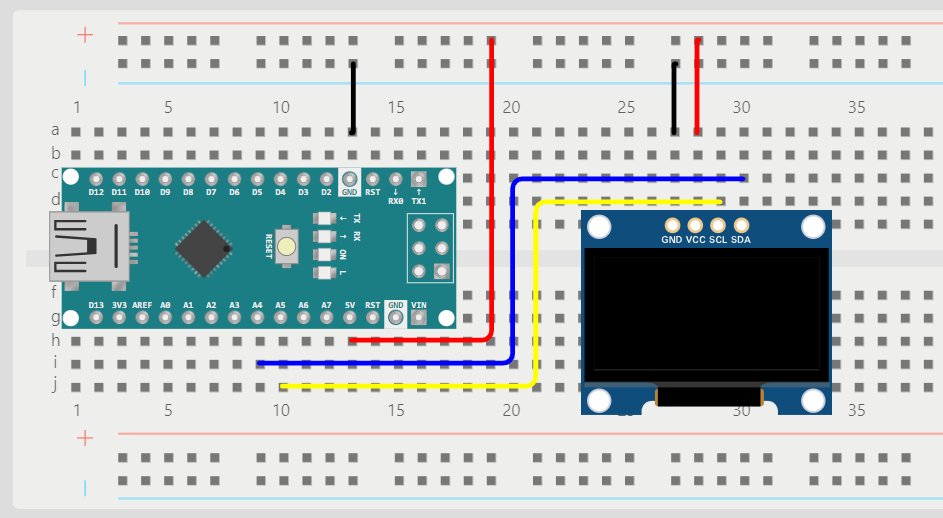
To use this display, you can connect it to power (GND and VCC, it can be either 3.3 or 5V) and connect the SDA and SCL pins to the SDA (A4) and SCL (A5) pins of the Arduino. These are hardware i2c pins:
(click images for larger version)
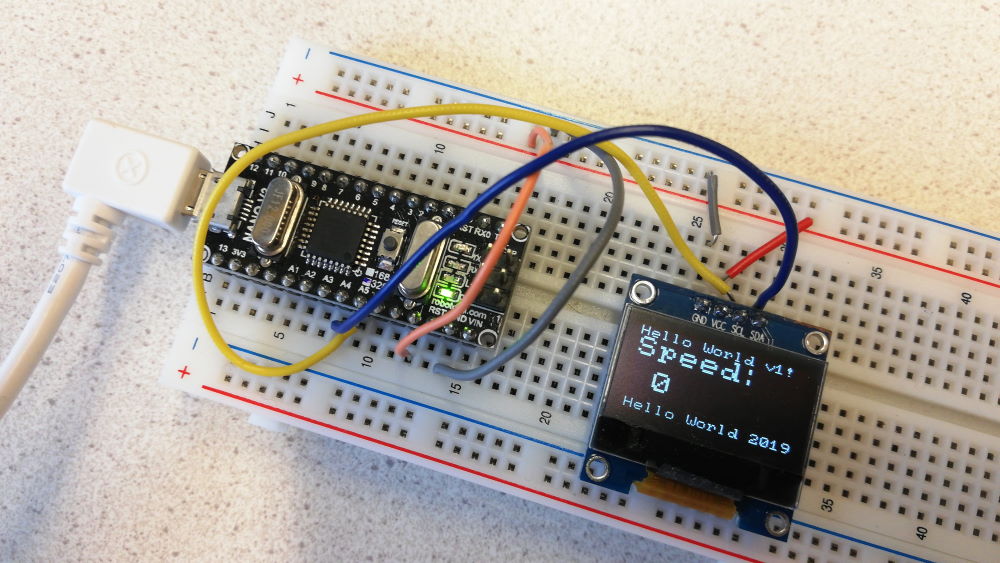
You can mount this display directly onto a breadboard and connect the wires:
Download example sketch
To test this display, you can use this example sketch: oled_display_i2c_u8g2.ino. Open it in the Arduino IDE. The sketch uses the U8g2 library, which you must install before you use this sketch: In the Arduino IDE, select Tools > Manage Libraries, then search for “U8g2” and install the library.
Next, connect the Arduino to your computer with a USB cable.
Before you upload the example sketch to the Arduino, configure the Arduino IDE to use the correct setting for the type of Arduino you use: under the Tools menu, check the board settings:
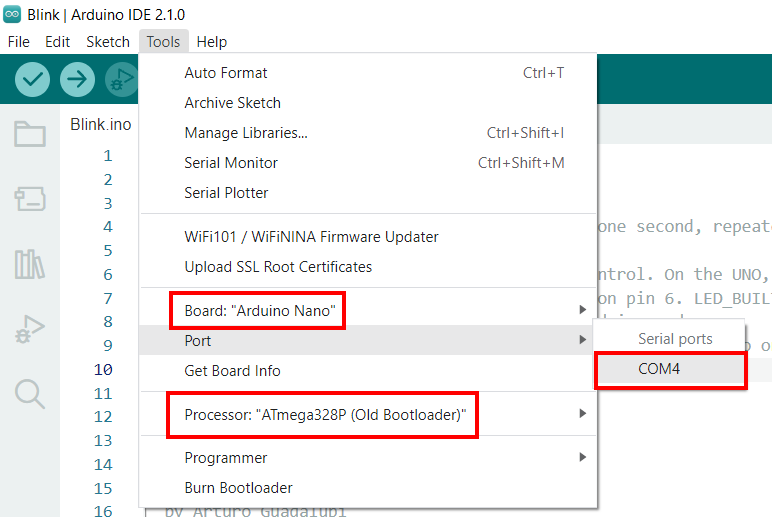
The Port can be any active Port (eg. COM1-12, or on Mac OS something like “/dev/tty.usbmodem…” or “/dev/tty.usbserial-…” ). There should be one option you can select here. If no port is visible, or none of the ports work, you might have to install the CH340 driver before you can use the port. Other troubleshooting options are here.
Upload the example sketch
Now upload the sketch (press the Upload button ![]() ) to transfer the sketch to the Arduino and run it. The display should show some text messages and the value of the variable
) to transfer the sketch to the Arduino and run it. The display should show some text messages and the value of the variable speed.
To display values of variables with this display, you might need code like this:
display.drawString(0,3,"Speed: ");
display.setCursor(7, 3);
display.print(speed);
This shows the message “Speed:” on the first part of line 3, then displays the value of variable speed starting at the 7th character position on line 3, to make it appear after the “Speed:” message.
More info
- u8x8 library reference
- Complete simulation with breadboard of the first example on Wokwi
- Adafruit GFX Graphics Library & Monochrome OLED Breakouts
- Extensive tutorial with info on drawing graphics and display bitmap images.
- Another extensive tutorial “Interface OLED Graphic Display Module with Arduino”
- Pixel Art on OLED Display
More tutorials for displays on this site.
How to make a menu
In this part of this article we will explore two possibilities to create a (navigation) menu with the display. A menu is a userinterface component to allow the user to navigate through various functions and options in your program. The small size of this display and the limitations of the Arduino present some challenges for this. Despite that, it is still feasible to create a menu.
Option 1: a very simple menu with 2-6 choices
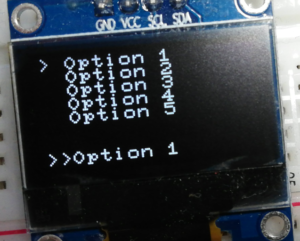
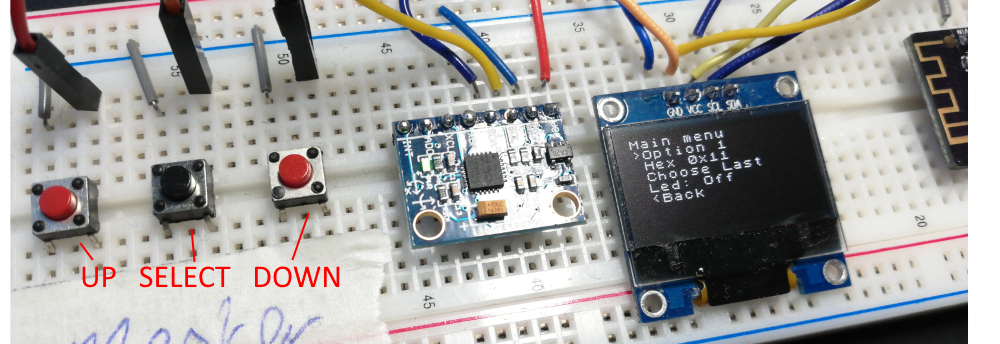
If you have a limited amount of choices or are looking for something simple to build on further this might interest you. It is a text-based menu in which you navigate using the up/down buttons and make a selection with the select button.
You can download the sketch menu_simple.ino here.
Further explanation is in the sketch. You can use 3 buttons connected to pins 4, 5 and 6, using internal pull-ups (no resistors required).
Open the Serial Monitor to see further output of the sketch.
Option 2: extensible menu
This is a bit more advanced than the previous menu, but still uses a limited amount of memory. With this you can add sub menus easily, as each menu is a simple list:
MenuItem PROGMEM firstList[3] = {
  { "Item_one", fun1 },
  { "Item_two", fun2 },
  { "Menu_2", gotoMenuTwo }
};

MenuItem PROGMEM secondList[3] = {
  { "Back" , gotoMenuOne },
  { "Item_three", fun3 },
  { "Item_four" , fun4 }
};
The second item in each list item is a function, which performs the action associated with that menu option. For instance function fun1 (linked to menu item “Item_one” in firstList) can be a function defined in the sketch:
boolean fun1() {
  // blocking functions that simply return true will be run once and will complete
  // before the code goes to the next loop
  Serial.println(F("FUN 1:  running right now and printing this long line"));
  delay(3000);
  return true;
}
Download the sketch menu_simple_oled.zip here.
Option 3: a menu system based on the ArduinoMenu library
The ArduinoMenu library is an advanced system to create menus. With this system you can define menus, submenus, input fields and other iteration objects that deal with all input/output and can call user defined handlers as a result of user actions. It comes with extensive documentation, which you will need, as this is a complex system. It has as a disadvantage that it will consume much of the resources of the Arduino. For instance, it occupies about 80% of the memory of an Arduino Nano. This does not leave much room for your own code.
The two examples below use the 0.96 inch OLED display and 3 buttons to navigate and make selections in the menu.
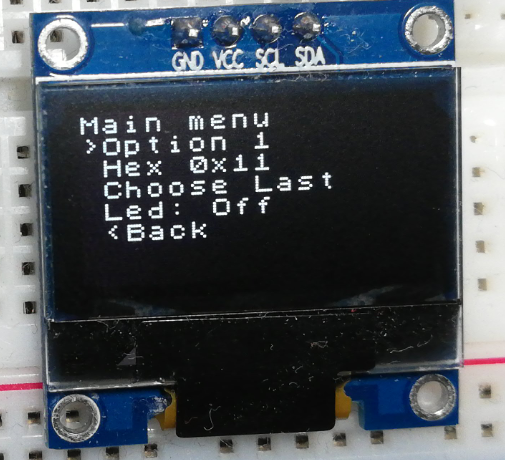
- Example 1:
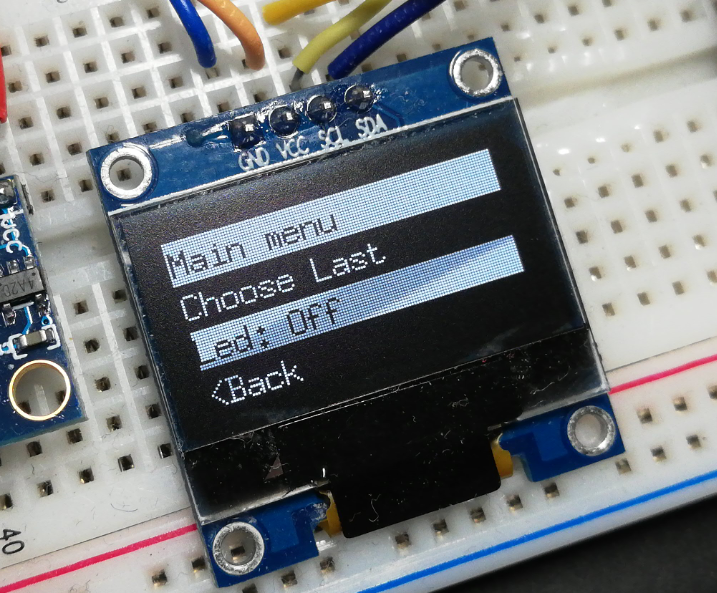
menu.inodemo of text based navigation menu using submenus and abiltity to change settings from the menu. - Example 2:
menu_u8g2.ino, same menu but using graphics menu system, u8g2 version, uses inverted bars for selection.
Open the Serial Monitor to see further output of the sketches. Menus can be navigated through the Serial Monitor also (by entering numbers to select menu items).
More info on menus
These might also be of intrest: