This tutorial will introduce you to coding in Python, setup your editor and get started with some basic examples.
First, you need an editor that helps you to write code in Python. Two options for editors addressed here are:
Thonny is an editor specifically for Python programming, and focusses on beginners. Visual Studio Code is more advanced, and can be used for a wide range of coding languages and applications. But Visual Studio Code is also good for beginners to start with and will in the long run provide a much broader use. It supports AI assistance with coding.
If you want to explore alternatives, or see a more comprehensive comparison, expand the section below:
Comparison of different editors/IDE’s
| Feature / IDE | Thonny | Visual Studio Code | Spyder | PyCharm |
|---|---|---|---|---|
| Target Audience | Beginners, educators | General developers, adaptable | Scientists, data analysts | Intermediate–advanced Python devs |
| Ease of Use | ★★★★★ Very easy | ★★☆☆☆ Moderate (needs config) | ★★★☆☆ Easy–Moderate | ★★☆☆☆ Moderate–steep |
| Built-in Debugger | Yes (beginner-friendly) | Yes (powerful) | Yes (good) | Yes (advanced) |
| Package Management | Basic (pip only) | Terminal-based (pip/conda) | Integrated (Conda/pip) | Integrated + virtualenv |
| Virtual Environments | Yes (basic) | Yes (via terminal/extensions) | Yes (Conda support) | Yes (easy setup) |
| UI Complexity | Very simple | Customizable/modular | Data-focused (RStudio-like) | Feature-rich, heavier UI |
| Integrated AI Assistance | No | Yes (excellent: Copilot, Chat, etc.) | No | Limited (Pro edition or plugins) |
| Extensibility | Minimal | Huge extension marketplace | Limited | Moderate (plugins in Pro edition) |
| MicroPython Support | Yes (e.g., Raspberry Pi Pico) | Possible (with extensions) | No | No |
| Free Version? | Fully free | Fully free | Fully free | Community edition (limited) |
| Best For | Teaching, simple scripting | General coding, web/dev/data | Scientific computing, data science | Professional development |
Further below, steps to setup both editors will be explained. You may pick one. But first, lets install Python:
Install Python
If you have not done so already, download & install Python. Detailed steps for the Python installation are here. At the first screen of the installation of Python, make sure to select the box that says “Add Python to PATH”:

Check Python version
To check your installation, issue the command “py –list” or “python –version” (without the quotes) on a Command Prompt. It should list the version of Python that was just installed:
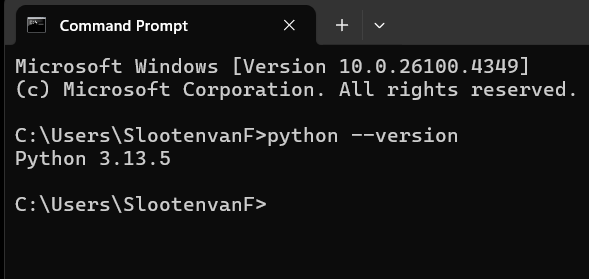
If this does not work, you might have forgotten to check the box that says “Add Python to PATH” at the Python installation. Or you did not restart your computer. If after a restart, it still does not work, you can fix it with these instructions, or, you must uninstall Python, restart your computer, then start over with installation.
You may use the above also to check your current version of Python and decide if you need to update. It is recommended to use a recent version of Python.
Troubleshooting
If you experience problems, try to google for it. Eg. if the installer appears to hang, you could google: “python installer stuck”.
Scroll down further below to see the setup steps for Thonny.
Setup Visual Studio Code
Now install Visual Studio Code. After installation, if asked to reboot/restart your computer, do that first.
Start Visual Studio Code. Go to Extensions:
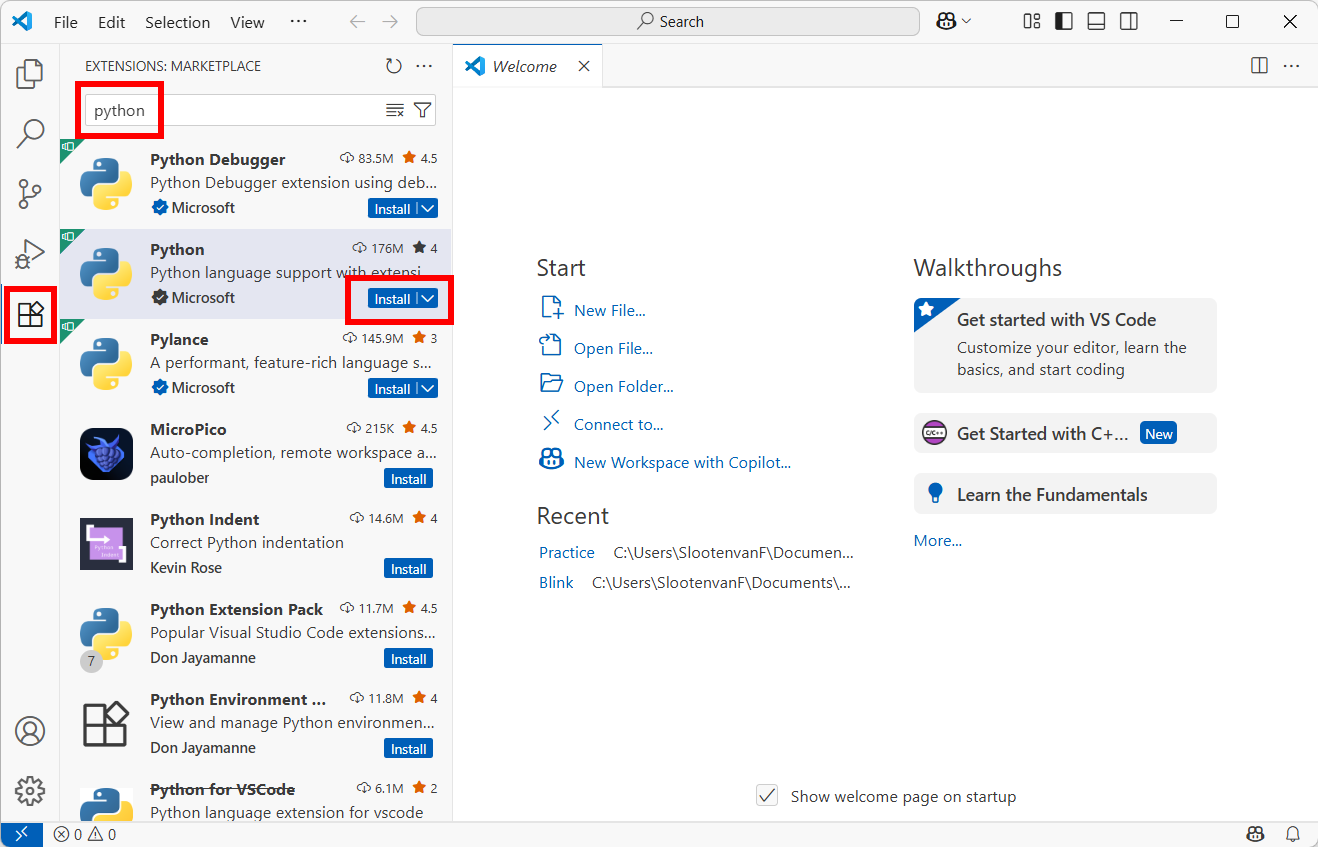
Install the Python extension. In short, you install an extension by searching for its name in the overview of extensions, then click “Install”. More details here.
After installing the extension, restart Visual Studio Code. Need more help? Installing the Python extension will install Python Debugger and Pylance too.
You are now ready to start coding. You can follow this tutorial for a few first steps, or do the walkthrough provided in the welcome screen (if that is not showing, open it via Help > Welcome):

Start a new project (Visual Studio Code)
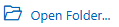
Now start a new Python project: click “Open Folder” in the welcome screen, or select File > Open Folder from the menu.
Create a new folder somewhere under your Documents folder, and select that:

In the Explorer, click the New File icon. Or select File > New File from the menu:

Select Python as the file type:

Press Ctrl + S or File > Save, and save it as “hello_world.py”:

Type a few lines of Python code:

Press Ctrl + S to save the file, then Run it (click the Run icon):

Look for the text being printed in the Terminal:

Congratulations! You just wrote your first Python script!

Now practice with some more examples, for instance from this tutorial “Introduction to Programming”, or the “Python” one.
You may add more Python scripts to this “Basics” folder, eg. via Ctrl + N (or File > New).
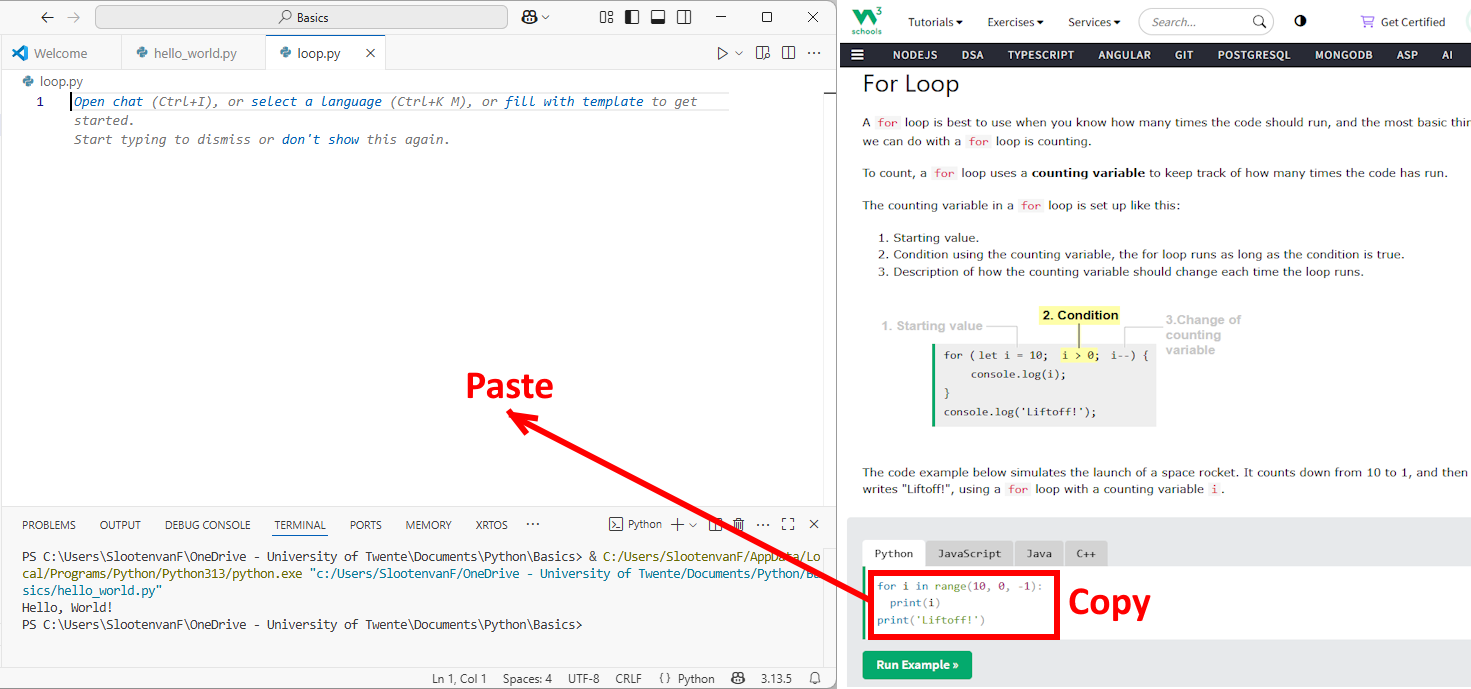
For instance, if you want to practice scripts from the “Introduction to Programming” tutorial, you may copy-paste that code into your own script in Visual Studio Code. Below is an example from the Loops tutorial page:
And run that:

Proceed to the “Learn more” section futher below this page.
Setup Thonny
If you have not done so already, download & install the Thonny editor. If you need help with installing, scroll down to “Instructions & downloads” on the Thonny homepage to get to the instructions for your specific type of operating system.
Next, start Thonny.
Start a new project (Thonny)
When you start Thonny, you will see it has different views, from instance like this:

However, you might have different views open. In this example, you see a view “<untitled>”, which is the editor, in which you can enter code. The Shell shows text output, for instance when running your code. The other views I assume are clear. You can turn views on or off via the View Menu. Except for the Help view, that is available via Help > Show Contents.
If there is no code view yet (view “<untitled>”), click the “New” button (a paper icon) or select File > New from the menu, to create a new file. You can then save this file (using the floppy disk icon or Ctrl + S) in a folder that represents your project. It’s recommended to name the file something descriptive, like “hello_world.py”:

Type a few lines of Python code:

Press Ctrl + S to save the file, then Run it (click the Run icon) and look for the text being printed in the Shell:

If it does not work, check what is shown in the bottom right corner, that should be like in the screenshot above. If it’s not, click it, and select “Local Python 3…” and try to Run again.
Now practice with some more examples, for instance from this tutorial “Introduction to Programming”, or the “Python” one.
You may add more Python scripts to the current folder, eg. via Ctrl + N (or File > New).
For instance, if you want to practice scripts from the “Introduction to Programming” tutorial, you may copy-paste that code into your own script in Visual Studio Code. Below is an example from the Loops tutorial page:

And run that:

Learn more
You have now learned how to get the examples from a tutorial running from your own editor. Now I would suggest to start learning how to modify those examples, and see what happens.
You might have noticed that the loop example counts backwards. Can you make that count forward again? In steps of 2? And count until 100?
If you need help with solving questions like these, you might need to look up the coding reference, eg. to find out what arguments the range-function as used in that for-loop can take.
This is also where AI assistance can come in handy (only available in Visual Studio Code):


Above is an inline chat, available via Ctrl + I or the Copilot icon in the title bar. More on AI assistance in Visual Studio Code.
Extra challenge
Lets do a bit more challenging project! Combine what you learned from the “Introduction to Programming” and “Python” tutorials. A few example projects are below.
Both practice using variables, arrays, loops, input, and if-statements by building a simple text-based app.
Challenge 1: Number guessing game
- Write a program that picks a secret number between 1 and 10.
- Ask the user to guess the number.
- Tell if the guess is too low, too high, or correct.
- Repeat until they guess correctly.
You will need to be able to get input from the user. Drawing a random number is also something that could be of use.
The description is already a kind of recipe, or pseudo code version of what the app should do. So we can start coding right away. Do not forget to test (run) the app after each step.
1. The first line is pretty straightforward: get a random number generated by the randint() function of the random module. Then, for testing purposes, print that on the next line. (Later on, after testing, remove that line).
View example code for this step
# draw a random number between 0 and 10
secret_number = random.randint(1, 10)
print(secret_number)  # For testing purposes, print the secret number
2. Read input from the user can be accomplished via the input() function.
View example code for this step
guess = input("Do a guess. Enter a number between 1 and 10: ")3. To check if the guess is too low, too high, or correct, we need an if-statement. And prints for each result.
View example code for this step
# Check if the guess is correct
if secret_number == int(guess):
    print("Congratulations! You guessed the secret number!")
else:
    print("Sorry, that's not correct.")
    if int(guess) < secret_number:
        print("Your guess was too low.")
    else:
        print("Your guess was too high.")
You might notice that we use int(guess) to convert the guess input to an integer value. (What happens if you do not do that?)
4. “Repeat until they guess correctly” means we have to put things in a loop, and repeat that until the guess is right.
First, we put everything starting from the input() statement in a While loop that repeats forever. Make sure to indent the code in the loop properly.
View example code for this step
while True:
    guess = input("Do a guess. Enter a number between 1 and 10: ")
    print("Your guess:", guess)

    # Check if the guess is correct
    if secret_number == int(guess):
        print("Congratulations! You guessed the secret number!")
        break # end while loop
    else:
        print("Sorry, that's not correct.")
        if int(guess) < secret_number:
            print("Your guess was too low.")
        else:
            print("Your guess was too high.")
A small addition:
We assume the user might want to keep doing the guessing game until decides to quit. So if we allow the user to enter a ‘q’ that would be nice. Then, when the user guesses right, we can reset the game (start over, draw a new secret number, …)
View a complete solution of the game
# Number guessing game

import random

# draw a random number between 0 and 10
secret_number = random.randint(1, 10)
print(secret_number)  # For testing purposes, print the secret number

print("----------------------------------------------------------")
print("Welcome to the number guessing game!")
print("I have a secret number between 1 and 10... Can you guess it?")

tries = 0
while True:
    guess = input("Do a guess. Enter a number between 1 and 10 or 'q' to quit: ")

    # Check if the user wants to quit
    if guess.lower() == 'q':
        print("Thanks for playing! Goodbye!")
        break

    # Check if the input is a valid number
    if not guess.isdigit() or not (1 <= int(guess) <= 10):
        print("Invalid input. Please enter a number between 1 and 10.")
        continue

    tries += 1

    # Check if the guess is correct
    if secret_number == int(guess):
        # If the guess is correct, congratulate the user and show the number of tries
        print(f"Congratulations! You guessed the secret number in {tries} tries!")
        # Reset the game:
        secret_number = random.randint(1, 10)
        print("I have a new secret number between 1 and 10... Can you guess it?")
        tries = 0
    else:
        print("Sorry, that's not correct. You may guess again.")
        if int(guess) < secret_number:
            print("Your guess was too low.")
        else:
            print("Your guess was too high.")
Some more additions where done in this final version, check out the code, and see if it makes sense 😉
Challenge 2: Simple Grocery Helper
Another example to help you muscle your coding skills.
Create a Grocery Helper that lets a user:
- Add grocery items to a list.
- View the grocery list.
- Check whether a specific item is already on the list.
- Get a message if a favorite item (like “chocolate”) is on the list
Recipe (pseudo code) of step 1:
Start with an empty grocery list (an empty array).
Repeat the following steps until the user types 'x':
     Ask the user: "Enter a grocery item (or type 'x' to finish):"
     If the user types anything other than 'x', add it to the grocery list.
     If the user types 'x', stop asking for items.
Recipe (pseudo code) of step 2:
Repeat for every item in the list:
     Print item.
Solution for step 1 & 2

Recipe (pseudo code) of step 3:
Repeat until the user types 'x':
     Show grocery list (step 2).
     Ask the user to enter an item: "Check item ('x' to quit): "
     If the item is in the list print "<item> is already on the list"
     Else, print "<item> is not on the list"
Solution for step 3
(code of step 2 is moved into the loop)

Recipe (pseudo code) of step 4:
Declare a variable 'favorite' (at the top of the script)
Repeat for every item in the list:
     If item equals favorite, print "Your favorite item <item> is on the list!"
Solution for step 4
(variable was declared at the top of the script)

(code of step 4 was put after step 1)

More tutorials
Checkout these other tutorials:
- My other Python tutorials
- Get started with creating an App with a userinterface (tkinter)
- Getting started with AI assisted coding in Visual Studio Code
- Or start with programming a microcontroller, like the Raspberry PI Pico.
- Learn more about Python: w3schools Python tutorial.
Specific topics covered in other tutorials:
- Setting up virtual environment and managing packages is covered in the “Getting started with Dashboards” tutorial.


