Important notes before you start:
- It is recommended to watch the video “Getting started with Eclipse”.
- Before you can start this tutorial, you must have installed Eclipse (details below).
- This tutorial can also be done in Python: the tutorial for that you can find here.

This tutorial helps you to become familiar with the Eclipse development environment. It is a programming environment that is also used by professional software developers and offers many possibilities. Therefore, it looks complicated at first, but you will find that it is indeed user-friendly. By doing the first tutorials you will learn to find your way with it. You are going to write an Application (= simple program). In this first tutorial you will make a Java application that displays a text on the screen after pressing a button. It is not an earth-shattering event, but it provides insight into a number of actions that you will keep using. The purpose of this tutorial is to become familiar with the principles of the use of Eclipse.
The tutorial consists of the following steps:
- Start Eclipse and create a new project.
- Practice basic Java
- Create a user interface.
- Add components to the user interface.
- Have buttons do something.
These steps are explained in detail below.
First: install Eclipse
Expand the section below to see how to install Eclipse.
Install Eclipse and Window Builder
Install Eclipse IDE for Java Developers:
Download the Eclipse Installer. Make sure to download the Eclipse Installer! So not a zip-file with one of the packages which are lower on that page!
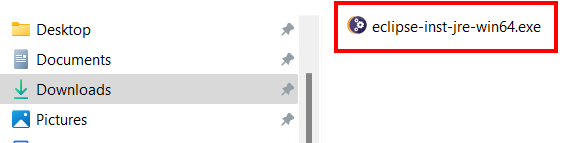
Run the installer (it is in your Downloads folder):
Select the first option: “Eclipse IDE for Java Developers”:

Click “Install” (keep options as they are).
Click “Accept Now”.
Wait for the installer to finish. This can take several minutes.
If you get a popup about Trust, select “Always trust all content” and “Yes, I Accept the Risk” and then “Trust Selected”.
Click “Launch” to start Eclipse.
Select the option “Use this as the default and do not ask again” and click “Launch”:

If you get a popup about “Windows Defender Exclusion Check”, select the first option (‘Exclude Eclipse IDE…’) and press Proceed.
Eclipse: Add Window Builder
The tool to create graphical user interfaces is not part of all editions of Eclipse, and must be added manually. In Eclipse, choose Help > Install New Software… In the field Work with, enter this address:
http://download.eclipse.org/windowbuilder/latest/
Press Enter to input the address, then select WindowBuilder:
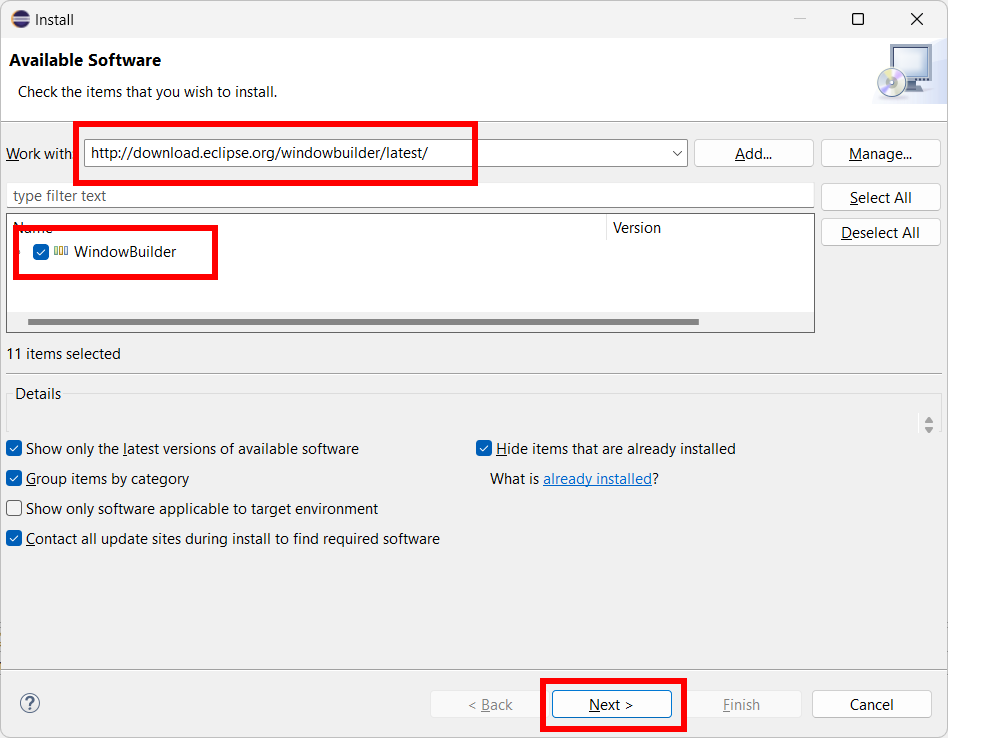
To start the installation press Next two times. Accept the license, then Finish.
The installation will continue in the background. Wait for it to finish (you can see its progress in the lower right corner).
If asked to restart Eclipse, do so.
1. Start Eclipse and create a new project
Start Eclipse (using the icon on the Desktop or via the Start menu). A dialog “Select a directory as workspace” will appear. You may accept the default directory shown there or choose another folder. Check the option “Use this as the default…” and press Ok. Once you have chosen the location of the Eclipse workspace folder you should never move it: it will cause all your work to disappear!
Create new project
You are now first going to create a new project. A project is a folder for a number of related program components like source (code) files.
It is usually located under the Workspace folder within your Documents folder.
To start a new project, select File > New > Java Project from the menu. A Wizard will appear. Here you can enter the name at Project Name, like: “Assignment1_s1234567” (use your student number in the name):

Double check your options are the same as above.
Create the project by clicking Finish.
If the Welcome screen is still visible, remove the checkmark “Always show Welcome at start up” in the lower right corner, and close the Welcome screen:
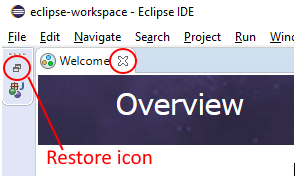
You might have to click the Restore icon to view the project:
The Eclipse screen should look like below:

You now have a new project, but it is still empty.
The screen you see now is the default screen layout of Eclipse. If you ever want to return to the default layout, for example if you accidentally clicked away some items, you can always return to this layout via Window > Perspective > Reset Perspective…
Important reminder: never move files or folders which are part of your Eclipse workspace: they disappear from Eclipse.
2. Practice basic Java
In this step we will create a basic Java file and practice the basic syntax of Java, based on the W3schools tutorial, specifically the parts on Java syntax, output, comments and variables. You might want to read these first.
Create a basic Java file
Select File > New > Class from the menu to add a basic Java file to the project. Type “introduction” (without the quotes) at “Package”, and type the name of the file in the field “Name”, we will name it “Main” (without the quotes). Make sure to check the options “public static void main(String[] args)” and “Generate comments” to add a main method to the class:

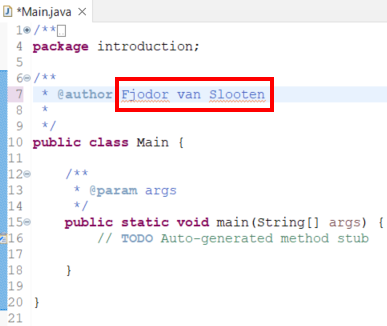
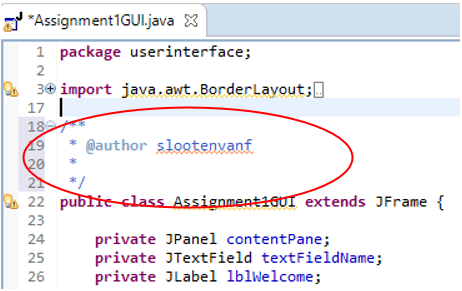
Press Finish to add the Java file to the project. Add your name after the @author tag in the comments in the header of the file:
Display a message on the Console
Locate the single-line comment “// TODO Auto-generated method stub” inside the main method. Replace that with the line below (type it yourself):
System.out.println("Hello World");Now we will run (execute) the application and see what happens. What do you think that will happen? Press the Run icon to run the application (the green arrow ![]() in the menu bar).
in the menu bar).
It should show the Console at the bottom of the Eclipse IDE, with the output (result) inside the Console:

Add a comment behind the code you just added, which explains what happened (it should explain what that line of code does). That could look like this (replace the comment with your own!):
System.out.println("Hello World"); // explanation of what happens hereMore explanation of this first example can be found here (read it if you did not fully understand this part!). The next two pages on w3schools explain output (the println() method) and the use of comments. Read those too. Use that to add another line of code with a println() method call.
Declare a variable
Read the page on Variables on w3schools. Use that to add a variable called name of type String and assign it with a value of your own first name. Add that line as the first line of code in the main method (before the two println() lines).
Display a message and the value of a variable
Now change the hello-world line to print your name, using the value of the variable name:
System.out.println("Hello "+name);Your code should now look similar to this (except, the value of the variable name holds your own first name, and the comments are different):

Run the application again. It should display the welcome message using your name.
Do not forget to add a short description in the header comments on the top of the Java file.
Doing more self-study is strongly advised. There is a tutorial “Learn Java basics with a simple calculator” which can help you. And more on w3schools.
3. Create a user interface
In the this step we are going to add a user interface. A user interface is also called graphical user interface (GUI).
We will use a JFrame Form as a basis for the user interface. Right-click the main project folder in the Package Explorer and Select New > Other (or click File > New > Other):

Next, browse to WindowBuilder, Swing Designer and select JFrame:
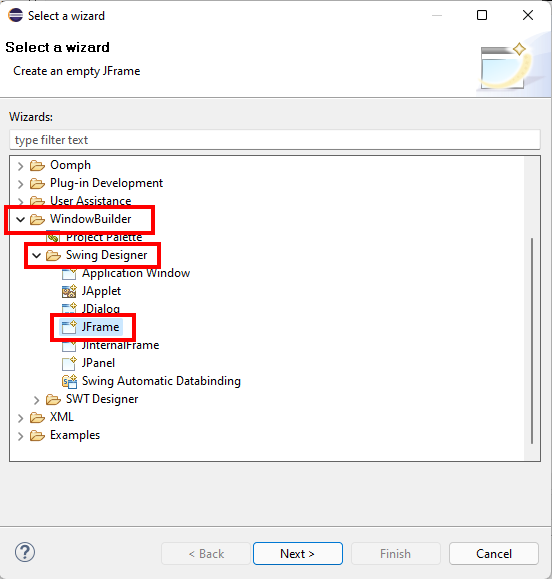
No “WindowBuilder”? If the folder WindowBuilder is missing, you might have a version of Eclipse that does not have the WindowBuilder installed. Check the installation instructions on how to install it.
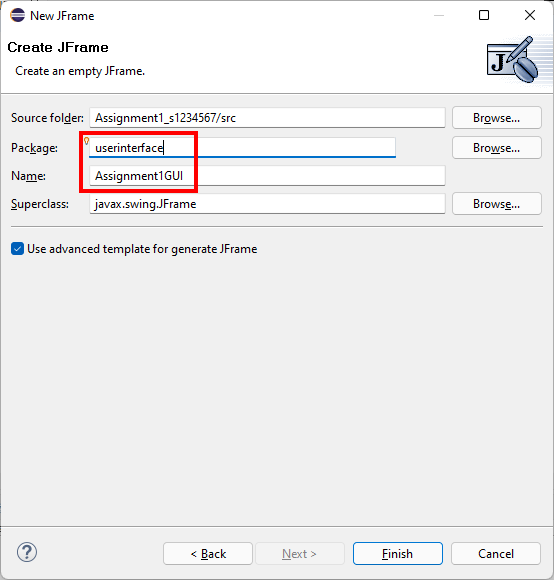
In the next screen, type at Name the name “Assignment1GUI” and at Package type “userinterface” and click Finish:
Eclipse Views
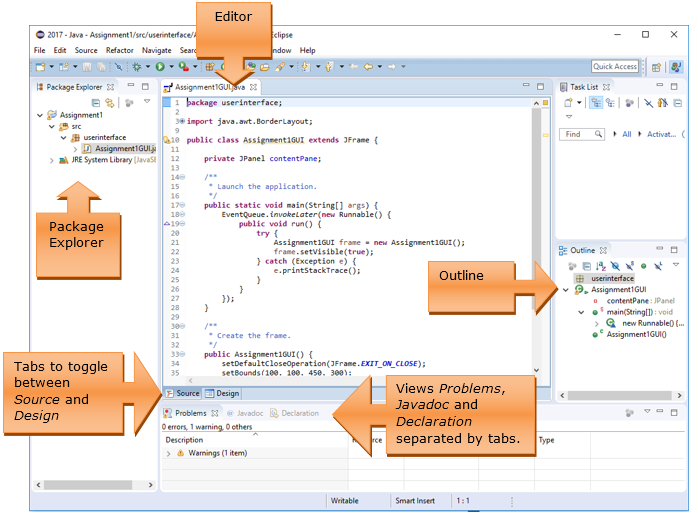
Below is an explanation of the main views of Eclipse. The complete set of views is called the Workbench. Within the Workbench there are components called Views. For example, the Package Explorer is a View, where you can view all the parts of a project.
Your screen should look something like the figure below. The most important view is the Editor, where you are going to write Java code. At the bottom of this View there are two tabs, which allow you to toggle between the source code (Source) and the design of the Graphical User Interface (Design).
In a development environment like Eclipse, user interfaces can be designed, without writing its code yourself. You do this with the visual Window Builder, which is accessible via the Design tab in the Editor.
If you want to view the source code, click on the Source tab.
Code in the Editor
In the Editor, you can view the code of the current open file, Assignment1GUI.java. There is already some code, which was automatically generated to create an empty JFrame form, which we will use as a base for the user interface.
Scroll all the way down in the Editor. While scrolling you see two methods: ‘main’ and ‘Assignment1GUI’. Method ‘main’ is the start of the program. It creates a new frame and makes it visible (can you find these two lines of code?). The second method ‘Assignment1GUI’ is a special method which has the same name as the class, we call this the constructor. It constructs (builds) all parts of the class. For example, it creates a new JPanel (can you find that line of code?).
Add text output to Console
We can send text to the Console with this piece of code:
System.out.println("My first Java code");Add this piece of code on a new line in Assignment1GUI() after the line indicated by the arrow. Beware that you enter the code before the end of the method, before the curly bracket ‘}’.

The code should then look like:

Run the application
To see the result, we can run the application: click on the green arrow ![]() in the menu bar.
in the menu bar.
If you get a warning that the file was not saved, click Ok.
If you have not made any mistakes during programming, an empty Window appears that should look like the one below:
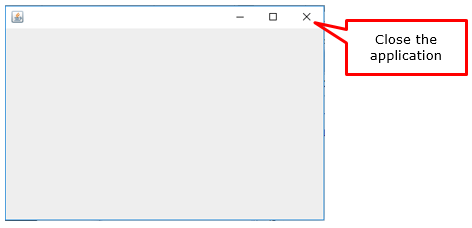
Also, a Console view will appear at the bottom in the Eclipse Window with your text message:
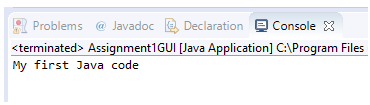
You may close your application.
Now click on the Design tab in the Editor:

The screen that appears is also known as the WindowBuilder.
You can use this to create a user interface in a visual way (without writing code).
Again, you see a number of Views, such as the Structure, which includes the user interface components and Properties, and the Palette.
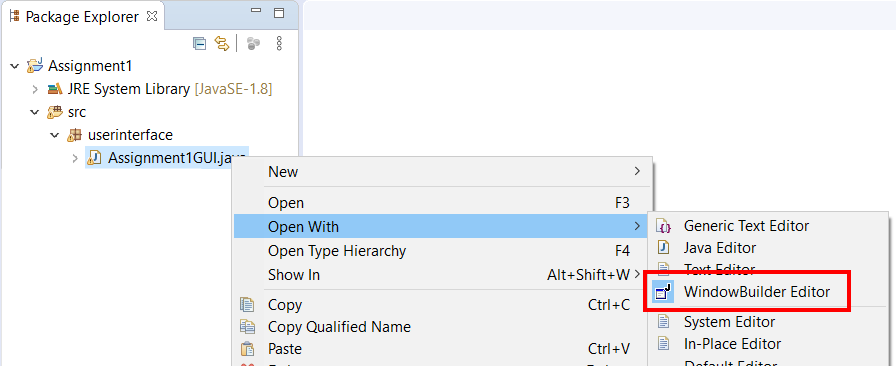
No Design tab? If the Design tab is not visible, right-click the .java file in the Package Explorer, and choose Open With > WindowBuilder Editor:
4. Add components to the user interface
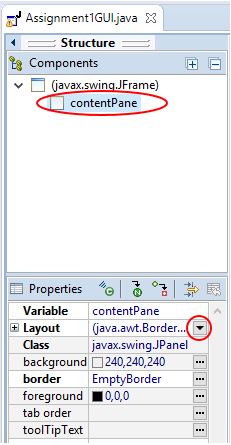
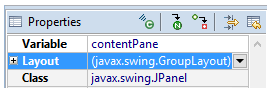
Before we can add user interface components, we must select a layout. In the list of Components select the contentPane and in the Properties view, behind Layout select “GroupLayout”:
You are now going to insert a textfield that is required to enter the name of the user.
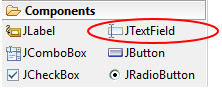
Find the JTextField in the Palette and select it:
Now you can insert the textfield in the WindowBuilder by clicking with the left mouse button on the spot where you want to insert the textfield:

You can resize the textfield by dragging the dots. You can also move the field by dragging it.
The two blue dots and lines indicate that the side and the top of the textfield are attached to the edge of the Window. This means that when the size of the window is changed, the textfield changes accordingly. By clicking on the arrows, you can change the way it is attached.
As long as the textfield is selected you can adjust properties such as content (Text) and the variable name (Variable) at Properties.
You can get a quick preview of the user interface you have created, at the icons at the top of the editor by using the Preview button:

Tip: It is important that you immediately assign the right Variable name to a component. Later on, you will notice that this greatly increases the readability of your code. So, give the textfield a suitable name. We incorporate the type and the function in the name of the component. Then it becomes clear what it can do (type) and what it’s for (function). A good name would be “textFieldName”. Change the Variable at Properties:

It may be useful to include a hint at the toolTipText to reflect the purpose of the textfield.
To make the purpose of the textfield even clearer, we place a Label in front of it:

Run the application
To see what the application looks like when you launch it, click on the green arrow ![]() in the menu bar.
in the menu bar.
You will probably see a warning similar to the one below because you have not saved the Java file. Select the option “Always save …” and click on OK.

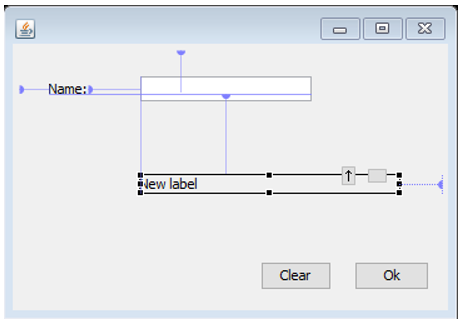
If you have not made any mistakes during programming, a screen appears that should look like this:

By clicking on the cross, you exit the application again and return to where you left off in Eclipse.
You may have noticed that there are one or several warnings visible in the Problems View. You may ignore these for now. Should there be any error messages, you will have to (try to) solve these.
Now place two buttons (JButton) in the user interface in the same way you did with the textfield. Customize text and Variable of both. It will look like this, for example:
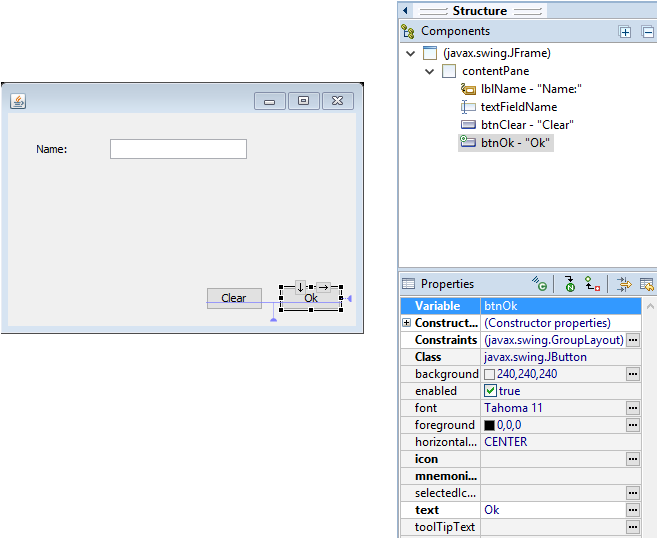
Notice the Properties of the selected button: did you enter proper Variable names for both buttons?
5. Have buttons do something
You have used the WindowBuilder to design the user interface of your application. This is an easy way to quickly create a user interface because Eclipse generates the Java code for you. In the second part of this tutorial you must make sure that the user interface actually does something by adding Java code.
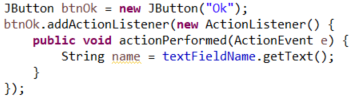
The Java code to be run can be specified in an Event Handler. An Event Handler ‘handles’ an Event. In this case, a click on the button. You can have Eclipse create such an Event Handler by double-clicking on a button. Do the following: Double-click the “Ok” button in the WindowBuilder.
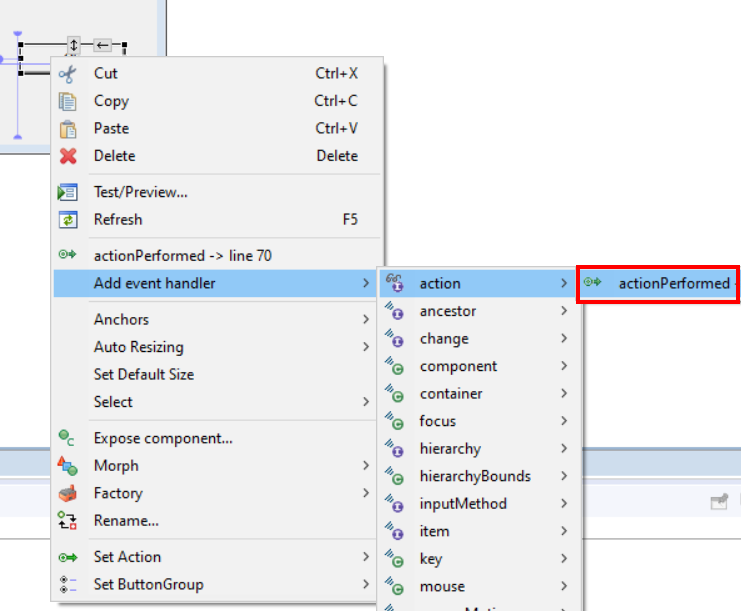
This way of creating the Event Handler might not always work. For instance on MacOS. In that case, you can also add it by right-clicking the Button and then select Add event handler > action > actionPerformed:
Once you have done this, a piece of Java code is added, which is used to create the Event Handler:

At the moment you click the button, Eclipse switches to the source code Editor, where you can view and edit the Java code of your application. You can switch between the source code Editor and the WindowBuilder (Design) by using the tabs at the bottom:

Now we are going to add a line of Java code to the Event Handler. Click on the place indicated above in the editor behind the curly bracket { and press Enter.
An empty line appears where you can type a new line of Java code. We are going to use the textfield to enter the name of a person. It is used as an input field.
In order to save the name of the person, we use a variable of type String. We declare this as follows:

Next, type a ‘=’ sign, followed by the variable name of the textfield (if necessary, check the correct variable name for the textfield in the code), followed by a dot and then the text “getText”:
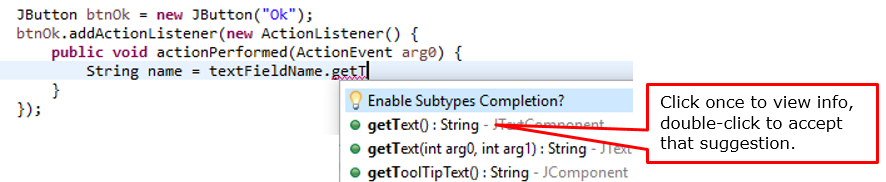
As you type it, a popup with suggestions from the Editor will appear. The Editor recognizes the name of the variable and will make corresponding suggestions. In this case, the Editor recognizes that you have used the name of a textfield and will prompt you to use the properties and methods of that field. Documentation of those properties and methods also appears. We cover this in more detail as part of the next tutorials.
For now, you may finish the Java code as follows:
We are going to show the name entered in a label in the user interface. To do this, add a label (switch to Design tab!):
Make sure the label is empty (it does not contain any text) by deleting the text ‘New Label’ at text in Properties. Give the label a meaningful name:
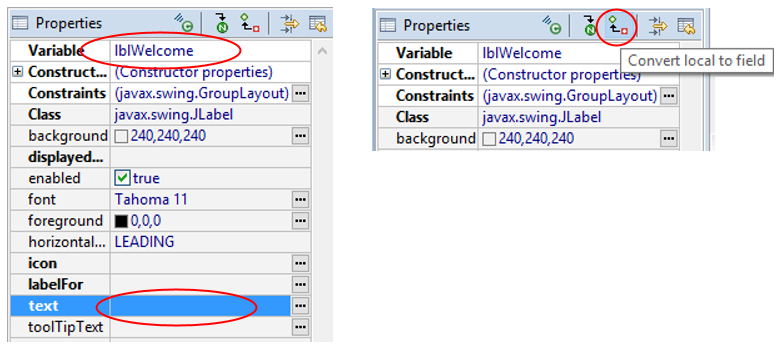
Also click once on the “Convert local to field” icon. This converts the label into a field that we can use in the entire class (more about this later).
Now double-click again on the Ok button to go to the code of the Event Handler and insert the second line of code:
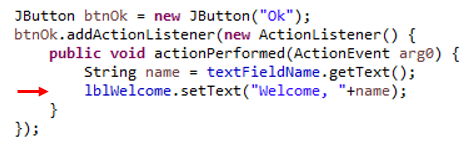
Please note: if you have given the label a different name, you must use that name here!

If you get an error (labelWelcome cannot be resolved), go back a bit: you might have missed to convert the label to a local field. Or your label might have a different name.
Now run your program using the Run button and see what happens when you click on the Ok button.
Do you understand the two lines of code you have added to the Event Handler? If not, check the lecture notes.
Now add an Event Handler for the Clear button in the same way. Double-click on this button in the WindowBuilder and type the Java code. When this button is clicked, the contents of the textfield and the label for the welcome-message should both be cleared. We use the method setText() of the label, with an empty string between the parentheses to accomplish this:
First type the name of the textfield, followed by a dot and start typing the name of the method. When a popup appears, double-click on the method you need:
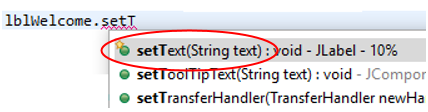
If the setText() method does not appear as a hint, keep typing until it appears.

Please notice the comment which is added to the end of the line in the example code above.
Do the same for the textfield also: add a new line of code with a call to the method setText() for the textfield.
Run the program and check if both the textfield and the label are cleared when clicking the Clear button.
Document the application
Comments are important means to document a program. We will add a comment at the top of the Java file, which we use to add author information and a general description of the program. Click at the top of the Editor on the empty line above the definition of the class:

Select Source > Generate Element Comment from the menu. A Javadoc-styled comment will appear above the class definition:
Change the comment at the specified location so that your name and student number are placed there (behind @author). Also type a brief description (in your own words!) of the program on the first line. It will look similar to:
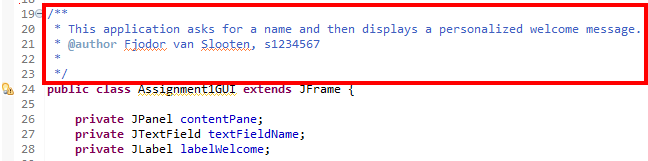
To enter Javadoc. comments, you may also type /** and press Enter.
Customize the app
You may now further customize your program, for instance with different text that appears in the text box and a different title*. Adjust the layout as well: e.g. different size, font or colors of components.
* The title of the application is a property of the JFrame. Go to the WindowBuilder (Design tab) and select the JFrame (javax.swing.JFrame) at Components. You can then look up and edit the relevant property in Properties.
You can customize the background color of the application by changing the background of the contentPane.
Extra challenge: time-based welcome
Time-based welcome
Suppose, instead of using “Welcome,” you want to welcome the user with a custom message according to the time of day. For example, “Good morning” if it is morning. In that case, customize the event handler of the Ok button as follows (first line is already there):

By calling the method LocalDateTime.now().getHour(), we can retrieve the current time, after which we determine if it is morning by using an if-statement.
If you get a warning-bubble in the side-line, click it to import the appropriate library:

To create the import, you can also press the keys Ctrl + Shift + o (or on a Mac, Command + Shift + o).
Activate Eventhandler of Ok-button when user hits ENTER
You might have noticed that hitting the ENTER key on the keyboard does nothing. It is custom that hitting ENTER will activate the default button (the Ok-button).
To realize this, add the following code at the end of the userinterface code (all the way at the bottom of the constructor Assignment1GUI(), place it before the last two } brackets at the end of the code):

Result:

Summary
You have familiarized yourself with Eclipse and written your first piece of code.
In addition, you have learned the following.
- Create a project.
- Write a Java program in a project.
- Use the WindowBuilder to create a user interface.
- Run a program to check if it works the way you intended.
- Format a user interface.
- Written your first lines of Java code.
- Realized method calls.
- Added author details and documentation.
For the following tutorials, it is important that you have practiced with Eclipse and the examples, for instance if you use a book or practice more using online tutorials. Therefore, as extra practice do the exercise in the appendix (scroll down to see it), which explains how to use Java examples.


