This article has been updated to reflect the 2022 version of Android Studio (‘Giraffe’).
This article goes through the basic steps of installing, configuring and creating your first app with Android Studio on Windows. For other platforms and for a more thorough guide, go to the Android Studio install guide or this Javaworld guide. Android Studio needs lots of resources, so it is recommended to run on a high-end PC or laptop.
Download Android Studio from developer.android.com/studio.
Click the ‘download options’ link if your platform is not automatically detected.
Run the downloaded file.
Click Next a few times, then Install to start a default installation.


When finished, hit the Finish button. Android Studio will be started.
Setup Android Studio
The first time you start Android Studio, you can import settings, eg. from a previous install. If you have never used it before, leave the default option to “Do not import settings”. Click Ok.
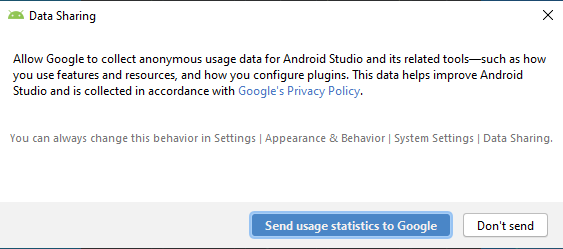
Decide whether you want to share data with Google and make the appropriate choice:
The Android Studio Setup Wizard will be started. Click Next a few times for a standard installation. Choose a theme you like. In the screen with “License Agreement” accept the licenses, by clicking them one by one in the area on the left and selecting the “accept” checkbox. Click Finish.
Some additional components will be downloaded and installed. Check the log for errors, then click Finish. (if errors occurred, check the troubleshooting info at the bottom of this article)
Android Studio will be started with the welcome dialog (you might not have any projects listed yet):

Choose “New Project”
Choose “Basic Views Activity”, click Next.
Type a name: “Hello world” and select the Language “Java”.
Select API level 27:
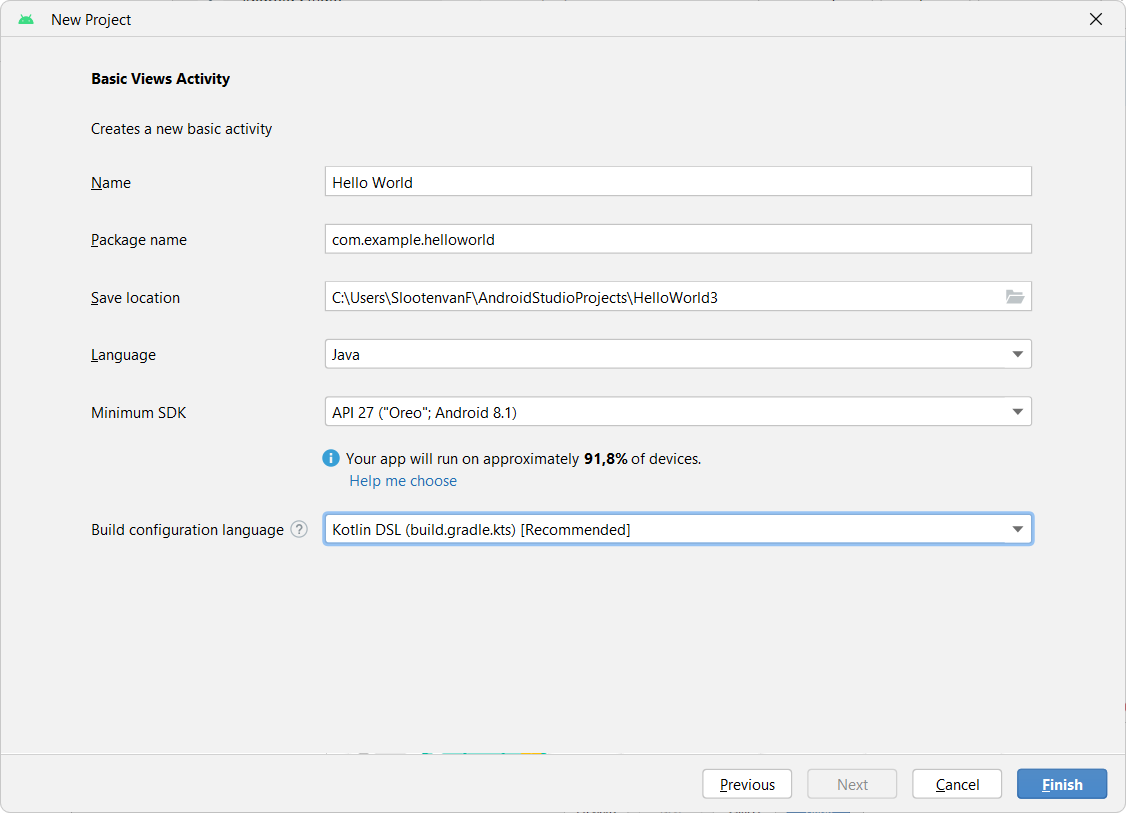
Press Finish. Android Studio will be started. Some additional tasks will be started to setup the project, for instance Gradle downloads and a build. This might take a few minutes.
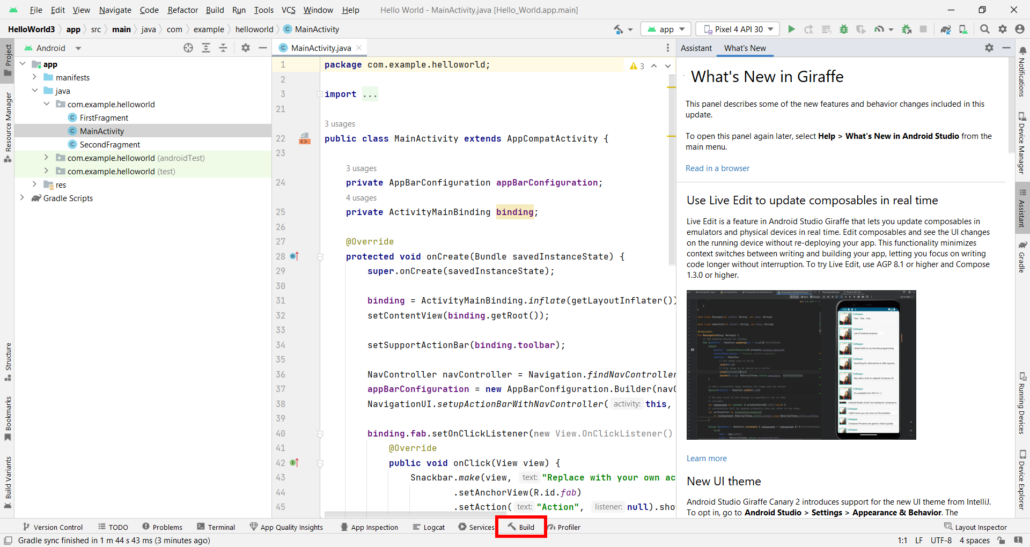
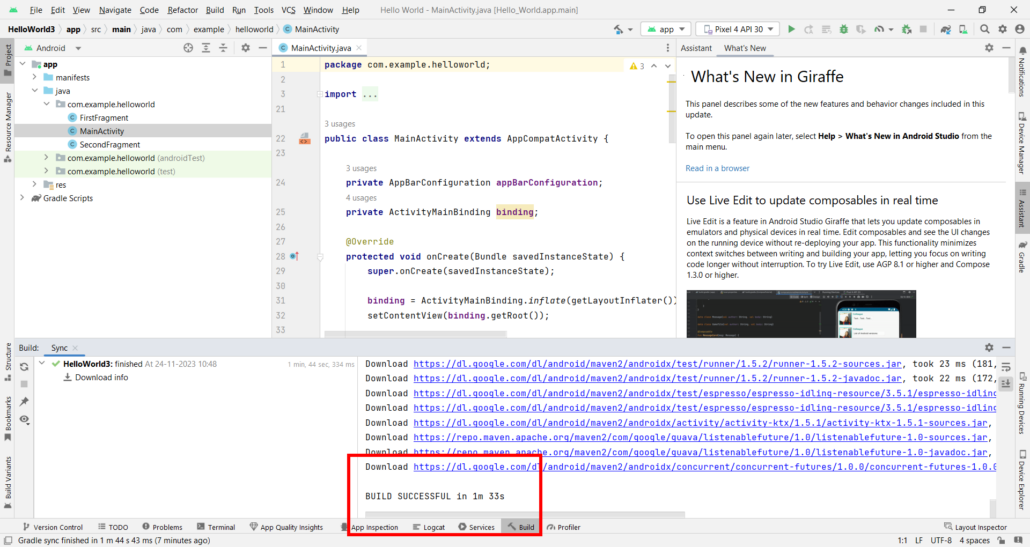
It is advised to run Android Studio full screen. Close the What’s New screen. Check the build log by clicking build at the bottom, it should be completed successfully:
The file MainActivity.java should be open. If not, open it via the Project structure, under app, java, com.example.helloworld.
Configure an emulator
We are going to use an emulator to test the app. An emulator ’emulates’ a device (a phone) on your computer. More info.
From the menu, choose Tools > Device Manager. Click “Create Device”. Choose the device you prefer; in this example we use the Pixel 6a:
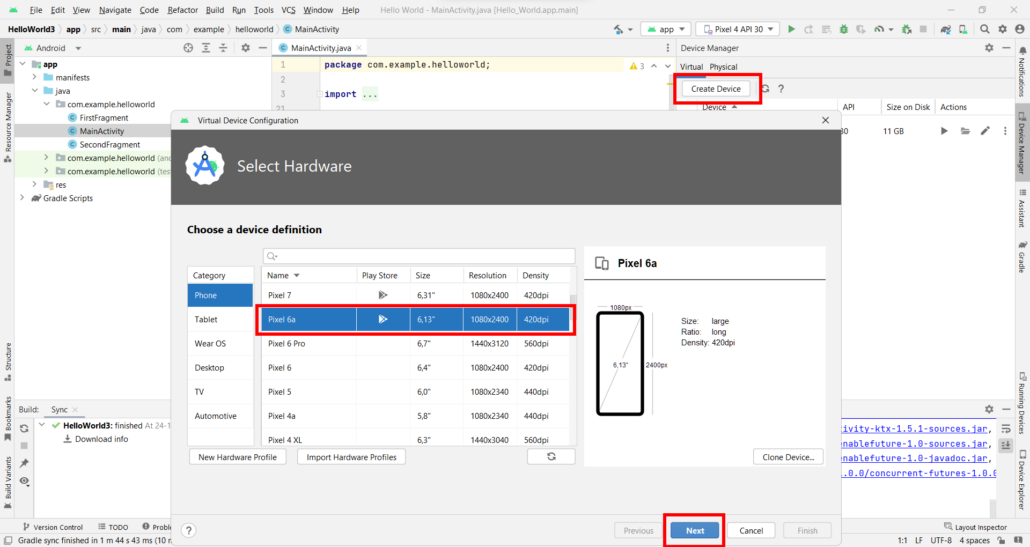
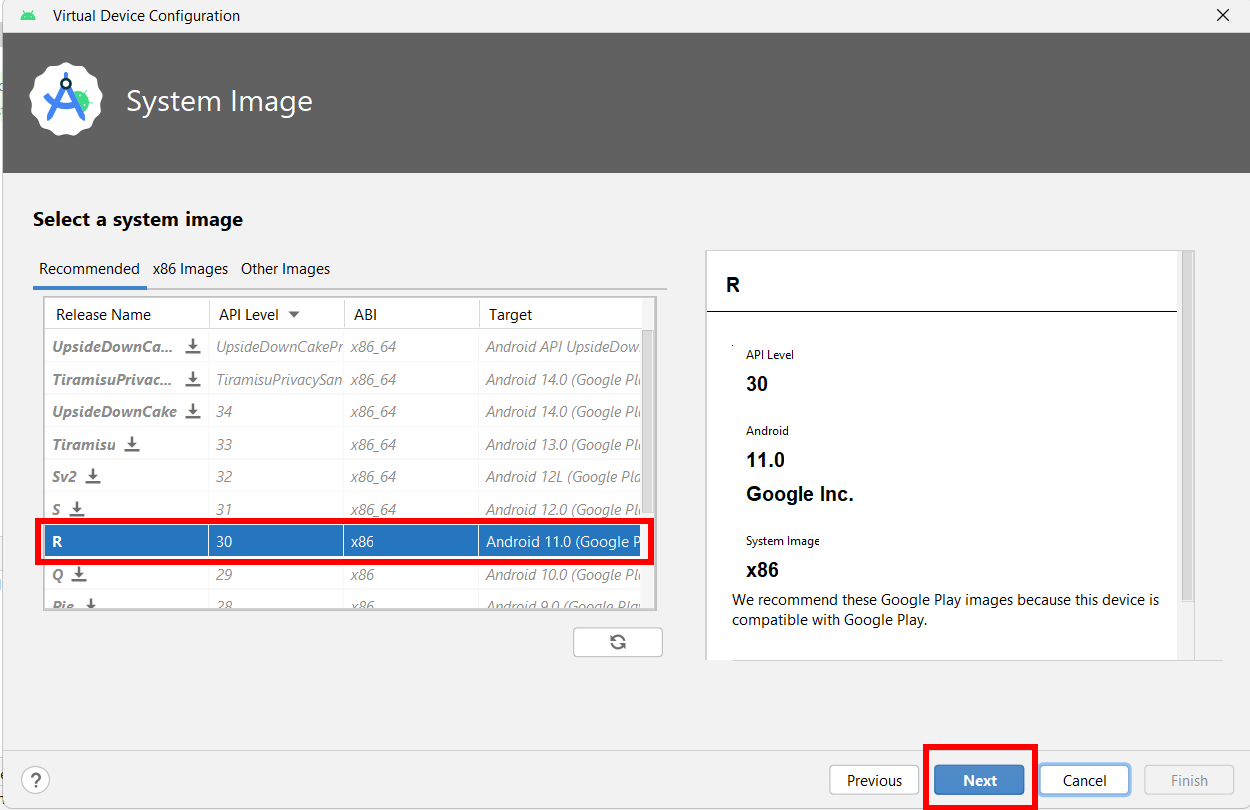
Click Next. Choose one of the recommended System Images (we use R, Android 11). Click the download icon ![]() in the list to download that system image and install it (in the screenshot above it does not show that icon because it was already downloaded).
in the list to download that system image and install it (in the screenshot above it does not show that icon because it was already downloaded).
Click Finish. Then Next and Finish again.
The Device Manager should now list your device:
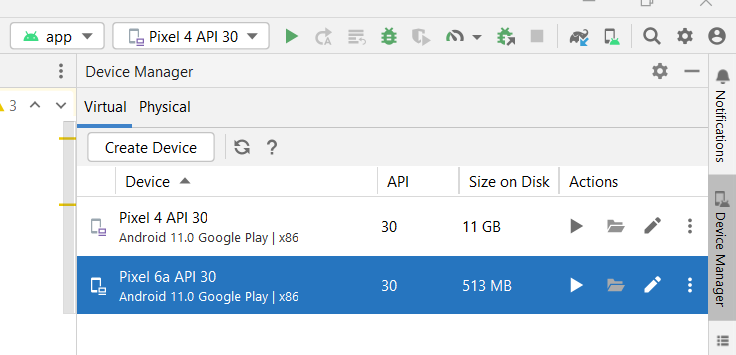
You may now close the Device Manager.
Run your app
From the toolbar, click the Run icon:

This will build your project, start the emulator and run your app in the emulator:
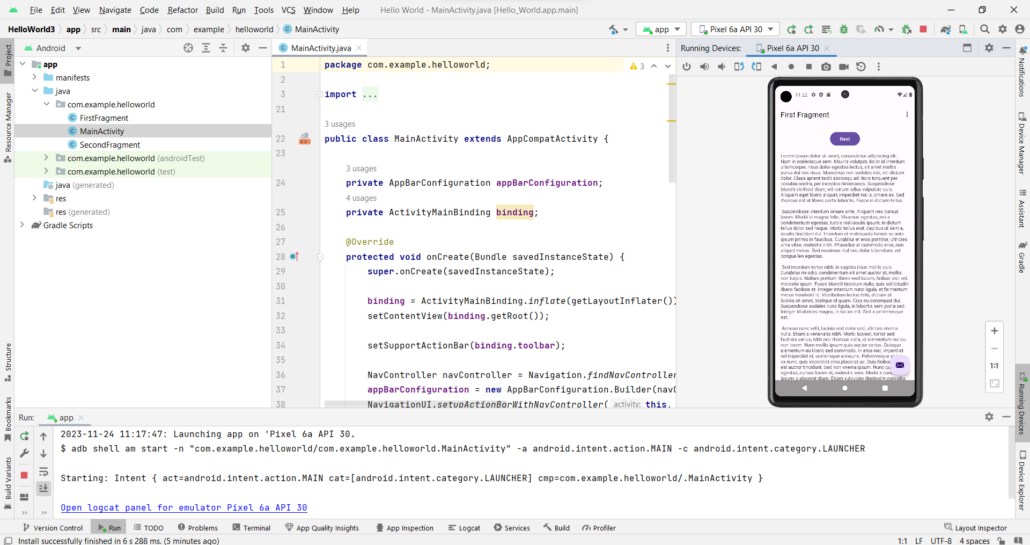
When the app runs, try interacting with it, click the menu icon and the mail-icon. Also navigating between the two fragments (these are like pages in the App) should be possible (click the ‘next’ button). In this stage, but some basic interaction should be possible.
Run on your phone
It is also possible to test the app by running it on your phone. More info.
First, check the android version of your phone. It should match the target version used by the project in Android Studio.
On your phone, enable Developer Options and turn on USB debugging.
Connect your phone (with an USB cable). Select the option to “transfer files”.
Your phone should appear in the list of devices:

Now press Run and wait for the app to be installed and started on your phone.
On some phones, you might need additional steps to allow running apps via a usb connection.
Next tutorial: write your first app
Continue to the next article: “Android Studio: create a first interactive userinterface” or go to the list of articles on Android App Development.
Learn more
Learn Java:
Troubleshooting
Pages that might be of help if you run intro trouble:


