Tag Archives: electronics

Micro SD Card Module with temperature sensor

Data logging with the Raspberry Pi Pico W

This tutorial extends the tutorial of a temperature sensor with a display, and adds data logging to that. This can be realized by logging to an SD card, to the memory of the Raspberry Pi, or by logging to a website (via Wifi). The first part is logging to an SD card. Part 1: Data … Continue reading Data logging with the Raspberry Pi Pico W

Tutorial: build a laser distance sensor with a Raspberry Pi Pico

In this tutorial, we will build a laser distance Sensor with a Raspberry Pi Pico and CircuitPython, using a VL53L1X Time-of-Flight (TOF) sensor. In this tutorial you will learn to build a distance sensor. It takes the basic steps to connect electronic components and programming the Raspberry Pi Pico in Python. It uses an laser … Continue reading Tutorial: build a laser distance sensor with a Raspberry Pi Pico

Wokwi logo

Prototyping in a rush? No time for physical prototype? Simulate it!

Learn more about simulating a physical prototype. Wokwi is a great simulator that you can use to build your electronics projects online, without the need to get components, wire them on a breadboard and then test. If you combine it with Chat GPT to do the coding, you can have your prototype up-and-running in literally … Continue reading Prototyping in a rush? No time for physical prototype? Simulate it!

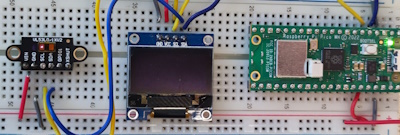
Breadboard with temperature sensor, display and Raspberry Pi Pico

Tutorial: build a connected temperature sensor with a Raspberry Pi Pico W

In this tutorial you learn to build a temperature sensor and connect it via Bluetooth with an App. It uses a DHT11 temperature & humidity sensor and Bluetooth communication with your phone. For this we will use a Raspberry Pi Pico W, the Wireless edition of the Pico. It consists of the following steps: This … Continue reading Tutorial: build a connected temperature sensor with a Raspberry Pi Pico W

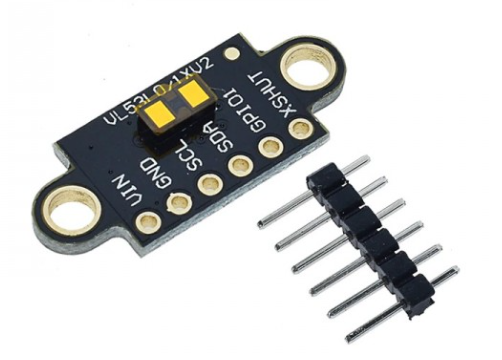
Sensor with separate header pins

Using the VL53L1X Time-of-Flight Distance Sensor

This short tutorial introduces the VL53L1X Time-of-Flight (ToF ) distance sensor and hook it up to an Arduino Nano. Further directions: If you bought it like this: You will first have to solder the header pins. Connect the sensor Because the sensor uses I2C its wiring is simple: It’s operating voltage is 3.3V or 5V, … Continue reading Using the VL53L1X Time-of-Flight Distance Sensor

Tutorial: build a distance sensor with a Raspberry Pi Pico and CircuitPython

In a previous tutorial “build a distance sensor with an alarm” we used an Arduino Nano (coded in a C-variant). Now, we will do the same with a Raspberry Pi Pico and CircuitPython, a version of Python which runs on microcontrollers. If you are more interested in programming the Pico with the Arduino IDE (in … Continue reading Tutorial: build a distance sensor with a Raspberry Pi Pico and CircuitPython

Tutorial: Create a gamecontroller for the catch-the-ball game

In this tutorial, we are going to create a gamecontroller which can control the game using movements. By tilting the gamecontroller, you can control the movement of the basket. We will extend the game made in the previous tutorial. Carrying out the assignment Realizing the gamecontroller can be done in 2 ways: Using the MPU-6050 Accelerometer … Continue reading Tutorial: Create a gamecontroller for the catch-the-ball game

Tutorial: build a distance sensor with an alarm

Introduction to Arduino and programming . There is also a “quick walk-through video” of this tutorial. My practicals which use this tutorial have an introductory presentation (pdf). Further directions: We will build a distance meter in this tutorial. It uses an ultrasonic distance sensor to sense the distance to an object nearby. It consist of the … Continue reading Tutorial: build a distance sensor with an alarm

Getting started with Blynk

Blynk is an app with which you can control any piece of electronics you have build, eg. a circuit build with an Arduino. To get started with Blynk, you can follow the getting started guide: www.blynk.cc/getting-started then continue at step 5 of docs.blynk.cc (under getting started) to add a first Widget. The first example (BlynkBlink) builds … Continue reading Getting started with Blynk

Idea generation with LittleBits for “Design for Specific Users”

Tomorrow a Littlebits-workshop will be held for students doing a project on “Design for Specific Users”. We are going to practice building small, interactive circuits. Aim is to investigate design possibilities in the idea phase of the design process and quickly try-out different directions for idea’s. Students are encouraged to experiment freely by building circuits, mixing … Continue reading Idea generation with LittleBits for “Design for Specific Users”