Application Development: instructions on submitting files
This page is from last year! The 2021 edition is on Canvas.
To submit (intermediate) results, assignments as Eclipse/Arduino projects and a video demonstration, various files and folders have to be handed in on Canvas. The best way to do this, is to combine all files (&folders) into a single zip-file. But the demo video must be kept apart.
Requirements
Work to be handed in is checked only if meets the following requirements.
- Format of file is ZIP (Rar and other formats are not allowed).
- Documents in Word (.doc or .docx) or PDF format.
- Eclipse and Arduino projects: contains the entire project folder.
- Handed in on time.
- Name and student number is included in the comments at the beginning (header) of the Java/Arduino files (this is explained in the first assignment).
- Optional: The assignment is demonstrated during an audit by the teacher/assistant.
The submission process is explained further below in three steps.
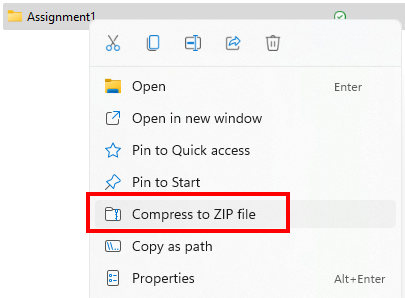
Figure: Example Windows: Send to, Compressed folder
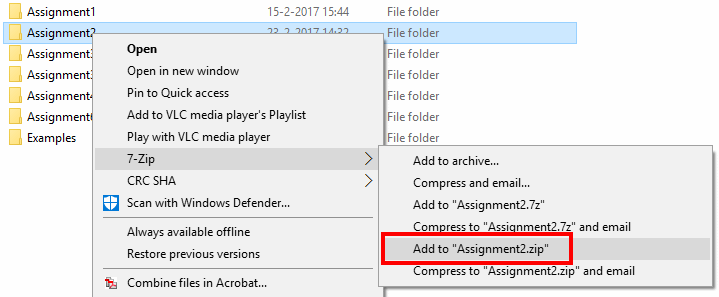
Figure: Example for 7-zip
Step 1: Create zip file from Eclipse or Arduino project
Creating a ZIP file can be done in different ways and with tools like 7-Zip or the built-in Windows-archive tool to create a compressed folder.
In all cases you have to locate* the folder of the project with the Explorer, click it with the right-mouse button and select the appropriate option from the popup menu. If you have to hand-in multiple folders, select them all (hold the CTRL key while selecting).
* In Eclipse, in the Package Explorer, right-click the main folder of a project and select "Properties" to view its location 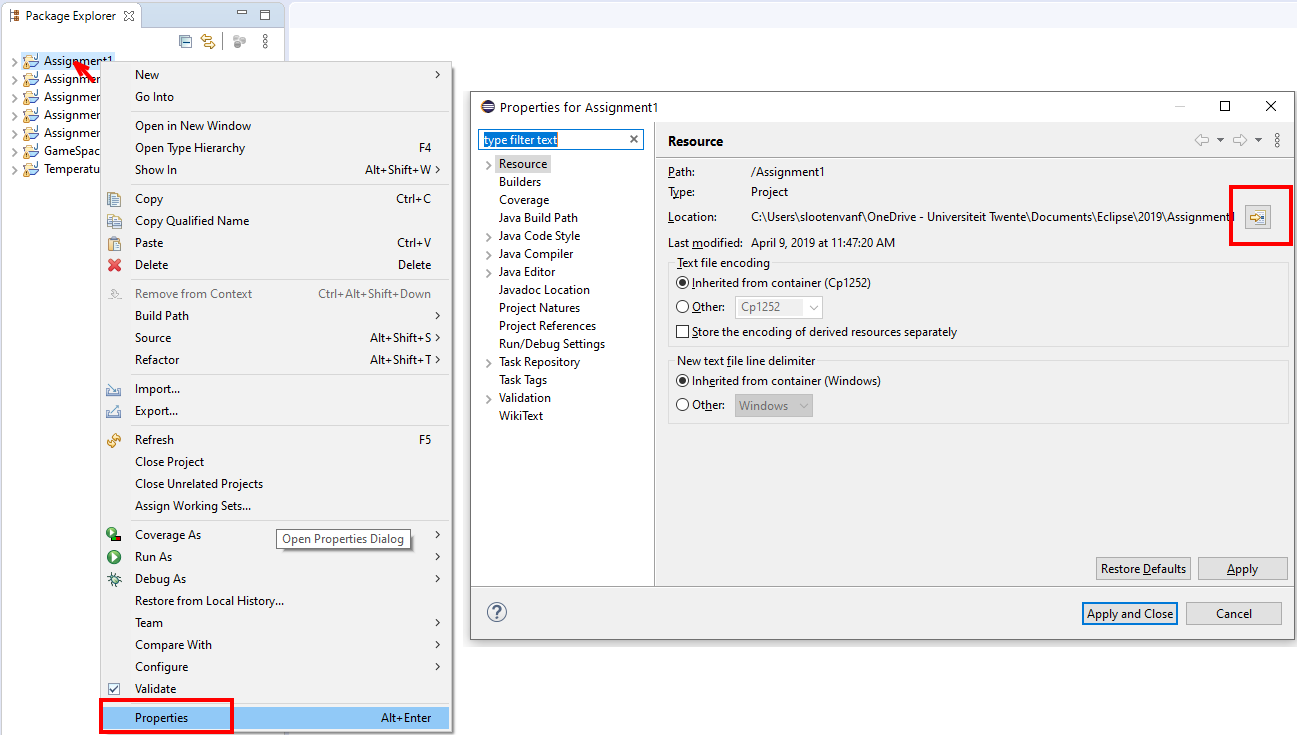
In Arduino IDE, select Sketch > Sketch Folder to view its location.
Step 2: Rename file
The ZIP file created with the above procedure will probably have the name of the folder, like Assignment1.zip. Rename this file so that the information required in the file name is there. An example for assignment 1: Assignment1_s1234567.zip.
Rename a file by clicking the file with the right mouse button and choose Rename.
Step 3: Hand-in (on Canvas)
Check out this quick demo on how to submit an Eclipse project in a zip-file and a video demonstration together:
Via the site menu in Canvas navigate to the proper location where you have to hand-in the files. Click the Submit Assignment button and navigate to the ZIP file you just created. If necessary, add an explanation under 'Comments'. Press the Submit button to submit the file. Next, add the video file with your demonstration as a media comment.
How to create a demonstration video
For most of the assignments you have to create a demonstration video (in English). There is no limit on the duration. However, keep it as short as is necessary to show the required info. Show the parts of the code that you added yourself, with a short explanation.
What should be in this video?
- First shot: you. Introduce yourself. You should be visible and you should state your name.
- If you are demonstrating an Eclipse project, use a screen recorder (explained below) which can record the screen while you are visible via the webcam.
- If you are demonstrating an Arduino project: make sure your circuit is visible (through the webcam), demonstrate its working, then record the screen also (to show the code in the Arduino IDE).
Make sure the webcam image is rather large, so anything you have to show (eg. your breadboard) is clearly visible! (you can move it closer to the cam while demonstrating).
Record your screen & webcam
Screen recording with your webcam visible can be done with these free tools:
- OBS Studio (more advanced, see info below)
- Loom (simple, does its job)
With Loom, videos are immediately placed online. Make sure after recording you download the video (mp4 file), then submit that on Canvas!
After this, you can remove the video from the Loom website. Loom can be used as browser extension, or as a standalone desktop app
There are many other ways in which you can make a demo video. As long as the result is good, you can use any other tool.
Introduction to OBS Studio:
A tip if you use OBS Studio: "Laptop? Black screen when capturing? Read here first."
Important: reduce size of video
Uploading a lot of large videos might be a problem for Canvas. So you must reduce the video to a maximum size of 50Mb. Some tips on how to do this:
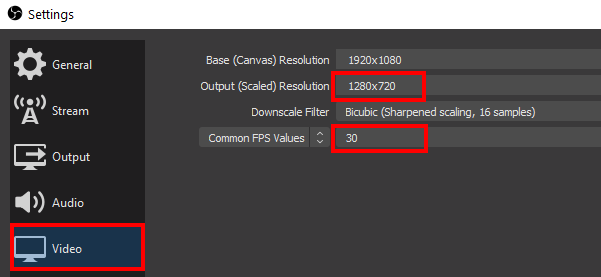
Set your recording quality to 720p (1280x720 and 30 FPS). In OBS Studio, go to settings and under "video" set the output (scaled) resolution to 1280x720 and 30 FPS:
In the Loom desktop app, you can click the resolution indicated in the lower right corner just above the "Start Recording" button and set it to "720p":

It is also possible to reduce the size of the video file after you have done the recording. You can use a tool like Handbrake for that. But since this requires an extra tool and more work, it is recommended to do it as indicated above (and not need a second step).
Hand in code with your report for the project
At the end of the project, you must hand-in code that is part of your prototype. The (Java and/or Arduino) code you wrote for the prototype is not part of the report, but a (digital) appendix. You must provide the complete Eclipse or Arduino project (or projects) as an attachment, as indicated in the steps above. It may be helpful to put all parts* of the report together in one folder, and then from this folder create a zip-file that you can then submit.
* Components: report itself (PDF), folders Eclipse or Arduino projects, video etc.